


Flyleft - You have inspired me ! - See what I got !
bluestarrgallery
16 years ago
Sort by:Oldest
Comments (18)
Related Stories
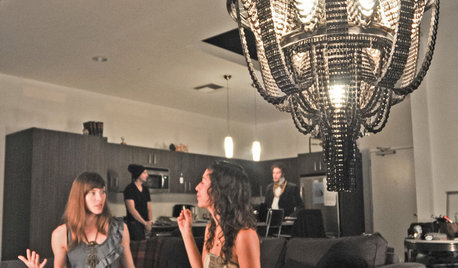
SALVAGEBike-Chain Chandeliers You've Got to See
Take a video ride with us to see how an artist creates amazing lighting fixtures solely from bike parts
Full Story
ENTERTAININGGot Hand-Me-Down Dinnerware? Make a Memorable Meal
They might be mismatched and not your style, but those inherited plates and forks can help bring meaning to your table
Full Story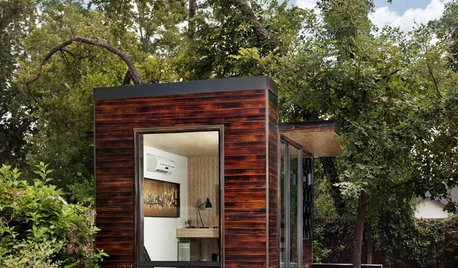
ARCHITECTURE9 Modern Prefabs You've Got to See
You won't believe how far prefab architecture has come until you lay eyes on these stunning modern designs
Full Story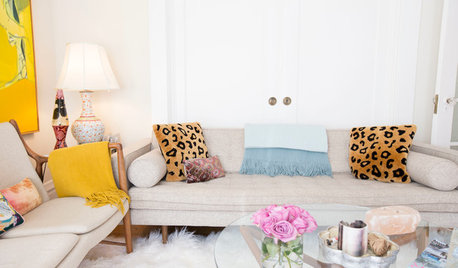
ECLECTIC STYLESee How a Bright Victorian Apartment Got Its Collected Look
Arriving in San Francisco with little but a chair and bed, a couple hits on an interior style that feels collected over time
Full Story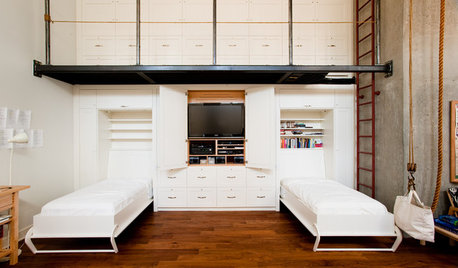
STORAGESee a Hollywood Actor's Ship-Inspired Storage That's Boatloads of Cool
All hands on deck to check out this spacious storage and sleeping room featuring a steel gangplank, a pulley system and nautical rope
Full Story
REMODELING GUIDESHave a Design Dilemma? Talk Amongst Yourselves
Solve challenges by getting feedback from Houzz’s community of design lovers and professionals. Here’s how
Full Story
EDIBLE GARDENSSee How a Practical Garden Can Be a Visual Treat, Too
A university edible garden overflows with ideas for growing produce and flowers in containers, beds — or a pickup truck
Full Story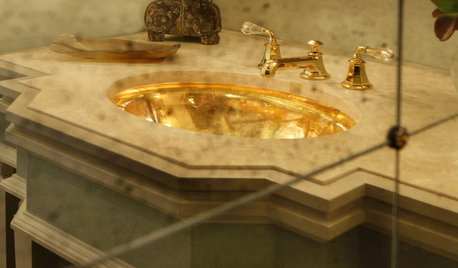
GLAM STYLEWe've Got a Golden Ticket
Make that 9, actually. These winning rooms use glimmers of gold in designs that may make you gasp in delight
Full Story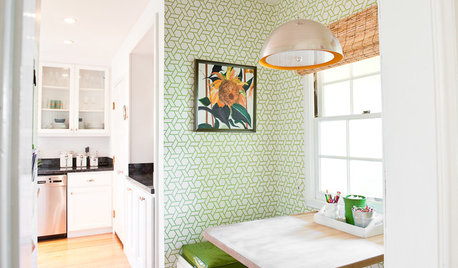
KITCHEN DESIGNSee a Pretty and Practical Kitchen Nook Makeover
Dark finishes and drab walls got the switcheroo, making way for springtime-fresh colors and kid-friendly touches
Full Story
HOUSEKEEPINGGot a Disastrously Messy Area? Try Triage
Get your priorities straight when it comes to housekeeping by applying an emergency response system
Full StorySponsored
Leading Interior Designers in Columbus, Ohio & Ponte Vedra, Florida


mahatmacat1
bluestarrgalleryOriginal Author
Related Discussions
You have got to see these pics!!
Q
You have inspired me!
Q
You all have totally inspired me!
Q
ot-absolutely incredible-you have got to see this
Q
mahatmacat1
threedgrad
bluestarrgalleryOriginal Author
mahatmacat1
weelass
spanky_md
mahatmacat1
bluestarrgalleryOriginal Author
mahatmacat1
spanky_md
mahatmacat1
mahatmacat1
bluestarrgalleryOriginal Author
mahatmacat1
spanky_md
bluestarrgalleryOriginal Author