


Cleaning 50+ year old pine tongue and groove
pupwhipped
15 years ago
Featured Answer
Sort by:Oldest
Comments (7)

cabman
15 years agobrickeyee
15 years agoRelated Discussions
Removing rotten tongue & groove pine to replace with good wood???
Comments (4)I use a Fein Multimaster with a flush cut E blade. Dremel also has a much cheaper version called a Multi-Max. Lay down a metal speed square where you want to make a cut. Tape it down good using blue tape and then make your cut using the fat part of the speed square as your guide. Cut back slightly at an angle so the new board will drop in clean....See MoreHardwood Floors--Not tongue & groove
Comments (17)In the old days they scrubbed floors regularly with lye and other harsh cleaners. Daily cleaning involved strewing sand on them and sweeping it away. Many old houses had no subfloor. I certainly don't have any except where additional flooring was laid later. Although I have plastered ceilings in my first floor, many early homes had the planks of the second story floor visible from the rooms in the first floor. Going back to my comment above, if you can see ground through the cracks, you really should consider laying down some vapor barrier (on the surface of the soil). Unless you live in the desert, your building is taking up huge amounts of ground moisture and that will impact your comfort and the health of the house structure, in a big way. However, for floor finishes, there are a number of ways you can handle it without using poly, or stain. The simplest way is to clean them well (that's scrubbing on your hands and knees) followed by carefully drying them with rags. The next step is to remove any stains you want to shift (water, cat pee, etc.) This will raise the grain a bit, but it can be smoothed down by light hand sanding without impacting the established patina. Then you can seal the floors with a variety of things from tung oil to varnish to shellac. All of the above have pros and cons, but each is an historic finish. One of the advantages of doing this type of floor work is that it is relatively reversible (oil is less so, see below) and can be patched up in sections where necessary because of later wear, unlike poly finishes. Another advantage is that you may be able to avoid having the floors sanded, which will not only save you money, but preserve the thickness of the floor boards (they can only be machine sanded a few times before they must be replaced) and you will not lose the patina of old wood. You would be surprised how often people arrive here and report they are paying extra to install floors with artificially created patina. My personal choice is a pure tung oil finish followed by a coat of Butcher's wax. This is quite durable and easy to maintain. And if one of my cats has an accident the fluid stays on top for a bit and I can clean it up with no problems. (Cat pee, or any fluid, not cleaned up promptly will create a mark on almost any type of wood floor finish, including poly after it has had some use.) One thing to think about with tung oil finishes is that if you do choose that, you will have to sand the floors down before switching poly at some later date. This is somewhat true even for shellac and varnish which can get caught in cracks and interfere with the smooth flow and adherence of later poly coats. Keep in mind, too, that some "tung oil" finishes have only a small amount of tung oil and they are mostly polyurethane varnishes. I prefer pure tung oil. (You can read about it at the Real Milk Paint company website.) Some people who are allergic to nuts (peanuts, cashews, etc.) may also be allergic to tung oil which comes from a tropical tree. I'm not sure how much of an issue it is on floors, but it can be problematic to use it on kitchen counters, or at least I've seen reports of that being a concern. As for getting the smell of old cat pee out of unfinished wood: it's hard to do. The best product I've tried is something called Get Serious. It's for sale at PetSmart places and online. IMO it works better than the more commonly used Nature's Miracle. YMMV. One other caveat, I've seen reports that washing unfinished wood with Murphy's Oil Soap can lead to subsequent finish adhesion problems. I don't use it, so I'm not sure. However, FWIW, I once toured Montpelier in VA , the home of President James Madison, and I was lucky enough to be the only visitor that day so I got a behind the scenes tour of the restoration work in progress. And the highly skilled restorers were washing the floors with Murphy's. I live in a modest country-style Greek Revival farmhouse and I have great appreciation for simple, plain, buildings. Too often the grander houses are the ones that one sees or reads about. It warms my heart to hear about other plain houses getting the care they deserve as they tell a story of their own. You can't really go wrong trying to keep what you can of the old materials; repair rather than replace; and go slow so you don't wind up doing things that shouldn't have been done. If these 19th c buildings weren't solidly, if simply, built they wouldn't have survived into their third century. I try very hard to make sure that whatever I do is along the lines of careful maintenance of what I have, and when necessary, minimal changes at the same level of build-quality. I sure don't want future owners in 2108 shaking their heads at the penny-foolish and thoughtless "improvements" done under my care. Molly~...See MoreWhat color should I stain tongue and groove porch ceiling?
Comments (27)I am reading this thread and working on a porch ceiling too. I like this color and would love to know what is shown in the photo and what stain she decided to go with!! Any answers? The wood is pine and I’m leaning towards Golden Oak or possibly Mountain Ash by SW for a hint of gray. Let me know if anyone has suggestions!! Appreciate the help!...See MorePainting tongue and groove ceilings white in log house?
Comments (19)Thank you for all the feedback. It is really helpful. We really don't plan on going anywhere, which makes me think that I need to choose what will make us most happy for living her another 20 years. I suppose we can take the paint off down the road if it just isn't working out. The contractor wants to get the ceiling painted first before floors and cabinets just because it is easier for them. But we can tell them we want to go slow. I have my heart set on the wood floors and we found something that all 7 of us (hubby and 5 daughters) all like. They are all really wanting to try the painted ceilings too. The girls are ready for a house change (teenagers) and so I think we might just go for it. I found these photos from another log house remodel that look like what we are aiming for. The sink we have now is an 1920's farmhouse that I found at a flea market. I love the look but it is really stained beyond what we can afford to repair. We've been "test driving" it to see if we want to invest in the special sink base we would need. But it hasn't been very comfortable to use... stains easily, small drain, dishes chip easily even with a grid in the bottom. So we are going to put in a new farmhouse sink and keep this one for a work sink elsewhere....See Morepupwhipped
15 years agobobismyuncle
15 years ago
Tina Hough
3 years ago
Charles Pharis
3 years ago
Related Stories
REMODELING GUIDESTongue and Groove Wall Paneling Joins the Comeback Club
Try this smooth architectural move to give your walls a streamlined appearance that conveys quality
Full Story
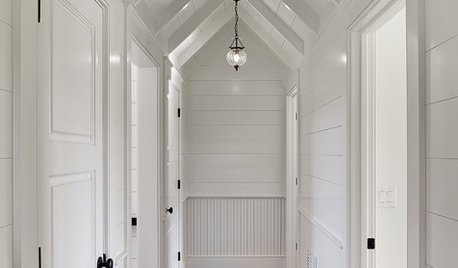
REMODELING GUIDESRenovation Detail: Tongue and Groove Ceilings
As camouflage for damaged surfaces or simply for their rich texture and beauty, tongue and groove ceilings create high impact
Full Story
BASEMENTSRoom of the Day: Swank Basement Redo for a 100-Year-Old Row House
A downtown Knoxville basement goes from low-ceilinged cave to welcoming guest retreat
Full Story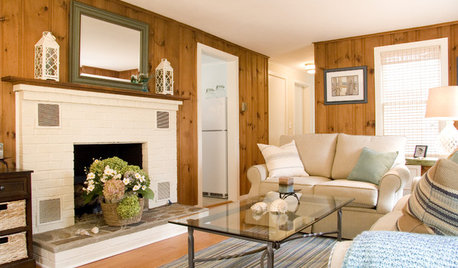
WALL TREATMENTSThese Are Not Your Grandfather’s Pine Walls
The knotty look went from popular to pariah in years past, but today’s designers are finding new and stylish ways to embrace it
Full Story
HOUSEPLANTSMother-in-Law's Tongue: Surprisingly Easy to Please
This low-maintenance, high-impact houseplant fits in with any design and can clear the air, too
Full Story
LOFTSHouzz Tour: 12 Years of Tinkering Produce an Amazingly Artful Loft
Major DIY efforts turn 3 units in a former Portland factory into a single home brimming with personality
Full Story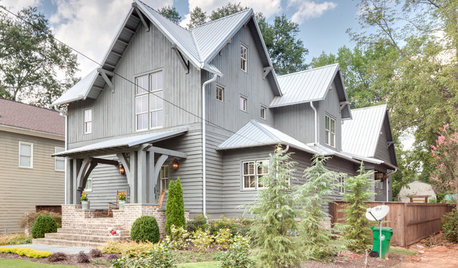
FARMHOUSESHouzz Tour: Some Old Tricks for a New Atlanta Farmhouse
A ‘pretend story’ helped this builder create a new farmhouse that feels like it was added onto over several generations
Full Story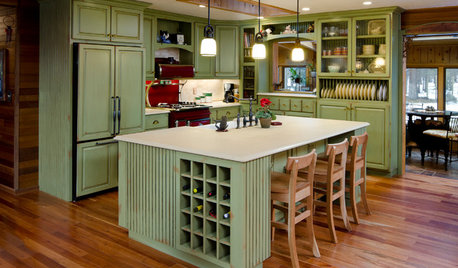
MOST POPULARHow to Reface Your Old Kitchen Cabinets
Find out what’s involved in updating your cabinets by refinishing or replacing doors and drawers
Full Story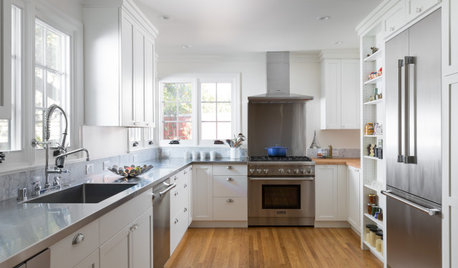
HOUSEKEEPINGHow to Clean Stainless Steel
Protect this popular kitchen material with a consistent but gentle cleaning routine
Full Story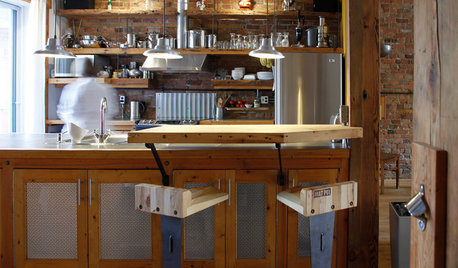
KITCHEN DESIGNPersonal Style: 50 Clever Real-Life Kitchen Design Details
Get ideas from savvy homeowners who have a knack for creating kitchens celebrating personal style
Full Story


Sue Brown