


Dry wall Prep for Ceramic Tile
12 years ago
Featured Answer
Sort by:Oldest
Comments (10)
 12 years ago
- 12 years ago
Related Discussions
Please help with prep for tile and a washer dryer stack
Comments (12)1) You can brace or block the joists per standard construction, but what might be easier is to strap the bottom edges of the joists. Typical strapping is done with a 1x3, but a lot of times I'll simply use a 2x4. Run a 2x4 across the bottoms of the joists, perpendicular to the joists. Add a dab of PL adhesive and use a couple of screws at each fastening point. You have specific needs here, so spacing the 2x4s as you need will work very well. What it does is if a single joist wants to deflect downward, the strapping transfers that load to the adjacent joists as well. So it's good as a floor stiffener. For a washer/dryer set up, it also dampens the entire floor platform in terms of the possibility of the spin cycle causing the floor to reverberate. The strapping serves the same purpose as cross-bracing or solid blocking between the joists. It's code-approved, though code only requires it for 2x12 joists, with the strapping being made of 1x3, and the strapping spaced every 8'. The strapping is more effective long-term than bracing or blocking, due to fitment, installation, and shrinkage issues. 2) Do the whole floor. There are only restrictions on maximum spacing (every 8'). So if you make it every 2', or 3', or 4', no worries. Strapping is also easier because you're not wrestling with any of the utilities that take up space between the joists. 3) Your joists span 8-1/2'. For simplicity, why not do run three pieces of strapping? One at 1/4 span, one at half-span, the other at 3/4 span. Just a little over 2' spacing. 4) 3/4" ply over the diagonal boards is plenty. It does not have to be exterior grade. 5) Your floor sandwich can be made up of: -Tile -Ditra -Floor heat wires encased in SLC (no wires under the washer/dryer area through, see comments later) -Plywood underlayment covered with SLC primer -Diagonal plank subfloor -joists I usually advocate a small platform under the washer/dryer stack. It's more for damping than load spreading. I've done sandwiches of plywood/cement_board/plywood, or plywood/MLV/plywood. MLV is mass-loaded vinyl. Screw through the top layer of ply, through the middle material, and into the bottom layer of plywood to secure it together. Or just use construction adhesive. I drill a hole through the middle of the platform sandwich to accommodate the flood pan's drain line. I usually put a square of rug pad on the floor. The inexpensive, maybe 1/8" thick, rubbery mesh or open weave type of rug pad. It acts as a bit of a damper, but also holds the platform in place. I then set the platform on the rug pad. Then put the flood pan over the platform with the drain plumbed through the hole in the platform. Then set the washer in place and the dryer on top of that. I recommend you tile the entire floor, but again, no heating wires under the location of the washer. You'll be putting the sandwich platform on top of the tile in that area, and the insulative value of that platform can shorten the life span of the heating element. Pricklypear, the Ditra-XL is simply thicker than regular Ditra. It really wasn't designed for a specific tile size. It's sole purpose is to allow the thickness of "Ditra plus tile" to match up with the thickness of a typical hardwood floor....See MoreBathroom tile and prep questions
Comments (5)"I have put the blue drywall behind where the vanity will go, I'm satisfied it's not going to get that wet, but around the shower and above it, I want to tile and thought I'd use backerboard or whatever the fibrecement sheeting is called....which leads to a couple of more questions -" "Blue" drywall...is that blueboard, or drywall typically used for veneer plaster applications? It can be finished with paper tape and joint compound, so it'll be fine in non-wet areas (wet areas being a shower or tub surround). For shower and tub surround walls, below 72" or below the height of the shower head, you don't want to use a drywall-type product. As you mentioned either a fiber-cement (hardieboard) or a true cement board (durock or wonderboard) would be used for the wet walls. The seams get finished with thinset and mesh-type fiberglass tape. In wet areas, above the 72" from the floor height, you can transition to a drywall-type product and paint the surface. Or continue the cement board and tile to the ceiling. Where you transition from the cement board to the drywall board, hide the horizontal seam behind the top course of wall tile. "1) I understand some drywall mud is suitable for tiling and some isn't, what's best, and should the backerboard stuff be mudded at all?" This will hopefully be an all-in-one reply: In wet areas, use cement board or fiber-cement board as the tile backer. For those seams use thinset and mesh tape. When you tile in a wet area, use thinset to adhere the tile to the cement backer board. In non-wet areas, the tile backer can be the items listed above, or you can go with regular drywall. Since the drywall will not be getting wet, those joints can be finished with joint compound and paper tape. For adhering ceramic tiles in non-wet areas, you can use thinset or mastic to adhere the tiles to the drywall. For adhering a natural stone in non-wet areas, you should use thinset, do not use mastic. Mastic can bleed through and discolor or stain the stone. "2) Can said mud be used for a transition join between the drywall and the backerboard? Can I tape the join, or is fibreglass tape (the mesh stuff) better?" For that transition seam you can use either; joint compound and paper tape, or thinset and joint compound. "4) I'm (ideally) keeping the original door jamb which means it finishes more or less flush with the drywall. Around the rest of the house I've used a plain, chunky square 4"x1" trim/skirting/doorframe. I figure I have to either affix the trim *before* the tiling because I assume the tiles will butt up against them. I thought about using parchment paper or similar to protect the trim edges when tiling then remove paper and silicone seal the edge (and maybe not attempt to grout up to the edge of the trim)" An easy way is to tack a scrap piece of wood in place where the trim will go. If your trim is 4", set the edge of the scrap piece of wood at the 4-1/8" line. Now tile right tight up against the piece of scrap wood. When tile is set, remove the scrap piece of wood. Install your 4" trim. You should now have a very nice 1/8" gap between the edge of the tile and the trim. Caulk that gap, as wood may move seasonally and the movement would cause grout to cracks. There are color and texture (sanded vs unsanded) caulks made to match most grout colors. "5) Am I crazy to leave the vinyl flooring when I'm doing virtually everything else? Vinyl is in good shape despite the work etc that went on around it, and it continues out into the hall unbroken so I'd have to redo a fair amount of flooring. I'd love to tile it but I figure walls are hard enough (haven't tiled a wall before) so floors might be a it much...besides, I'm thinking as long as I'm prepared to remove skirting, vanity and toilet, the floor could be redone later, if necessary....?" That's your call. If you think you might tile down the road, then plan for it now. Think of how thick your tiled floor might be. Example, if your existing subfloor is 3/4" plywood, there is probably something like 1/4" luan over that and your vinyl is on top of that. So on top of your existing subfloor you have maybe 1/4" plus 3/16", or just under a half-inch of "flooring". If you tile, you might need to remove all that half-inch of "flooring" and add half-inch underlayment, then either 1/8" ditra or 1/4" cement board, then your thinset and tile (1/8" plus 3/16"). So sort of worst case (and a total supposition) you'd be looking at adding 1/2" ply underlayment + 1/8" thinset + 1/4" cement board + 1/8" thinset + 3/16" floor tile, or about 1-3/16" total. But before you add that thickness you'd be subtracting the already installed 1/4" luan and 3/16" vinyl. 1-3/16ths minus 7/16ths means the height of your finished tile floor will be 3/4" higher than the finish of your existing vinyl floor. (I think!) So, if you want a 1/8" gap between your wall tile and your floor tile, set the bottom edge of your bottom course of wall tile 7/8" above the height of your existing vinyl floor. Now, all that figuring and ciphering is nothing more than a crap shoot. So what I'd recommend in a case like yours is to plan on eventually having a tiled floor, tiled walls, and a wood baseboard as a transition between the two. If down the road you wanted a 5" tall baseboard, set a 6" tall baseboard in place now, and set the top of the baseboard level. Tile the walls with the bottom course of wall tile sitting on top of the baseboard. When you eventually finish your floor, remove the baseboard, tile the floor, then rip about an inch off the baseboard to make it 5" instead of 6", and it'll fit nicely. A lot of "what if's" and made up numbers in my post, but it's a start. Mongo...See MorePrep for tile install. Please shed some light!
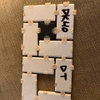
Comments (9)"So what do you think about me putting a thin coat of drywall mud up in the vanity area so the tile will grab?" - I think that is a really bad idea. I found this old post searching what info was online (Houzz/Garden Web) in relation to "Scratch Coats". There is so many versions of a scratch coat it is hard to tell what one is right or wrong for each job your tackling. Installing tile over drywall mud (finish, all purpose or joint) is a bad idea. Installing tile over drywall that has not been covered with drywall mud is often OK as long as the area is not in the shower or around the tub. Installing tile over painted drywall is done all the time but the strength of this assembly relies totally on how well the paint was applied and what type of paint there was. Your question (top of page) was answered well I think by the fellow coming to look at the job. Adding a 1/4" of cement board would make for a much stronger wall than skimming out an old wall with fresh drywall mud. I put a few pictures together showing a simple scratch coat and hopefully this will help you understand what a cement board (CBU) sheet look like scratch coated. The CBU is Wonderboard lite. The thin-set Laticrete 253 Gold. The waterproofing membrane on the left wall (Laticrete Hydro Ban Sheet Membrane) and the inside of the niche was done wit Ardex 8+9. I realize the post is years old but it is the first hit on a google search.......See MorePorcelain or ceramic tile for walls?
Comments (10)Choosing tile is not hard.Some tile sellers make it more complex than necessary by passing out a lot of misinformation. Tile for a shower wall does not have to be particularly hard, but it must be reasonably waterproof. All commercial tile is tested for water absorption and the resulting grade is written somewhere on the box. You should look for the ANSI Water Resistance rating. Water absorption is tested by weighing the tile, then boiling it for five hours. The tile is then soaked in cold water for another 24 hours. It is then weighed again to find its gain in weight from the original dry state. Any weight gain indicates water absorbed by the tile. The result is stated as a percent of change from its original dry weight in four classes: Non-Vitreous Water absorption of more than 7.0% by volume. Tile for non-wet areas. Around fireplaces, for example. Typically intended for dry walls, hobby, and crafts use. Semi-Vitreous Water absorption of more than 3.0 percent, but not more than 7.0 percent. Tile for areas that may get wet on occasion, but are unlikely to see constant or standing water. Backsplashes or countertops, for example. Vitreous Water absorption of more than 0.5 percent, but not more than 3.0 percent. Virtually any indoor application including shower walls and floors. Outdoors in areas that do not freeze. Impervious Water absorption of 0.5 percent or less. Any indoor or outdoor application.You are looking for tile rated Vitreous. But, keep in mind that Sophie Wheeler is absolutely right about the need for careful installation. Even properly rated tile will cause water problems down the road if it is poorly installed. We use the Kerdi installation method in preference to the older cementitious backer board method. It's a little faster and a lot more durable. For more information on how to buy ceramic and porcelain tile, seePorcelaain vs. Ceramic Tile: Is there a difference?...See More- 12 years ago
- 12 years ago
- 12 years ago
- 12 years ago
- 12 years ago
- 12 years ago
- 12 years ago
Related Stories
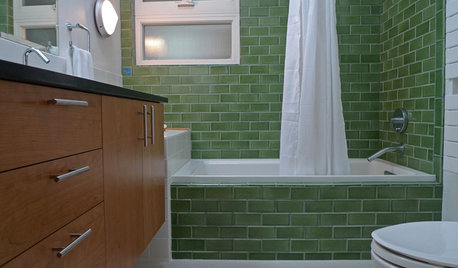
BATHROOM DESIGNBathroom Surfaces: Ceramic Tile Pros and Cons
Learn the facts on this popular material for bathroom walls and floors, including costs and maintenance needs, before you commit
Full Story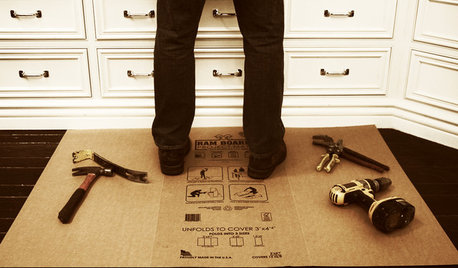
BATHROOM DESIGNOut With the Old Tile: 8 Steps to Prep for Demolition
This isn't a light DIY project: You'll need heavy-duty tools and plenty of protection for your home and yourself
Full Story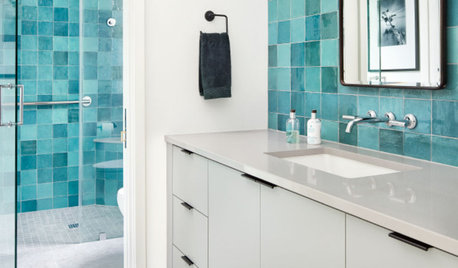
TILEPorcelain vs. Ceramic Tile: A Five-Scenario Showdown
Explore where and why one of these popular tile choices makes more sense than the other
Full Story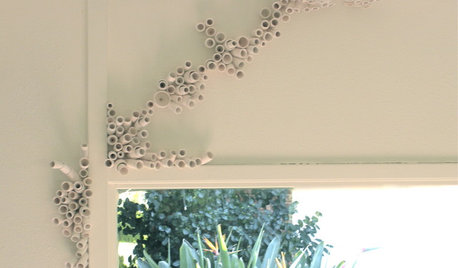
DECORATING GUIDESInterview: Ceramic Art Goes Vertical
Nature Inspires the Amazing Wall Installations of Katherine Dube
Full Story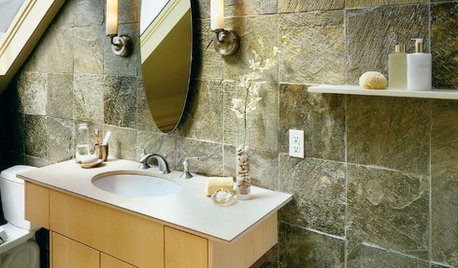
REMODELING GUIDESGet Stone and Ceramic Surfaces Super Clean
Keep your kitchen or bathroom looking as good as on installation day with the right cleaning methods for counters and tiles
Full Story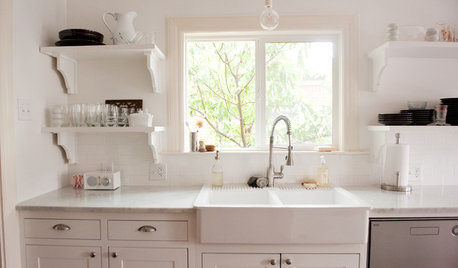
KITCHEN DESIGNKitchen Sinks: Easy-Clean, Surprisingly Affordable Ceramic
You get a lot for the price with ceramic sinks, and they're available everywhere. See the pros and cons here
Full Story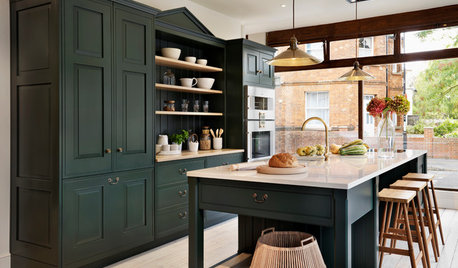
SELLING YOUR HOUSEKitchen Ideas: 8 Ways to Prep for Resale
Some key updates to your kitchen will help you sell your house. Here’s what you need to know
Full Story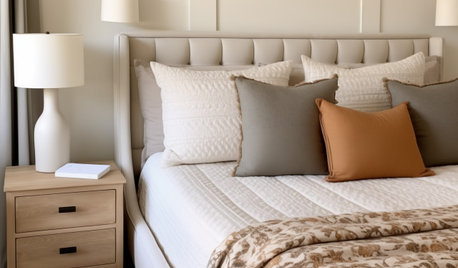
MONTHLY HOME CHECKLISTSYour Checklist for Quick Houseguest Prep
Follow these steps to get your home ready in a hurry for overnight visitors
Full Story
KITCHEN DESIGNButcher Block Makes the Cut for Holiday Kitchen Prep
Countertops and cutting boards will likely take a beating over the holidays. These butcher blocks have the chops to perform under pressure
Full Story
OUTBUILDINGSStudio Tour: From Old Shed to Sunny Ceramics Workshop
Elegant porcelain antlers and more now emerge from an Atlanta outpost where critters once roosted
Full Story
User