


Brutuses - I will post easy valance directions later
My3dogs ME zone 5A
15 years ago


Featured Answer
Sort by:Oldest
Comments (20)

jynxed23
15 years ago
tinam61
15 years agoRelated Discussions
Easy Photo Posting Instructions
Comments (31)Photobucket has changed a bit since this thread first started in May 2006, so it's probably time for an update. I'll leave it to you to open your account at Photobucket (or whichever service you choose) and get photos uploaded from your computer to your page there. (If you have problems, email me at solstice98@att.net). Here's what your photos will look like at Photobucket: Instead of the 3 choices you used to have, now you'll see that there are 4 boxes under each photo. For posting directly into messages, click on the one that says "HTML code". You'll instantly see a little pop-up box that tells you it's "copied". Go back to the message you are typing into GardenWeb and click on where in the message you want the photo to appear. "Paste" it into that spot. You should see the html code (it's just text at this point, not an actual photo) that starts with a 'less than' sign and the word 'img'. Now when you click on "Preview Message" you should see your text as you've typed it and the photo. (If you can't see the photo then we won't see it when you sumbit the message either, so keep trying.) If instead of posting the picture for direct viewing in your message, you want to use the URL link boxes, then in Photobucket you would copy your image by clicking on the second box - the one that is labeled "Direct Link". That works but it forces readers to click on the link to get to your image. It's more fun to put it directly into the picture - instant view & instant gratification. If your photo shows up too large in GardenWeb, then just go back to Photobucket and edit the size. Click on 'edit', then 'resize' once the picture opens. 'Message Board' is obviously a nice size for message boards, but if you have graphic images, logos or little animations, then you can go smaller. Your image will automatically change once the message is posted to GardenWeb so you don't have to change anything there. If you rename, move or delete your photo in Photobucket, the connection is lost in GardenWeb because you aren't really putting the picture there; you are just putting code into the message that tells the computer to pull up and insert the photo there. Hope that help! But don't hesitate to ask questions if you have problems. Kate...See Morebrutuses: OT...need your help
Comments (20)david, it is obvious you don't deal with animal rescue and don't have an idea of what is going on in the streets as it relates to animals. Those of us who care more about the animals well being than some human's hurt feelings won't stop doing what we do to save their lives. No, I have no respect for someone who throws their animal in the street to suffer the consequences. To mention a few, death by car, infection with Feluk/aids, having babies to suffer on the street, being killed by dogs or people, being dowsed with acid, and the list goes on and on. Your ideal solution is great, but let me enlighten you. Humane societies and aniaml shelters do not "round up" stray cats. It's not in their job description no where in the US that I know of. If you have an animal trapped or caged, someone will come get it. Some will come out to pick up injured animals, but they also have to be "gift wrapped." Others insist you bring it in. 99% of aniamls rescued off the streets are rescued by caring individuals, not governement run agencies. Also, if the humane society in her area did come to "round up" the cats, the tom would have been put to sleep, no doubt. His wounds would have dictated his future. Chances for the other two would be slim to none as far as being adopted. More than 10 million animals are killed in shelters every year because there are not enough good homes for them all. The ones who die first are the ones who come in off the street, whether they are previous pets or strays. You had better hope that if your animal gets out one day a caring person like Pinktoes picks it up and not the animal shelter. And if she chooses to have your animal spayed or neutered, then thank her because she did the responsible thing. There are millions of homelss cats that no one cares about. People like Pinktoes and AuntJen and thousands of others make a difference in the lives of a few animals and if everyone took their initiative, showed their heart, didn't mind spending the money, there wouldn't be millions of cats on the street suffering. When a human shows no respect for an animal's life, I show no respect for them. Pinktoes did the right thing morally and legally. Do not insult her for doing the right thing. Because of her, these cats will no longer suffer and that sir, deserves a big thank you from those who prefer to sit on the sidelines and pass judgement while others clean up the mess made by uncaring humans. Pinktoes you can contact me through this forum or send me a personal e-mail. My address is listed at the top of this thread by my name. I do hope the tom comes back negative for the feluk/aids viruses. They are so suseptible when they are out there fighting, etc. In trying to trap the female, why don't you try to get your friend to help you humanely trap her. It's no big deal. If your friend isn't familiar with trapping, find someone in your area who is. There are usually rescuers who will come out and trap for inexperienced folks like yourself. It is unnerving, but after the first 100 you get use to it. LOL...See MoreI'm panicking and I think I need some direction...
Comments (56)Sounds wonderful! I'm glad you enjoyed your dinner party. See, if your ever worried about a dinner party again, just put those chocolatinis on the menu! I should have mentioned martinis when you were worried. A friend of mine was having a dinner party and made a big batch of appletinis to go with the appetizers. They were such a hit she made a couple more batches. At 9:00 she realized that she had never started dinner, and wasn't actually sure she was capable of cooking at that point, so she made more appletinis and had her husband call for pizza. All the guests spent the night sleeping on various chairs, couches or the floor. They thought is was they best party ever....See Moremy3dogs easy sew window treatment directions
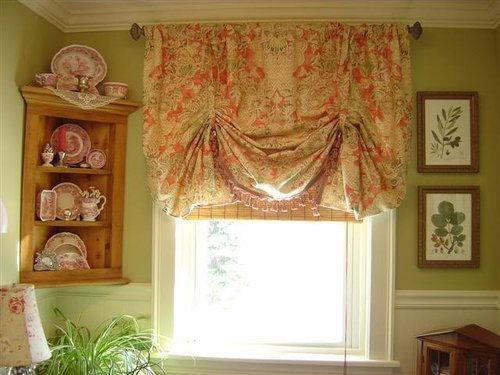
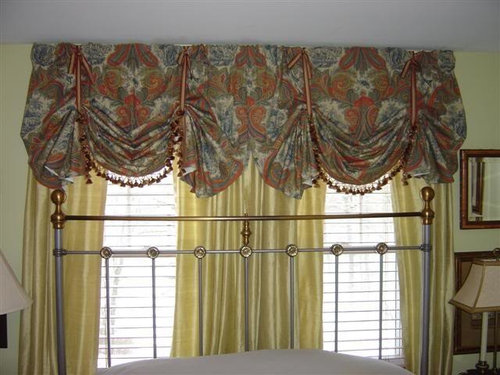
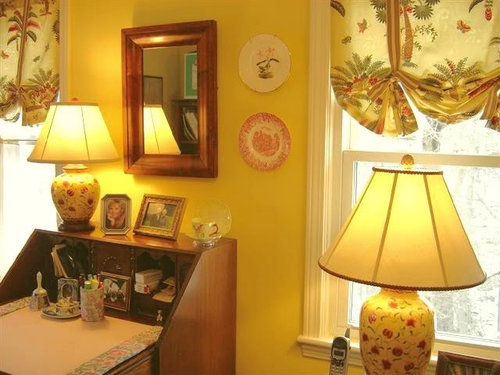
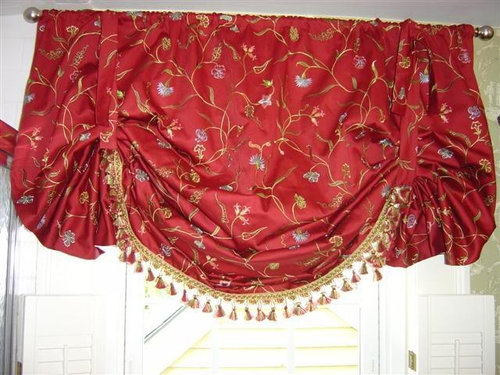
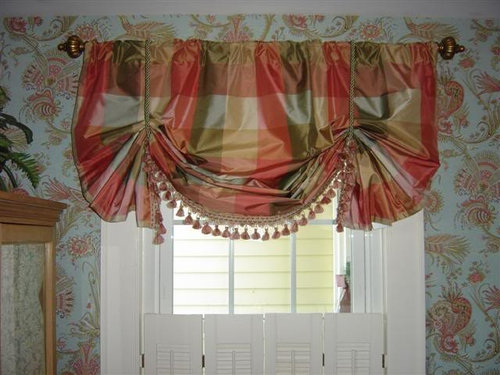
Comments (8)Easy to sew valance directions They ARE EASY - but the directions are long, because I am trying to give you enough detail, even if you are a beginner. Read them all the way through so you understand them, and ask any questions you may have. If you are a real novice, you may want to make a sample using just muslin, or other inexpensive fabric, til you get the hang of it. This is a no-pattern valance that I started making last summer. It requires just straight stitching. My windows are generally about 50" (more or less)in height. If your windows are very short or very tall, you may want to vary the length of the fabric you use. I would say to err on the 'buy more' side though, so they don't look skimpy. The fullness adds richness. I generally use 1 1/4 yards of 54" wide home dec fabric to make the valance. You will need an equal amount of lining fabric. If you choose to put trim on the bottom (it adds a lot to the treatment, IMO) buy 1 1/2 yards of trim to make sure you have enough to go across the length of your 54" wide fabric. If your fabric is wider than 54", buy enough trim to cover its width. Cut your valance fabric and lining to equal lengths. I always measure the side edges of my fabric and mark the length before cutting. It may have not been cut straight at the store, and you want to be sure that your left side is the same length as your right side. Pin the two rectangles of fabric together on all sides, with the RIGHT (front) sides of the fabrics inside, facing each other. Before putting the fabrics together, I mark lightly on the back which is the TOP of the print (if using a print) and which is the bottom, so your print will end up right side up! Depending on the type of rod you plan to use for the valance, you need to leave openings on each side that will become your rod pocket. Continental rods (the flat wide plain ones) need a 4" rod pocket. If you use a decorative rod, with finals on the end that screw off, I would recommend making your rod pocket 2" wide. For a small tension rod, I'd make the rod pocket 1.5" wide. You don't want to force your fabric onto the rod - allow room to make it easy for you. Measure down from the TOP of your pinned together fabric, and make a light mark with pencil on each side, the size of your chosen rod pocket, plus 1/2". That 1/2" is going to be the width of your top seam. You'll be making a mark on the left and right sides 4 1/2" down from the top if you use a Continental rod, for example. Stitch from these marks down each side to the bottom, using a 1/2" seam. You'll need to leave an opening in the top or bottom to turn your valance inside out when you're done stitching. I'd suggest a 4" - 6" opening for turning. If your rod pocket openings are 4", you don't need to leave another opening, you can use them to turn it inside out. Mark the opening you need to leave, then stitch across the top and bottom edges, using a 1/2" seam, leaving your opening...well...OPEN! Clip your fabric corners off OUTSIDE of your stitching. This is just a small triangle of fabric from each corner. This will allow you to get nice sharp edges on your corners when your turn the valance right side out, as it reduces the bulk of fabric there. Turn your valance right side out, pulling it through the opening you left. I use a wooden chop stick to push the fabric gently at the corners to make them nice and square, once I have turned mine right side out. Don't push too hard, or you may poke a hole through your valance! At this point, you should have a lined rectangle of fabric, with rod pocket openings near the top of each side. Close the opening you left for turning, either by folding and pressing the edges in and hand stitching it closed, or use 'stitch witchery' type of fusing tape to do it. You can also sew it closed with your sewing machine, but you want to do it right at the edge. You want to make this closure as 'invisible' as possible, so I always use fusible tape. Carefully iron your valance. Use your fingers to work the edges, so that you have your seam right in the middle of each edge, so you don't see the front fabric on the backside, and you don't see the lining from the front. Now, to stitch the rod pocket. You will be making one row of stitching across the front of your fabric from side to side. Measure down from the top edge, so you have the same length opening on each side. The size of the opening you left on each side was determined above by the type of rod you're using. You can lightly pencil on the line that you need to stitch across, or do what I do - Place the fabric on the sewing machine, and put the needle down on the place where you'll start stitching. Take a 4" (approx) length of masking tape, and lay it against the upper edge of the fabric, to the right of the needle, and stick it to the sewing machine base. You can use this tape edge as a guide to hold the top edge of your fabric against as you stitch across. It helps you make a straight, even rod pocket. My sewing machine has tape on it for all different widths of rod pockets! If you chose to put trim on the bottom of your valance, do it now. I use 'Aleen's OK To Wash-It' fabric glue that you can get at WalMart or a fabric store. If you use glue, just follow the directions on the bottle to glue your trim evenly to the front bottom of your valance. I lay my valance on my kitchen island, and let it set overnight, while the glue dries. You can also stitch your trim on, either by hand or by machine. I prefer the glue, because you see no stitching on the back side. (I'm anal.) Now to make the ties. You can simply buy ribbon (such as grosgrain) or use purchased cord (see my dining room silk ones in the link) or make them out of fabric. Use either the same fabric or a coordinating one. Here, you first need to decide if you are going to tie your valance up with bows, or do knots. Bows take longer ties. Allow yourself a MINIMUM of 36" long ties. You can always cut them shorter if necessary, but you can't make them longer. I suggest hanging your valance up and using string to tie them up temporarily to see how long you need to make your ties. (It's longer than you think!) Cut your strips of fabric approx 4" wide and the length you have decided on above for your ties. Fold and pin the strips in half the the short way, so you have a long strip of fabric that is 2" wide. Make sure the right sides are together, (inside) because you are going to turn them inside out after stitching. Stitch along the pinned edge of each strip, about 1/4" from the edge. Now the fun part - turn those narrow strips inside out. My chop stick comes in handy for this, but use whatever method you choose to accomplish this. Press the ties just as you did the valance rectangle, making sure your seam is even on the edge. I fold in the raw ends and use my fusible tape to close them, but you can machine stitch them closed or do it by hand - Your choice. Your valance is done! Put it on your rod, using the rod pocket. Hang it in your window. Now, take the ties, and simply drape them over the rod on each side, having half of the tie fabric strip hanging in front, and the other half of the tie hanging behind the valance. Now, gather up one side of the valance in your hands, and reach behind it it grab the dangling tie in back. Tie up the valance, by tying the front and back pieces of the tie together, either in a knot or a bow. Do the same with the other side, making sure your ties on each side are tied up at the same length. Now stand back and make sure your valance looks even at the bottom on each side. Use your hand to 'finger fold' and drape your fabric until the look is what you want. You'll be surprised at what a difference it can make in the look by spacing your ties closer together, or moving them further apart on the rod. Also by tying the ties higher or lower... This is where you need to play around until you get the look you want. On the HGTV message board, a woman made these and kept posting pics asking for advice - Higher? Lower? Move the ties apart or closer...It's really all up to you. Hers looked GREAT when she was done, and she was so pleased to have made her own custom valance. I hope you all feel the same way, if you try them!...See Morelivvyandbella
15 years agoparma42
15 years agotexashottie
15 years ago
My3dogs ME zone 5A
15 years agoestreya
15 years agolivestrong
15 years agobrutuses
15 years agolaurensmom21
15 years agotinam61
15 years agocliff_and_joann
15 years agolivvyandbella
15 years ago
Lyban zone 4
15 years agooceanna
15 years agoMy3dogs ME zone 5A
15 years ago
anele_gw
15 years agoLyban zone 4
15 years agooceanna
15 years ago


Related Stories
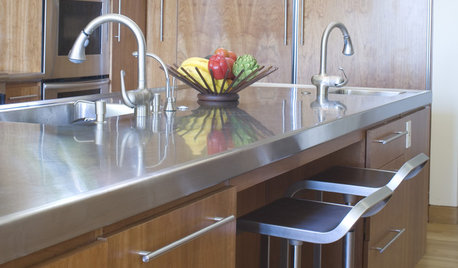
KITCHEN DESIGNDesign an Easy-Clean Kitchen
"You cook and I'll clean" might no longer be a fair trade with these ideas for low-maintenance kitchen countertops, cabinets and floors
Full Story
DECORATING GUIDES12 Antique Store Finds to Nab Now, Place Later
See the accessories one decorator always buys when she spots them — as long as she gets there first
Full Story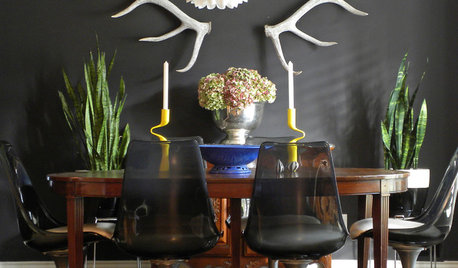
HOUSEPLANTSMother-in-Law's Tongue: Surprisingly Easy to Please
This low-maintenance, high-impact houseplant fits in with any design and can clear the air, too
Full Story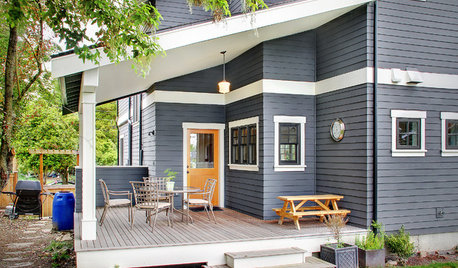
EXTERIORS5 Easy Tips for Choosing Your Exterior Paint Palette
Make your home the talk of the neighborhood — in a good way — with an exterior paint scheme that pops
Full Story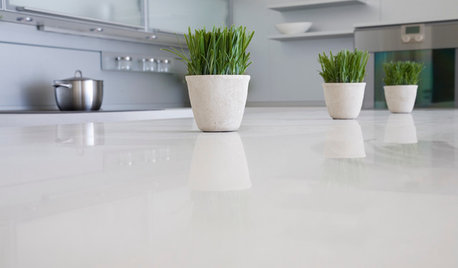
KITCHEN DESIGNKitchen Counters: Stunning, Easy-Care Engineered Quartz
There's a lot to like about this durable blend of quartz and resin for kitchen countertops, and the downsides are minimal
Full Story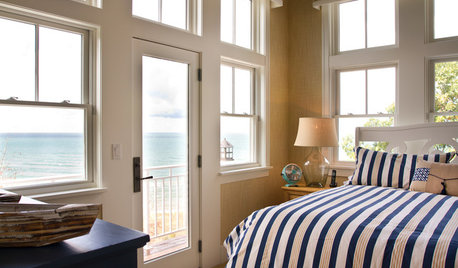
BEDROOMSRest Easy: Myth Busting for Bedding and Mattresses
We put to bed some of the misconceptions that may be keeping you from a good night's sleep
Full Story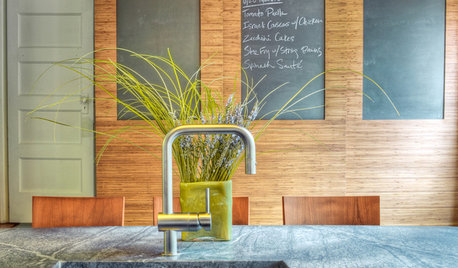
KITCHEN DESIGNKitchen Counters: Durable, Easy-Clean Soapstone
Give bacteria the boot and say sayonara to stains with this long-lasting material that's a great choice for kitchen and bath countertops
Full Story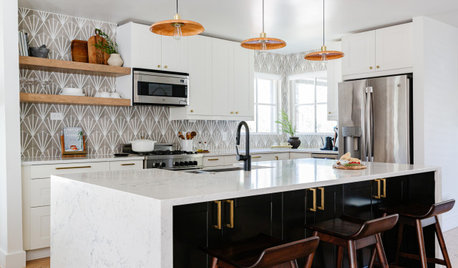
HOUSEKEEPINGThe Quick and Easy Way to Clean a Microwave
All you need is water and a couple of other natural ingredients to get your appliance sparkling and smelling fresh again
Full Story
BATHROOM DESIGNThe Family Home: 8 Easy Tips for an Organized Bathroom
If your bathroom has that hit-by-a-hurricane look that tends to come with kids, sort things out with these tried and true ideas
Full Story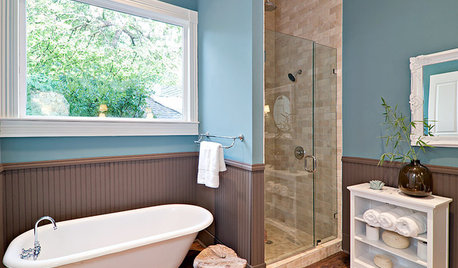
4 Easy Ways to Renew Your Bathroom Without Remodeling
Take your bathroom from drab to fab without getting out the sledgehammer or racking up lots of charges
Full Story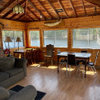


My3dogs ME zone 5AOriginal Author