


Clear coat essential when painting cabs?
simplegirl
14 years ago
Featured Answer
Sort by:Oldest
Comments (12)

wi-sailorgirl
14 years agoRelated Discussions
Sanity check - painting custom cabs yourself?
Comments (14)I have been using cabinet coat on my moldings and trim and it is great. It has a subtle sheen to it, but not too much. I'd recommend the foam brushes for the primer coat and using a brush for the paint. Since your surfaces are wider, you may even want to try a 1" foam roller for the primer. My moldings and windows all have tight spaces. My most important tool is my ipod that I download audiobooks onto. They are free from the library and keep me from losing my mind. I have had to sand, prime and then paint (2x) all the old windows and trim, paint the new windows and trim (2x) and paint most ceilings and all walls in the reno (involving 5 rooms, a bathroom, 2 closets and a laundry room). Luckily, I have discovered Aura, so did not need to prime all the walls. I bought one can of "oops" in Regal though, but that is for the closet and will be used for stenciling as well. The ceilings need primer though :(. I have been painting every single day for weeks and sometimes more than 12 hours in a day on my days "off", although with 2 kids and a dh to also clean up after, feed and clothe, it has tested my sanity in many ways. Luckily, I work 4 days a week from my office usually and have been able to do more from home, although my business calls have been all on speaker phone while I am covered in paint, lol. The funny thing is as I survey each element, I have a clear memory of what book I was listening to as I painted or prepped. It is a great way for time to pass faster because your hands are engaged and you mind is as well. The cost of hiring out was $3,500 for priming everything and painting the ceilings with me still painting the master bedroom, living room, dining room and den walls, PLUS all the moldings and trim. The painter would have painted the kitchen walls. Our budget has been stretched to the breaking point, so I just added to my list and am plugging away at it all. I can say that the painter seemed very qualified, but no one will paint as carefully as I do. I may not be as fast as he'd be, but the end result will be as good or better. When you are doing it on your own home, you just care more. If I am going to live with and take the credit/blame for how it comes out, there is no way I'd do a sloppy job!...See Morepainting cabs: brush vs. roller
Comments (4)In your case, you specifically asked for a brush, I'm assuming. So you should be getting a brush. But there are two schools of thought on this. Personally, I think using a brush, and getting brush marks is one of the best reasons for having your cabinets hand painted. (The other is the option to repaint easily in future.) It's a softer look, and shows a human touch. Some other people (most people, in fact) want a factory-like finish with no visible brush strokes, and using a roller, or better yet, a sprayer, and a self-levelling paint. So maybe they assumed you were one of these people. But that should give you a finish without ANY marks, not roller marks. So it sounds like they didn't succeed on either count. Whichever look you're after, talk to the boss. It's perfectly fixable....See MoreBarker Cabinet - clear coat finish
Comments (23)pseudochef, It is hard to get a good representation of what the insides look like with the lighting in my kitchen but here is what I was able to get with my iphone of the only cabinet left empty: The inside is their standard maple finished plywood and the shelves and cabinet box are banded in whatever wood you get for the doors The right side of the cabinet in the second picture is one of Barker's finished end pieces. They have them in the slab style that we bought as well as a style that looks like a cabinet door. On the left side of that cabinet is one of their filler strips and under it is their light valance. If you are going to use their valance make sure you order too much, I ordered just enough and now have to wait for another piece to finish my last cabinet like grlwprls said the drawers boxes are top notch. The dove tail is tight and sanded smooth and the blum glides are awesome. So easy to put in and I can't stop playing with the soft close. According to their site they just recently upgraded the drawer glides to blum's top of the line. We got the standard baltic plywood drawer boxes. If you get the clear coat, like we did, they will come coated like the rest of the cabinet. Definitely don't hesitate to email Chad, he is great, I must have sent him 30 emails over the last two months and he never seem to get annoyed. KBSpider; we were going to do maple as well and that is the sample cabinet we ordered, but decided to go a bit darker. Definitely don't regret the decision. This post was edited by sevngang on Tue, Mar 5, 13 at 20:47...See MoreClear coat TIG before or after ceiling install?
Comments (6)I certainly understand the time and space constraints but I still think that working at waist level is a lot easier and will generally result in a better end product. I'd also use a quality water based finish like those from General Finishes. At normal room temperature and humidity, you can expect the finish to be dry to the touch within 30 minutes and completely dry within 2 hours. What I would do is use a series of saw horses in each room that would hold roughly 1/4 of the material needed for that room's ceiling. Finish that first 1/4 in the first room, then move on to the second, and third room. By the time you're done in the third room, the first room's material should be at least dry to the touch. Move that material to the floor, placing it on some scrap lumber, and start on the second 1/4 of material. Depending on how much time you have that evening, you could move onto the third 1/4 (which, in theory, should leave you roughly 1/4 of the room to move around in). You may find that you'll want more than one coat on each board which will require a light sanding between coats and a wipe with a tack rag....See Moresimplegirl
14 years agobrickeyee
14 years agogrowlery
14 years agosimplegirl
14 years agorosiew
14 years agomorgne
14 years agosimplegirl
14 years agorhome410
14 years agobrucel
14 years agosimplegirl
14 years ago
Related Stories
HOUSEPLANTS8 Essentials for Healthy Indoor Plants
Houseplants add so much to our homes — and can thrive when grown in the right conditions. Keep these tips in mind
Full Story
SELLING YOUR HOUSEFix It or Not? What to Know When Prepping Your Home for Sale
Find out whether a repair is worth making before you put your house on the market
Full Story
ARCHITECTURE3 Surprising Essential Tools for the Modern Architect
If your architect doesn't work with these, you might want to steer clear. And nope, we're not talking about CAD
Full Story
DECLUTTERINGDecorate with Intention: Clutter Clearing 101
Fearlessly face disorganized areas to find the home of your dreams
Full Story
CONTRACTOR TIPSBuilding Permits: When a Permit Is Required and When It's Not
In this article, the first in a series exploring permit processes and requirements, learn why and when you might need one
Full Story
FURNITURE10 Furniture Essentials for Small Spaces
Here are items to opt for when a full-size sofa would be the elephant in the room
Full Story
FRONT DOOR COLORSFront and Center Color: When to Paint Your Door Bright Red
Welcoming and intense, a red front door kicks up a home's entryway and is impossible to miss
Full Story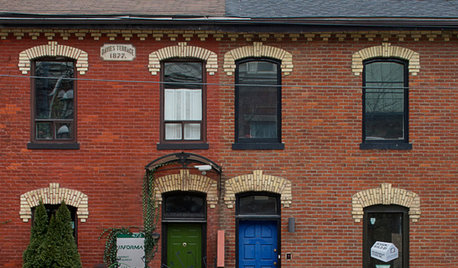
FRONT DOOR COLORSFront and Center Color: When to Paint Your Door Blue
Who knew having the blues could be so fun? These 8 exterior color palettes celebrate sunny-day skies to electric nights
Full Story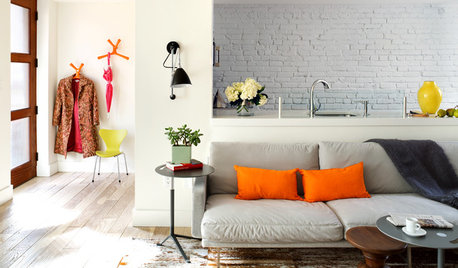
ORGANIZINGHow to Keep Your Home Neat When You Don't Have a Mudroom
Consider these 11 tips for tackling the clutter that's trying to take over your entry
Full Story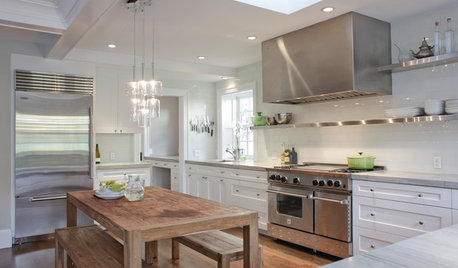
KITCHEN DESIGNCooking With Color: When to Use White in the Kitchen
Make sure your snowy walls, cabinets and counters don't feel cold while you're riding white's popularity peak
Full Story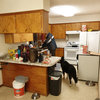

megsy