


What is the best way to demo a wall?
judithva
13 years ago
Sort by:Oldest
Comments (13)
Related Stories

DECORATING GUIDES13 Stylish Ways to Accent a Bedroom Wall
From tried-and-true favorites to the latest textures, these creative ideas can strengthen your bedroom’s design
Full Story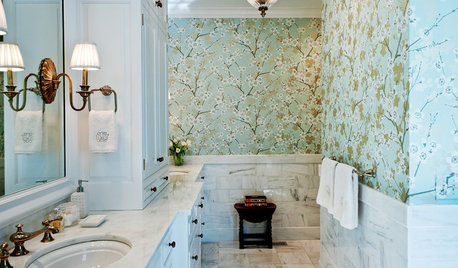
WALL TREATMENTS11 Ways to Roll With Wallpaper All Over the Home
Ditch the misconceptions and latch on to some great ideas for decorating your walls with patterned, textural and colorful wallpaper
Full Story
BATHROOM DESIGN15 Cheap and Easy Ways to Makeover Your Bathroom
Makeover Magic Can Happen When You Think Outside the Bathroom Box
Full Story
KITCHEN DESIGN10 Classy Ways to Jazz Up Your Kitchen Walls
Ditch the kitsch — these ideas let you decorate your kitchen walls in a tastefully appealing way
Full Story
DECORATING GUIDESIt’s a Mirror-acle! 5 Ways to Make Reflecting Walls Work
From the bedroom to the outdoors, mirrored walls can help reflect light and create the illusion of space
Full Story
ACCESSORIES12 Ways With Today's Wall Decals
Adorn Your Walls: No Nails, Paint, Wallpaper or Commitment Required
Full Story
WALL TREATMENTS6 Ways to Put Some Wonder on Your Walls
Show off wild, unusual treasures or collections with these tips from a seasoned stylist who appreciates individual personality
Full Story
DECORATING GUIDESDesign Details: 12 Ways With Wall Murals
Transform a room with a remarkable scene created in paint, paper, tile or decals
Full Story
DECORATING GUIDESOff the Wall: 9 Clever Ways to Ease Into Wallpaper
Not ready for a roomful of wallpaper? Try a little on a door, stairway or chest of drawers
Full Story
SHOP HOUZZShop Houzz: 6 Easy Ways to Cover Blank Walls
Dress up your walls with mirrors, art, tapestries, sculptures and maps
Full Story0
Sponsored
Columbus Design-Build, Kitchen & Bath Remodeling, Historic Renovations


hendricus
worthy
Related Discussions
Demo-ing wall containing gas pipe
Q
What is the best way to apply for a remodel permit under uncertainty?
Q
What is the best way to demo a fiberglass tub/shower?
Q
Best way to protect new wall to wall carpeting during open houses?
Q
judithvaOriginal Author
macybaby
judithvaOriginal Author
macybaby
judithvaOriginal Author
kudzu9
judithvaOriginal Author
macybaby
inox
judithvaOriginal Author
judithvaOriginal Author