


IPE Information 6 Aug 09
After following this forum for a year, I took the plunge and built a couple Ipe decks. I decided to share some of the notes I took, lessons I learned and links to information in hopes it would be assistance to others getting started. Please note, I am not a professional (but an avid DIYer) and these opinions should be taken in that context.
I want to provide specific thanks to a couple of the pros on this forum: Steve (Brooklyndeck) and John Hyatt for their help in building my deck and reviwing this material as well as Linda for her proofreading/editing skills.
Please post your comments, tips/tricks, advise or recommedations for improvement to this message and I will update it (assuming people find it helpful) If anyone can tell me how to fix the formatting, let me know. Email me if you want the word version.
"Bumping it" to keep it near the top if you feel it will be of benefit to others
Here goes:
Ipe
Ipe (pronounced EE-pay) is a Brazilian hardwood that has excellent properties for outdoor applications. It s extremely durable, weathers well and is very hard. It is commonly used on higher end decks and in commercial applications where longevity to harsh environments is a design consideration. ItÂs a very hard material that is approx 8 times harder than California redwood.
 Other materials that contain similar properties to Ipe include Garapa, Massaranduba, Cumaru, and Tigerwood. Each of these have some unique characteristics.
Where to Buy
 Many places on the internet sell Ipe and other Brazilian hardwoods. Some of the more popular places include:
o George at East Teak: http://www.eastteak.com/
o Advantage Lumber: http://www.advantagelumber.com/
o Austin Wholesale Decking: http://www.austinwholesaledecking.com/index2.htm
o Brandon at Decking Superstore in San Jose, Ca. (they shipped to Monterey for me and had reasonable prices and lots of inventory)
o http://www.bannerelktrading.com/ (they have a big selection of fasteners, blades etc)
Pricing
 Shop around, use the sources above and check locally. Buy from someone with a good turnover of material.
 Buy your Pressure Treated material from a lumber yard. You should be able to getter better material with higher levels of corrosion treatment than Home Depot or Lowes for roughly the same price.
Hidden Fasteners
This is a subject with a lot of controversy. On both Garden web and the Contractor talk websites, the consensus from the pros is to stay away from the edge and bottom mounts. I understand Tiger Claw has released a new product that is getting better reviews but has not stood the test of time yet.
Bottom line, screw from the top. Use plugs if you want that perfect finish. The headcote and trim screws have a small head that looks fine to most. Plugs can be bought from the suppliers noted above. I bought some from East Teak and they were delivered very quickly and were reasonably priced.
Finishing
 Make sure you use a stain made for Ipe. Ipe is a dense material that does not take regular stain well. Make sure the stain contains UV protection for maximum protection. Apply with a stain pad or brush. Make sure you remove excess material after 15 minutes (may show up as shiny pools of liquid)
 Sand the decking with a 50 or 60 grit random orbital sander - do not spot sand. A higher grit (100  120)may be preferred on the handrails.
 If you have lots of plugs, consider using a multimaster to cut plugs before sanding (an excuse to buy a new tool) otherwise a belt sander/palm sander works fine
 If you need to clean up an old finish or want to restore the original color, you need to use a mild stripper followed up by an oxalic acid (sometimes called brightener). Woodrich and Sunbrite sell materials for this that are relatively inexpensive.
 Recommended stain manufactures by members of the Garden web forum include:
o Penofin (apply in the afternoon, hot sunny days can be challenging)
o www.woodrich-brand.com similar to TWP
o TWP (buy the 100 series version vs. 500 series if available) Note: TWP is apparently not recommended by the manufacture for Ipe but some of the Garden web pros swear by it
o Messeners UV
Fasteners
 Brooklyn Decks: "I use #7 and #8 headcotes for my decks. The #2 square drive is easier to use...less chance of stripping. An impact driver is the best tool for screwing them in"
 John Hyatt: "I use noting but #7 square drive trim head screws to fasten S American lumber and havenÂt for 15 years or so
 I personally used the #8 brown colored headcotes on 4/4 Ipe. They worked great but seemed to be longer than necessary for 4/4 wood. No issues with stripping UNLESS I was attaching Ipe to Ipe (vs. Ipe to Pressure Treated (PT). In that case, I learned I had to use a larger drill bit and make sure I drilled deep enough so the screw did not bottom out. If it did, I would either snap the screw or strip it  usually snap it. I received a tip from Steve (Brooklyndecks) to lubricate the screws using a wax toilet ring seal when doing this type of attachment.
 Deck Ledger and Timber lock screws work excellent but you still have to drill a pilot hole if drilling into Ipe or it will split the wood (or not go into it)
 Use two screws per deckboard board into each joist. This will help prevent cupping of the boards.
 Some Sources of supplies:
o http://www.manasquanfasteners.com/Headcote_products
o http://www.mcfeelys.com/screws
o http://swansecure.com
o www.headcote.com
Framing
 You will most likely be using pressure treated wood for your framing. Lumber manufactures were required to discontinue using CCA (chromate-copper arsenate preservatives). New pressure treated wood contains much higher copper content to assist in preventing rot. These chemicals (copper) can create problems when you introduce another metal like aluminum, brass mild steel or zinc. Stainless steel is the optimal solution but is pricey.
If your project is near salt water  use it anyway. If not, make sure you use fasteners approved for use with PT (ACQ : Alkaline Copper Quaternary or CA: Copper Azole) wood. Simpson makes special "Z-max" coating for their parts.
Nails should also be selected by their finish and approved use in PT material. Nails must have a rating of G-185 to be approved for use in ACQ.
Another solution is to apply a barrier between the wood and the fastener such as builders felt or a peel and stick flashing (roofing/window membrane) material. I used the peel and stick flashing on my posts and anywhere I sistered a joist or beam. (This was to prevent water getting caught in between the boards)
 Make sure your using the appropriate tables for beam and joist spans. Links are provided below.
 Put joists 16" apart when using 4/4 Ipe unless the wood is being laid on the diagonal  12" apart when laid diagonally.
 Put joists 24" apart for when using 5/4 Ipe unless the wood is being laid on the diagonal. 16" apart when laid diagonally
Ventilation
 Decks require good ventilation. Do NOT enclose a deck that will get moisture under it that does not include provisions for good ventilation. The more moisture, the more potential for warping. Note: I did not see anyone ever recommend using edge mounted deck fasteners where moisture could be of a concern.
Code/Construction Requirements
 Make sure you check your building code requirements with local building departments. Code requirements vary!
 Decks.com makes available a guide with recommended details based on the 2006 International Residential Code. It is available here: http://www.decks.com/deckdetaildownload.aspx?binderid=3
 If you would like a basic starting place/plan, most of the composite deck manufactures have a design tool on their website that you can use to come up with a plan. They are a bit basic but can be a good foundation to start from: HereÂs some links:
Timbertech: http://www.timbertech.com/design-tools/default.aspx
Deckorator: http://www.ufpi.com/PRODUCT/deckorators/Deck-Design.htm
Moisture shield: http://www.moistureshield.com/deck-design-tools/
Calculating loads and pier sizes
 http://www.decks.com/calculators/BeamsAndFootingSizes.aspx
 http://www.finehomebuilding.com/PDF/Free/021180044.pdf
 http://www.nwbuildnet.com/articles/deck_loads.html
Stairs
I always bought premade stair stringers prior to this deck. I just didnÂt want the hassle of figuring out how to cut them myself. This time, I decided to take the plunge and do it right. It was the right decision! ItÂs really not that hard and a few tools make it even easier. Fine Homebuilding released a how to build a deck book that includes a CD that shows them actually being built and this website does all the calculations for you: http://www.decks.com/Calculators/Stairs.aspx?
Some other references I found and liked:
 http://www.stairways.org/pdf/2006%20Stair%20IRC%20SCREEN.pdf
Recommended tools
Impact Drivers - These are ones I personally used while building my deck. The best was the Makita
ïµïµïµïµ Makita Lithium Ion 18V Impact Driver
ïµïµïµ Dewalt 18V Impact Driver
ïµïµïµ Dewalt 14.4V Impact Driver
ïµ Milwaukee 12V Impact Driver (Not enough power for this application)ï
ïµ Bosch 12V Impact Driver (Not enough power for this application)
ïµ Porter Cable 12V Drill (Not enough power and not an impact driver)
Palm nailer ÂDepending on the size of your deck, you can be installing 100s or 1,000s of nails into connectors or in tight spaces.
The pneumatic palm nailer is an inexpensive solution that works great and is a huge time saver. I bought a Rigid one from Home Depot and it worked great.
Metal Connector nailer  I looked into these but could not justify the cost for one deck. Bostich, Senco and Palsode made them. The best rated I found was the Bostich. Note, they occasionally can be found refurbished at good prices.
Circular Saw  you will need one  get a good carbide blade
Pneumatic Framing Nailer- This will save you a lot of time and frustration. I used a case of nails on my deck (2,500 nails) I could not imagine swinging a hammer for all those.
Reciprocating saw  A very nice to have. Get one with an orbital action for faster cutting. I like the Milwaukee and Porter Cable brands
Miter Saw  I have a 12" compound saw made by Dewalt that worked fine. Get a good carbide blade. A series 20, 32 tooth Dewalt worked fine for me
BoWrench  Great for straightening out those pieces of lumber. I used one and it worked well
BOARDBOSS Â An alternative to the BoWrench and recommended by Brooklydecks. Available at MCFEELYS.COM
Smartbits  use for drilling and countersinking screws. Buy extra bits.
Drills- You will need one to predrill all holes in the decking. Hammer or rotary hammers are great for drilling into concrete or masonry. Rotary drills are more powerful and expensive. Makita/Dewalt/Milwaukee all sell 18V drill/driver sets that includes a hammer drill and driver.
Other tools: levels, chalk line, measuring tapes, framing square, speed square
Tool site that offers a deal a day: http://www.tooliday.com/ I have bought several items I never knew I needed from them.
Random Orbital palm sander  get one with the hook and loop system for attaching the paper. They work great. Buy 40-60 grit for sanding down plugs and general sanding. A finer paper will be desired for rails. I have used a Ridgid and Makita and they both worked great.
Multimaster - I do not own one (yet) but did get the opportunity to use one when building my deck. A bit pricey but for specific applications, very nice to have. If you did a lot of plugging, you might consider one to cut the installed plugs prior to sanding.
Contractors that have contributed to Garden web or Contractor talk that that built beautiful and safe decks
 John Hyatt: http://deckmastersllc.com/ location Oklahoma City, OK
 Brooklyndecks (Steve): http://urbanexteriors.biz/ location Brooklyn
 Deckkman22: www.alscustomdecks.com location Austin Texas
 BuiltbyMac: www.builtbymac.com location Eugene Oregon
 Greg : http://www.bergendecks.com/ location Bergen County New Jersey (seems to do more composite)
 Garden web files showing decks being built
 Garapa Deck: http://ths.gardenweb.com/forums/load/porch/msg0718450530954.html?61
 Ipe Deck: http://ths.gardenweb.com/forums/load/porch/msg0610144817578.html
 Ipe Deck: http://ths.gardenweb.com/forums/load/porch/msg072012207042.html
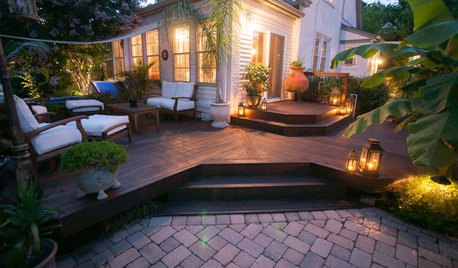
Lighting
 http://www.contractortalk.com/f50/recommendations-low-voltage-lighting-62566/
 One of the biggest discriminators of a nice deck/landscape installation is what materials were used and how the connections were handled. For results that will last, use a professional grade transformer, fixtures and proper connectors. There are several landscape lighting websites where you can do some research or potentially find a contractor should you decide to subcontract it out. I could not find the better transformers or fixtures at the big box stores. They can be bought on line or landscaping supply houses. In my research, the professional transforms I saw in use most included:
o Kichler, Vista, Cast, Hadco, Nightscaping, FX
o I have a 900 watt Kichler multitap and love it. The multitap transformers are a big help in addressing voltage loss. There is a big difference in providing 10.5 volts or 11.5 volts to a 12 volt lamp.
 Connectors: ACE connectors, Belden Solder Seal, Dryconn wirenuts
Balusters
 To me, a professional installation means the spacing between all the balusters is the same (between the posts). I found a program in excel that does the entire math for you. If I can figure out where I found it, I will provide a link.
Comments (10)


john_hyatt
john_hyatt
Related Discussions
Rust
Q
NEW: Petal Pushers Valentine Swap 09
Q
WoW Thanks! I WANTED that Swap # 4
Q
Cookalong - #34 - Chocolate
Q
wildebloem
salmon_slayerOriginal Author
brooklyndecks
Linda
wildebloem
john_hyatt
weedyacres
salmon_slayerOriginal Author