


My bathroom renovation: Before and after. Many, many pics.
rosemaryt
14 years ago


Featured Answer
Sort by:Oldest
Comments (26)

trinitytx
14 years agolast modified: 9 years agoredcurls
14 years agolast modified: 9 years agoRelated Discussions
Finished Bathroom Pics (two bathrooms!)--very pic heavy
Comments (41)Wooo!!! Cat, I am stuck at home because of the snow storm so wandered around here not looking at anything in particular and came upon your thread. I totally agree with you on the shower curtain choice. Regardless of whether I have the money to spare or not, keeping those suckers clean is a nuisance over time. We have a glass shower door that was installed back in 2003 and I can't tell you how much I hate cleaning it. Not that the door is all that dirty, but a shower curtain is way easier, and you can change the look/style whenever you feel like it. Can't do that with a pricey shower door. Anyway, everything looks lovely as usual, including the "prom" dress :-) Love, love those circular tiles, and the floor tiles that look like fabric. Gorgeous. What colour is that again? It looks greyish on my monitor....See MoreHappy Dance! Bathroom Finished! many pics
Comments (16)enduring: thanks --- the bedroom and bathroom walls are painted same color (as is newly created suite area between them) and this goes a very long way toward harmonious feel. Antique headboard is about same the finish as the bathroom vanity and this helps too. I did the best I could to make the original bathroom attractive, but it was a losing battle. I did not post the photos of mold, cracked tile, rusty hinges, broken tiles and fixtures, and the hated hollow core door. The room never felt clean no matter what I did. Ugh, it just wore me down. Towel bars on door were my only option as I wanted to eliminate clutter on walls. Original idea was to mount towel bar on half-wall, but the resulting clutter and narrowed walkway weren't worth it. Since the bathroom door is closed during showering anyway, it isn't a big deal for me to reach over to the door for my towel. DH takes his towel from door and hangs on shower door towel bar for easier access. Normally the bathmat hangs on shower door towel bar. This process is still not ingrained in our "muscle memory" but we are trying. We mounted the hand towel ring on the wall of the toilet nook, so to dry hands at the sink, I make a half turn behind me to reach hand towel --- or take the towel over to counter and rehang it after drying. Again, hiding towel ring there cuts out clutter. It would make more sense to hang towel ring on a tower beside sink, but I worried about the water droplets hitting the wood tower and making a mess over time. If the vanity were painted instead of stained, this probably would not have been an issue. See the tiny details that must be considered from the very beginning stages of planning?!?! We have two grab bars (Moen) in the shower. GC blocked the studs during build-out to accommodate these bars. Jury still out on whether we could have gotten by with handheld shower head only. During the weeks we were without a shower door (fabricator cut the door too tall; what frustration!), I carefully showered with handheld and grew to love it. Full-time though? I am not sure. Possibly so. Good luck with your plans....See MoreDIY bathroom reno finally complete! Before and after pics
Comments (43)Just one side note, it was mostly DIY- all of the plumbing and tub installation was done by a plumber. And the plaster walls were resurfaced by a professional. They were pretty bad after removing the tile. And my husband wanted plaster not Sheetrock....See MoreBefore & After: my new bathroom
Comments (29)Kristi, I hope you're still checking back here. I'm very interested in your tile. Is it more beige-ish, or gray-ish, or both? It's hard to tell from your photos. I'd like to do something similar in my smallish master bath. Would you say it's light in color? I'm afraid of making the bathroom too dark. Also, I really love the way you placed the tiles. It seems to be a herringbone pattern - am I right? I live in New Jersey, and I can't seem to find a store that carries Sarana tiles, but I'll keep looking....See Morejoan_mn
14 years agolast modified: 9 years agojennmonkey
14 years agolast modified: 9 years agogadgets
14 years agolast modified: 9 years agopatti43
14 years agolast modified: 9 years ago
Hellion
14 years agolast modified: 9 years ago
lydia1959
14 years agolast modified: 9 years agolinda_in_iowa
14 years agolast modified: 9 years agopekemom
14 years agolast modified: 9 years agokathleenca
14 years agolast modified: 9 years agohayjud_mn
14 years agolast modified: 9 years agominnie_tx
14 years agolast modified: 9 years ago
donna37
14 years agolast modified: 9 years ago
lindyluwho
14 years agolast modified: 9 years ago
socks
14 years agolast modified: 9 years agoschoolhouse_gw
14 years agolast modified: 9 years ago
marilyn_c
14 years agolast modified: 9 years agoLily316
14 years agolast modified: 9 years agoheatherinohio
14 years agolast modified: 9 years agosue_va
14 years agolast modified: 9 years agojannie
14 years agolast modified: 9 years agoLily316
14 years agolast modified: 9 years agojillianrose
14 years agolast modified: 9 years agoNorman Bentz
2 years agolast modified: 2 years ago
Related Stories
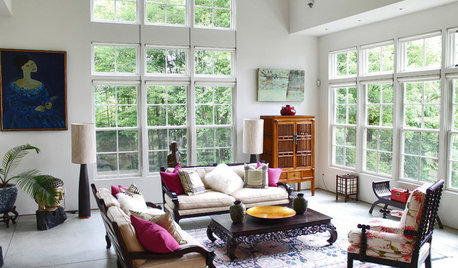
HOUZZ TOURSMy Houzz: Many Styles Meld Handsomely in a Vermont Countryside Home
With a traditional exterior, a contemporary interior and lots of Asian furniture, this home goes for the element of surprise
Full Story
BEDROOMSBefore and After: French Country Master Suite Renovation
Sheila Rich helps couple reconfigure dark, dated rooms to welcome elegance, efficiency and relaxation
Full Story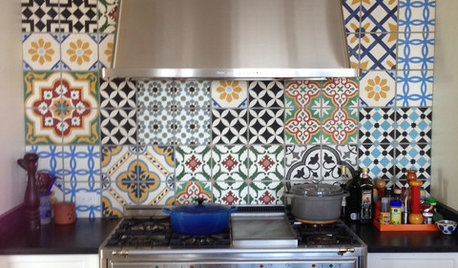
TILESo Many Reasons to Love Cement Tiles
You’ll notice their beautiful patterns right away, but cement tiles have less obvious advantages too
Full Story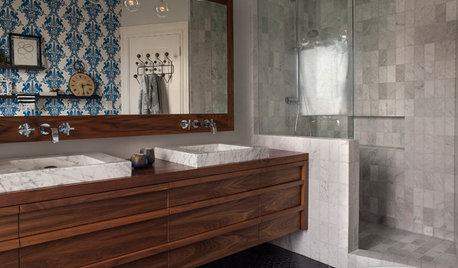
BEFORE AND AFTERSBefore and After: 19 Dramatic Bathroom Makeovers
See what's possible with these examples of bathroom remodels that wow
Full Story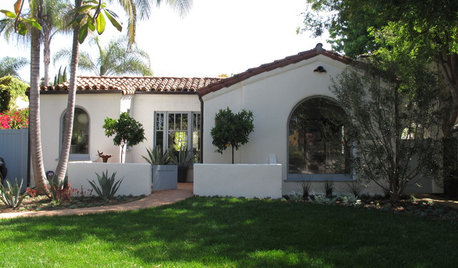
ARCHITECTURERoots of Style: Many Cultures Make Their Marks on Mediterranean Design
If you live in California, Florida or certain other parts of the U.S., your architecture may show distinct cultural influences
Full Story
DESIGNER SHOWCASESBefore and After: See How Rooms Came to Life at the Pasadena Show House
Read the design details behind transformations at the 2016 Southern California showcase house
Full Story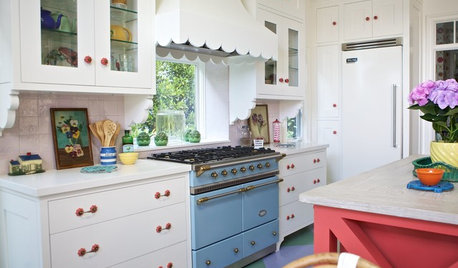
KITCHEN APPLIANCESThe Many Ways to Get Creative With Kitchen Hoods
Distinctive hood designs — in reclaimed barn wood, zinc, copper and more — are transforming the look of kitchens
Full Story
FRONT YARD IDEASBefore and After: Front Lawn to Prairie Garden
How they did it: Homeowners create a plan, stick to it and keep the neighbors (and wildlife) in mind
Full Story
ARCHITECTURECity View: Atlanta's Design Style Warms to Many Tastes
Outdoor living and hospitality? Of course. But Atlanta's architecture and interior designs express much more than just traditional notions
Full Story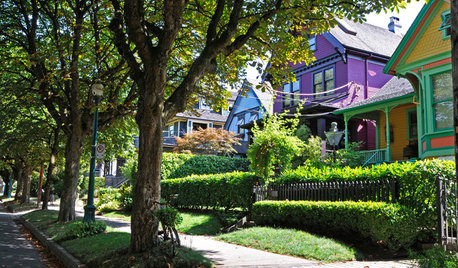
CURB APPEALWhen to Give Your Home a Coat of Many Colors
Drape your house in a dazzling array of hues to bring architectural details to life and draw admiration from the street
Full Story
rosemarytOriginal Author