


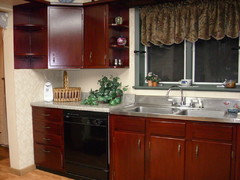
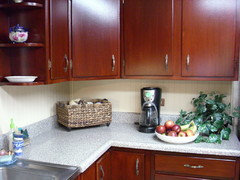
restaining cabinets darker without stripping
Happyladi
16 years ago
Featured Answer
Sort by:Oldest
Comments (13)

remodelfla
16 years agonever_ending
16 years agoRelated Discussions
Re-stain possible?
Comments (4)I ran into a very similar situation. DH was installing our hardwood floors (pre-finished with a warm golden>red oak stain). He installed new stairs and stair rail as well. When it was time to stain the balusters and railing I took a sample piece of flooring in, paint store called flooring manufacturer and got exact formula for the floor stain color. Another job I did fatigued (knew better, but with the major overhaul we wanted to hustle and wrap it up, the house was all torn up, furniture everywhere, etc.). I began applying stain to balusters in the evening without DH's halogen work light. Stupid. I had done half the 8 foot section before I went and got a really good work light and not only did it not match, it was baby poo brown. (Oddly enough, at the paint store on the sample baluster is was a near exact match). Getting that stain off was a bear and a half. I used a detail sander with multiple attachments (you can get one for about $60 or so and would urge you to get one, doing it by hand won't get all the curves, nooks and crannies sanded properly). There were deep crevices in the nooks and crannies that I could not access well, even with sandpaper folded. So I took some diluted bleach (1 part bleach to 3 or 4 parts water), applied to a q-tip in the crevice, let it sit, then sanded again. Not the greatest method, but it did bleach out some of the darkness. I worked on that several days but ultimately got it back to where nearly all the stain was gone, just a light hue left. (Woodwork is oak, and being porous sucks stain deep into the pores.) I used Minwax Golden Pecan (a very light stain), added just a hint of the stain from the store, and was able to get a near perfect match to the flooring. There is a slight difference in stain between sections on the railing, but not readily visible to the eye. You have to know the history, and look closely, to detect it. With the detail sander I started with 80 grit, then moved up in grit to 100, 150, 220 and then 280 or 300 for smooth as glass finish. The finer the grit, the finer it gets into the pores. I finished up with Minwax Wipe On Poly in Satin. It's been a few years and all is well. ;) I was working on only 4 foot section and I would not want to do that again. If you're looking at a large staircase and paying someone to do it, it's going to be very labor intensive (and if you DIY might require more than one detail sander, meant for 'small' jobs, I had a motor burn up on my first one while refinishing an antique chair that had excessive details to be sanded.) Oh, that little strip that came out lighter on the newel posts. You might be able to sand it off. Does sound like poly got on it and prevented stain from absorbing into the newel wood. If it won't sand off (start with grid order as mentioned above), you'll need to use a stripper (I like Bix Orange Get, doesn't splatter). But you'll have to be super careful and protect that floor really well!...See MoreHand sand/restain this cabinet
Comments (5)Maybe. It depends upon what is on there now and your proper choice of products. Stain, by generally accepted definition, is designed to be applied to bare wood. The wrong choice of stain or finish from the home center could spell disaster. The process you are describing is glazing. A glaze is a color product applied between layers of finish. The difference is more than semantic, because you must choose the proper product for a glaze. Confusingly, one such product is a GEL stain. There are also glazes that are specifically formulated for this purpose. Once you apply the glaze and let it dry thoroughly, you need to apply a top coat compatible with both what is there on your cabinets and what glaze you use. You are not likely to find this type of help by anyone wearing a bright-colored apron or vest, if you know what I mean. I can't really tell you where to look to find product help as it's hard to predict in your neighborhood. There are a couple of independent paint stores around me that if I walk in, they greet me by name, and when I ask for oil-based VanDyke glaze, they ask now much, and don't give me a glazed (pardon the pun)look. Glazes are pretty easy because they are designed to be manipulated so you can adjust it by manipulation until it's to your liking. If you don't like it, you can wipe off and start over. The finish that is on there now is highly dependent upon when your cabinets were made. Many are lacquer, a lot of those are pre-catalyzed lacquer. Fortunately, for a vanity-sized project, you can probably get by with a few cans of aerosol of either of these two products (again from a paint store that caters to the professional finisher.) But more recent choices can be post-catalyzed lacquer, two-part finishes, other finishes that will defy another finish from adhering well to it. Just "slapping on a coat or two of polyurethane" is unlikely to be successful. A whole different option is toning. This is a finish with color in it. These normally need to be sprayed to go on evenly (Read: forget Polyshades). Again, you can find these in aerosols for your small project. But toners are less forgiving. Very, very, light coats sneaking up on your desired tone. It's very quick to go from too little to too much and getting too much color or opacity before you know it. While you don't necessarily need to apply a clear coat over a toner, it's a good idea. One problem with toners is that if it chips, you end up with a different colored (lighter) spot. You see this a lot on low-end furniture where the finish is entirely toners, a chip and you see bare, uncolored wood. Another wrinkle in the whole idea is the vanity end-caps, if any. These are often just a vinyl laminate that approximates the wood color. You can't really do much with these except to cover them with real wood. Whatever you decide, I'd recommend practicing / trials on the inside of a door before you commit to front and center....See MoreRestaining chairs?
Comments (15)These are the finished counter stools and there are 2 matching bar stools too. The finish can't match a stripped, re-stained and clear finished piece but it is good enough for me on this furniture. Had I used the stripping method I would still be very much in the stripping and sanding phase, with staining and poly-ing awaiting, but this way the stools are done and back in use and I am confident no one will ever be aware that they have been refinished! I used the Bombay Mahogany shade of the Polystain. I am delighted with the color match to my cabinets. On my monitor the color in the second photo is much more accurate. I think there are two key factors to a good result. One is to use a good brush (it seemed like I was trying to apply the stain with a garden rake at times but I was too impatient to get the job done to go out and buy a new brush! Duh!) and the other is to apply only a very thin coat each time. The instructions tell you this but I think it needs emphasis! This product runs very easily and dries quickly so it is essential that you apply only a thin coat and work fairly quickly. I had to ignore the phone ringing as it is important to keep a wet edge. Other than that the stain covers well, these stools had one full coat and then a second coat where needed, and it is easy to go back when it is dry to tweak any areas that have not covered to your liking. The finish will not be as durable as a regular stain I am sure, but again touch up is a snap. If I haven't covered all your questions please ask away....See MoreOak cabinet restain-before and after pics!
Comments (26)WOW! You're a super hero! That's such a difficult undertaking! Oak is HARD to work with and yours turned out beautifully! After all that hard labor you deserve whatever granite makes you happy. Congrats on your gorgeous cabinets! They look brand new! I love the cathedral arch and that you have a bit of a doggy print. It makes it so yours!...See Morekitchenkelly
16 years agojessie21
16 years agojessie21
16 years agonever_ending
16 years agonapagirl
16 years agopettiford
14 years agodana_0001
13 years agovivianne
13 years agojwestmorganti_yahoo_com
13 years agogurlygurl7_gmail_com
13 years ago

Related Stories
KITCHEN DESIGN11 Ways to Update Your Kitchen Without a Sledgehammer
Give your kitchen a new look by making small improvements that have big impact
Full Story
4 Easy Ways to Renew Your Bathroom Without Remodeling
Take your bathroom from drab to fab without getting out the sledgehammer or racking up lots of charges
Full Story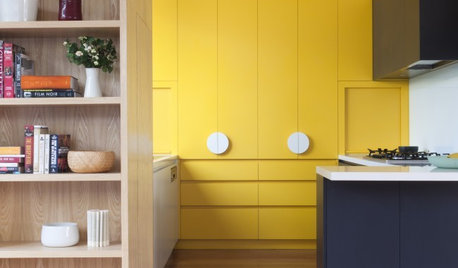
DECORATING GUIDESHow to Pull Off a Minimalist Look Without Sacrificing Your Style
Minimalism doesn’t always mean white and characterless — it’s about playing favorites
Full Story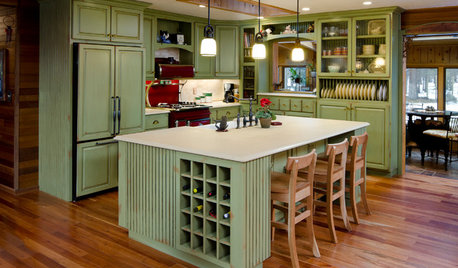
MOST POPULARHow to Reface Your Old Kitchen Cabinets
Find out what’s involved in updating your cabinets by refinishing or replacing doors and drawers
Full Story
KITCHEN CABINETSKitchen Cabinet Color: Should You Paint or Stain?
Learn about durability, looks, cost and more for wooden cabinet finishes to make the right choice for your kitchen
Full Story
INSIDE HOUZZInside Houzz: Refaced Cabinets Transform a Kitchen
No walls came down. No windows were added. But this once-dark kitchen looks completely different, thanks to bright new surfaces
Full Story
KITCHEN CABINETSGet the Look of Wood Cabinets for Less
No need to snub plastic laminate as wood’s inferior cousin. Today’s options are stylish and durable — not to mention money saving
Full Story
KITCHEN CABINETSKeeping Cabinet Color on the Down Low
Give just base cabinets a colorful coat for a kitchen sporting character and a spacious look
Full StoryMOST POPULARFrom the Pros: How to Paint Kitchen Cabinets
Want a major new look for your kitchen or bathroom cabinets on a DIY budget? Don't pick up a paintbrush until you read this
Full Story
KITCHEN DESIGNStress Less With Distressed Cabinets
Stop worrying over every little nick and chip. Intentionally aged cabinets give the kitchen or laundry room a relaxed, timeworn look
Full Story

HappyladiOriginal Author