House Shopping, Saw an Old House Today and Need Help Deciding
saphire
18 years ago
Featured Answer
Sort by:Oldest
Comments (32)
saphire
18 years agolast modified: 9 years agosocks
18 years agolast modified: 9 years agoRelated Discussions
Pictures:Brick House, Bare Beds,Old Shrubs: Keep or Get Out Saw?
Comments (6)The logical place for the mailbox, to my mind, would be hanging on the wall next to the front door -- but that's the way it was for most of the many houses I grew up in. But do check to make sure that a new location is allowed. If you have to put it somewhere away from the front door, consider a brick pillar that surrounds a utilitarian plastic or metal box (I like the idea but I think I wouldn't want it in front of your house). Many pictures here: http://images.google.com/images?hl=en&source=imghp&biw=1020&bih=832&q=mailbox+brick&gbv=2&aq=f&aqi=g1&aql=&oq=&gs_rfai= You might also see what you can find in the way of old-style mailboxes. Home renovation stores? Antique shops? Estate sales or auctions? Junkyards? tibs makes a good point about possible bulbs. It would be interesting to know what shrubs and plants the previous owners removed; a neighbor with a loved-looking garden might be able to tell you. Did the PO's take the plants with them or merely tear them out? If the latter, I'd assume that either the plants were in poor shape, required more maintenance to look good than the PO's could handle (for whatever reason), or that there were large shrubs that blocked the view of the house and someone decided the house would be more likely to sell without the landscaping. Then again, there's that huge bed full of mulch. Could be bulbs ... could be lots of bulbs.......See MoreHow old is your Garage/Shop and Home?
Comments (3)Very Good Points! I need to check into the Home Warranty since I am slowing and have done most repaird not insurance related in the past. I even replaced approx 20â if 2â cast iron plumbing until it was back to close to new thickness. From the kitchen sinkâÂÂs clean-out to almost center of the garage. I feel was due to shifting foundation, settled cast pipe and not flushed good when chemicals vs a Roto-Rota cleaned. A 1â bottom section was out about 3â before a total block at a Y to washer before traveling on thinner to the 4â pipe. The total block was bypassed creating a washout and pool that reentered past the block. Deceiving since I knew the pipe was draining by watching at the Ext clean-Out. The Tell Tale was when my Rota Rota came back with dirt mixed with grease/grime. I needed to talk to the wife of 42 yrs now on what should go into the garbage disposal vs trash after I had to reconnect it with a reduced strainer to keep it from smelling. LOL! A Camera Tech came with his camera and it fell through the bottom and his retriever w/n bring it back into the pipe. With his detector he could show me the exact location of the camera under the frig. He said I would have to call a plumber to retrieve it and he would return for an additional 100.00 on top of the original 250.00 (and he had traveled 10â of just over 50â to reach the 4â pipe. He was probably just a few miles away before I drill üâ holes in a 6â dia and popped a hole in the floor with a sledge and put the camera back in the pipe. I wanted to save him a trip and me some additional money. He came back for the camera but said the camera was not working well (Black & White) and he would come back when he got his new color equipment at no extra charge. Six months and six letters he came back with some nice color equipment. The repair and additional pipe looked good as far as it could go. The pipe was still draining but it became like a clogged artery with grease. If I had known I could have cleaned that with 50% bleach/boiling water mix he had recommenced when cleaning the line. Cheap me! His new equipmentâÂÂs camera would scale the pipe at 2500 psi as it traveled for an extra charge. I declined as well on letting my Home Owner Ins into the matter due to the deductibles on accessing the plumbing. Repairing the floor as my gain on all vs them paying any plumbing repair and all has been well approx 10 yrs. This street was put in 1968 and 5 - 6 of 10 on this side of the street have worked this 2â line only using different methods. I punched 3 approx 16â dia holed to join 2â PVC sections under the sink, center or cabinet to frig walking area, under the frig and jack hammer a 6 - 8" trench in the garage under storage approx 10â and pipe appeared full thickness. Others went around their homes, approx 3 times original dist or tunnel or jack......See MorePainting our old house....need help!
Comments (38)Les, thank you for your thoughtful input. It's really not about voting, at least I don't think so. I just really want to make it all look the best I can given the colors I have chosen. And given the fact that our house has gone through multiple changes through the years. We are trying to take it back, as much as we can, to what it would have been in the late 1880's. Yes there is a disconnect between the back addition and the rest of the house. Just was not sure how to "fix" it. At one time that addition also had a porch where the window is. When the previous owner renovated he removed that porch as it was not original. This picture was taken in the late 1950's He actually removed another porch on the garden side of the house as well. In total (counting the screened porch on the garden side)there were a total of 6 porches on our house! The windows in the addition are actually much smaller by comparison to the windows in the rest of the house. The windows in the brick part of the house are 84" and that's the inside measurement. All ceilings are 12' in the house. Sorry if I get a little carried away. But making our home the best it can be is a passion with me, can you tell? :-) oceanna, that is the same way I felt the first time I walked into our home, and still feel that way today! But it seems to be a never ending process. So much to do, so little time it seems. Actually people do slam on their brakes or drive very slowly past. One lady even ran the stop sign out front because she was looking at the house. (She stopped and told me about it the next week - got a ticket too!) jlc712, thank you. We love it and hope that when we are gone the next caretakers of our home will treat it with love as well....See MoreVery small house...Need help deciding where to put the remodel budget.
Comments (32)ok exact measurements. the house is not exactly a 20x30 square but its close enoguh. a few of the inner walls are thicker as they used to be exterior walls. the kitchen is 113inches by 141. It does fit a corner banquette with a round table and 3 chairs, and you can seat up to 2 on each leg of the banquette. Most comfortable with fewer than 6 people but up to 7 is possible. 8 if someone sits in the corner . Master is 130x116 (inches). Bedrooms are 80 inches wide and 136 and 116 inches long. Bathroom i was wrong on the measurements. It is 98x 57 (there is a cut out here so its not a perfect rectangle). The hall is 36 inches wide. The biggest benefit of using up that space to me is that people won't be as confined to a tiny hallway where it is awkward to pass anyone else. So I like the idea of taking part of the bathroom and part of the hallway to make another bathroom, and also to take down the walls int eh kitchen. So we would need to get some quotes for this but it seems relatively doable. We could wait on the closets for a while and it doesnt require moving any walls that we didnt already plan to move. Reality is it doesnt improve rental price THAT much to add a bathroom as far as I can tell, but there are only a few other rentals in the area to compare to. So addding the bath is partially for resale partially just because it irks me to have such a wasteful layout. Either way we do make back the cost of the bathroom quickly....See Moresaphire
18 years agolast modified: 9 years agoHomeMaker
18 years agohousekeeping
18 years agolast modified: 9 years agosaphire
18 years agolast modified: 9 years agoVivian Kaufman
18 years agolast modified: 9 years agobeds
18 years agolast modified: 9 years agoaprilwhirlwind
18 years agolast modified: 9 years agosaphire
18 years agolast modified: 9 years agosaphire
18 years agolast modified: 9 years agoaprilwhirlwind
18 years agolast modified: 9 years agosaphire
18 years agolast modified: 9 years agohousekeeping
18 years agolast modified: 9 years agosaphire
18 years agolast modified: 9 years agohousekeeping
18 years agolast modified: 9 years agosaphire
18 years agolast modified: 9 years agohousekeeping
18 years agolast modified: 9 years agosaphire
18 years agolast modified: 9 years agokitchenobsessed
18 years agolast modified: 9 years agogrowlery
18 years agolast modified: 9 years agosaphire
18 years agolast modified: 9 years agomaddiemom6
18 years agolast modified: 9 years agoelisabeth_rose
18 years agolast modified: 9 years agomaddiemom6
18 years agolast modified: 9 years agosaphire
18 years agolast modified: 9 years agobuddyben
18 years agolast modified: 9 years agohobbs67
18 years agolast modified: 9 years agolazy_gardens
18 years agolast modified: 9 years agoRichDragon50
18 years agolast modified: 9 years agomarianmoore
16 years agolast modified: 9 years ago
Related Stories
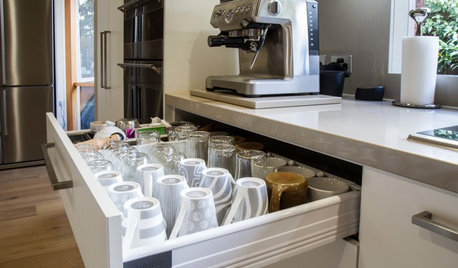
KITCHEN DESIGNToday’s Coffee Stations Have All Kinds of Perks
Some of these features are so over the top that they will give you a jolt
Full Story
LIFEHow to Decide on a New Town
These considerations will help you evaluate a region and a neighborhood, so you can make the right move
Full Story
KITCHEN DESIGNHere's Help for Your Next Appliance Shopping Trip
It may be time to think about your appliances in a new way. These guides can help you set up your kitchen for how you like to cook
Full Story
DECLUTTERINGDownsizing Help: Choosing What Furniture to Leave Behind
What to take, what to buy, how to make your favorite furniture fit ... get some answers from a homeowner who scaled way down
Full Story
SELLING YOUR HOUSE5 Savvy Fixes to Help Your Home Sell
Get the maximum return on your spruce-up dollars by putting your money in the areas buyers care most about
Full Story
UNIVERSAL DESIGNMy Houzz: Universal Design Helps an 8-Year-Old Feel at Home
An innovative sensory room, wide doors and hallways, and other thoughtful design moves make this Canadian home work for the whole family
Full Story
HOME TECHTurn 'Obsolete' Tech Into Fun Home Help
Here's how to put your old Mac, Atari or Newton to work around the house
Full Story
BATHROOM MAKEOVERSRoom of the Day: See the Bathroom That Helped a House Sell in a Day
Sophisticated but sensitive bathroom upgrades help a century-old house move fast on the market
Full Story
GREEN BUILDINGChampioning the Solar House, From the 1930s to Today
Homes throughout history that have used the sun offer ideas for net-zero and passive homes of the present, in a new book by Anthony Denzer
Full Story
EXTERIORSHelp! What Color Should I Paint My House Exterior?
Real homeowners get real help in choosing paint palettes. Bonus: 3 tips for everyone on picking exterior colors
Full Story


calliope