


Horse hair plaster cracks
bknouse
18 years ago
Featured Answer
Sort by:Oldest
Comments (23)

brickeyee
18 years agobknouse
18 years agoRelated Discussions
Clump of hair in wall?
Comments (25)It looks to me like steel wool and not animal hair and why it was reddish in color: the steel wool was rusting. This was a common practice and i have done it myself. Plugging a hole with plaster did not deter rats from chewing another hole back in the plaster, but rats hate chewing on steel wool. To stop them, its common practive to fill the hole with steel wool then plaster over the hole. Since rats have poor eyesight and travel by smell and whisker feel primarily, they just dont gnaw a new hole. It actually will stop them, and fills the unsightly hole. The orginal poster said it was in a chimney race, the perfect rat avenue from basement to living space....See MoreRemoving old plaster lath wall
Comments (19)I've removed many slat and plaster walls and this is the most efficient\minimal mess technique I have discovered. The fact is, this is a messy job and "bashing walls" is out of the question if you want to minimize the spread of dust and cleanup time. Here's what you need and how to do it: 1. Quality respirator mask (no exceptions). I recommend a $19 dual filter mask from Wal Mart. 2. Thick durable work gloves. 3. Protective plastic goggles (Wal Mart). 4. 1 Large black marker. 5. 10 X 12 thin plastic drop sheets (Wal Mart). 6. 1 flat pry-bar. 7. 1 Drill with half 1/2 inch bit. 8. Reciprocating Saw (any reliable brand will do) with extension chord. 9. 1 stud finder. 10. 1 ladder. 11. Large 96 gallon square trash bin with wheels or durable plastic storage container with wheels (preferably). 12. 1 Shop vacuum. 13. 1 Broom & dustpan 14. A partner to help (needs items 1, 2, & 3). Step 1) Turn off the power in the room that contains the wall you plan on stripping. You do not want to electrocute yourself! If other rooms have power receptacles on a separate fuse you can run an extension chord into the work room to power a flood lamp. Or if it's daylight you're all set ;) Step 2) Remove all wood trim from wall. Using the ladder, stud finder, and the black marker, start about 5" down from the wall\ceiling crease and locate and mark all the wall studs on the wall you plan to strip plaster slats from. Make your stud marks horizontal and 4" wide. Have your partner mark where the stud finder began beeping and where it stopped. Make note of all electrical switches and outlets. If you have multiple plugin outlets on a single wall chances are the wiring will be horizontally ran inside the wall to join the outlets. Use the marker to draw a horizontal line between outlets. You will not cut below or within 5" of the top of this line. Step 3) Cover the floor of the room where you're working with the 10 X 12 plastic. I like to "booth off" the room with plastic by taping 10 X 12 sheets from the ceiling to the floor using blue painters tape as it will not rip your drywall paint\paper when you remove the tape. I tape all joining plastic sheet seems from ceiling to floor and allow a slit for me to walk out during breaks. Step 4) Put on you respirator, goggles and gloves. Make sure your respirator is tight enough not to let air in and the nose bridge is snug on the bridge of your nose. You do not want ancient dust creeping in your mask! A hat is optional if you don't want dust in your hair (ladies). Position the 96 gallon trash can by the ladder and have your partner waiting for you to hand them square slat and plaster section to put into the garbage can. Step 5) Start at the left hand side of the wall. At the top of the ceiling, using the drill and the 1/2" bit, drill a hole on the right end of the 4" stud marking. Only drill a hole in the section your are currently working on. Step 6) Place the blade of the reciprocating saw half way in the 1/2" hole you drilled earlier and begin sawing downward. gently add downward pressure to the saw, don't force the saw, let the saw do the work. It should cut through like butter. Keep your cut line as straight up-and-down as possible. You can also steer the saw close to the parallel wall stud for a closer cut. If the saw blade pops out or is hard to move, chances are you're cutting into a wall stud. Stop, evaluate the situation (using a flashlight), and reposition and continue to cut just the slats and plaster. Stop cutting when you're about 2" from the floor. You should now have a semi-straight vertical cut line from ceiling to floor. Step 7) On the ladder, using the pry bar, at the top of the wall, you will pry off your first single square section of wall by using the following technique. At the top of the wall, from left to right, diagonally slide the pry bar (hook end towards you) behind the cut plaster panel and leave the very end of the pry bar(flat end) sticking out at the lower bottom left. With your right hand, firmly grad the upper right of the plaster section, holding the hook end of the pry bar against the back of the plaster wall section. With your left hand, firmly hold the flat end of the pry bar behind the lower left corner of the plaster wall section. Slowly pull the entire panel of plaster towards you keeping the pry bar firmly pressed behind the plaster section you are removing. If you do it correctly you will keep 98% of the plaster in tact and all nails joining the wood slats to the 2 X 4 beam will be pulled out at the same time. Hand the square plaster section to your partner to place in the bottom of the 96 gal plastic trash can. Continue this technique all the way down the cut in the section you are working. You should get the hang of it by the time you're done with the removal of your first section. Step 8) Repeat steps 5 through 7 until the wall is stripped. You may have some remaining nails to remove with the pry bar when you are completely finished with the entire wall. Step 10) Pick up stray pieces of plaster and slats when you're finished. Gently roll up the plastics sheets being careful not to spread the dust; dispose of the plastic. Sweep and vacuum and remaining dust and debre that escaped the plastic. You may need to make several trips to the waste transfer station with the trash can to dispose of the slat and plaster or you can pay someone to pick it up. I have this technique down to where I can strip a 10 x 8 wall in 60 min with little or no mess on the floor. Have fun, be safe....See MoreMounting Heavy Mirrors Horse Hair Plaster
Comments (4)What's behind your plaster is not strapping, but wood lathe. Lathe and plaster are not separate items, but integral parts of your wall. When plaster is installed it is sort of a stiffish glop, and it is pressed against the underlying lathe layer; some of the plaster is smushed through the openings between the lathe rows. When the plaster dries those pushed-through parts contract and stick, hard, to the back of the lathe forming what are called "keys". If you can find the back of some plaster to look at you will see exactly what I mean. These "keys" are what hold the plaster to the wall; any damage to them and your plaster will begin to fail (crack, break into pieces, fall off or sag). Fifteen pounds of mirror sounds a bit heavy to try to hang from just your plaster and lathe; the usual contemporary solution would be to install special bolts that go through the plaster and lathe and then press back against the back surface to support the item hanging on the front. Depending on the remaining strength of your wall this might work OK. Unlike a sheetrock wall, lathe is supported by a sometimes irregular patterns of vertical supports, but there vertucals under there. I think the preferred traditional (and safest for your plaster) solution would be to install some type of hanging rail bridging between two vertical supports and lagged into them through the plaster. Then hang the mirrors from this rail. If you look at pictures of Victorian houses you can often see this type of rail which is called a picture rail and was devised to handle exactly the problem you have. Good luck! Molly~...See MoreCalling all plaster wall repair experts!
Comments (54)We are remodeling our 1930s kitchen. The plaster is cracked and crumbly in some good-sized areas (2' by 4' and 3' x 5' approx). Our trusted electrician insists that the kitchen contractors should demo the plaster and replace it with drywall in the worst areas. The kitchen contractors (whom we've never used before) do not believe this is necessary, and that patching the plaster will be sufficiently strong. They say that if we apply drywall to the old plaster, the new cabinets will not fit, and it seems to me that the extra weight of drywall on already-cracked plaster will only worsen the problem. They caution against doing a complete plaster removal due to the expense and amount of dust. (2 people in our household have asthma, so this is an issue). One wall is exterior brick with no studs beneath the plaster. Another is terra cotta block, also without studs. Metal mesh lathe is used throughout. Because there are no studs, how can they anchor the new 42" solid cherry wall cabinets with either scenario? Without studs, will the brick-plaster or brick-terra cotta systems hold up? (Our previous cabinets were 32" metal). Chat room advice is as varied as my contractors'. I don't know whom to believe!...See Morebrickeyee
18 years agobknouse
18 years agosierraeast
18 years agobrickeyee
18 years agosierraeast
18 years agobknouse
18 years ago PRO
PROChristopher Nelson Wallcovering and Painting
18 years agobrickeyee
18 years agowlg2_2
18 years agocnvh
18 years agosierraeast
18 years agobknouse
18 years agobrickeyee
18 years agonaturelle
18 years agoputerboy
16 years agokim2007
16 years agobrickeyee
16 years agocoopers
16 years agobrickeyee
16 years ago
Julie Doughty
13 days ago
Related Stories
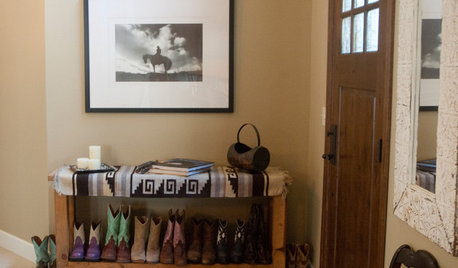
HOUZZ TOURSMy Houzz: A Horse Lover's Stylish Portland Retreat
With a wine room, a yoga studio and plenty of supercomfy spots, this Oregon home puts the good life through its paces
Full Story
PETSDealing With Pet Messes: An Animal Lover's Story
Cat and dog hair, tracked-in mud, scratched floors ... see how one pet guardian learned to cope and to focus on the love
Full Story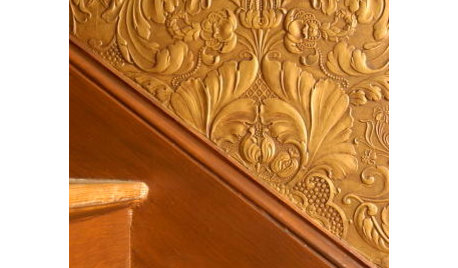
DECORATING GUIDESBrush Up on Paintable Wallpaper for a Posh Look
Customize your wall treatments the affordable way, with richly textured wallpaper painted any color you like
Full Story
HOUZZ TOURSMy Houzz: Relaxed Glamour in a Downtown Row House
See how this Maryland couple put their own creative stamp on their 1890 home
Full Story
TRADITIONAL HOMESHouzz Tour: Respectfully Updating a 1929 Farmhouse
Period details mix with new features for a family home as idyllic as its pastoral surroundings
Full Story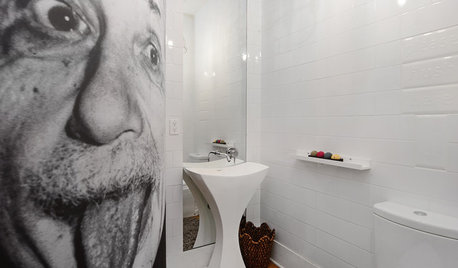
BATHROOM DESIGNThe Funniest Bathrooms on Houzz
Check out these creative loos for a chuckle, then share your own fun bathroom designs
Full Story
COFFEE WITH AN ARCHITECTMike Brady Lied to Me
Why "The Brady Bunch" is a terrible guide for the architectural profession
Full Story
DESIGNER SHOWCASESLivable Luxury at the 2015 Pasadena Showcase House of Design
Southern California designers mostly forgo the glitz at this year’s show house — a Tudor-Craftsman mansion and carriage house
Full Story
HOUZZ TOURSMy Houzz: Accessibility With Personality in an 1870 Home
Hand-painted murals and personal touches fill an accessible home with warmth and charm
Full Story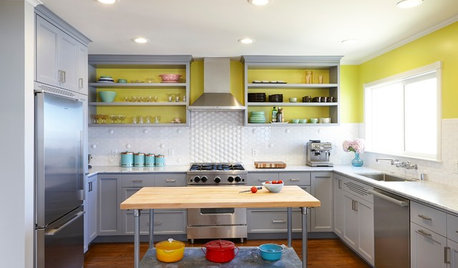
KITCHEN DESIGNKitchen of the Week: An 'Aha' Tile Moment in San Francisco
Design inspiration sometimes strikes in the place you'd least expect
Full Story


snowblower