


Redguard - thinset mesh on corners before or after?
netrate
10 years ago
Featured Answer
Sort by:Oldest
Comments (11)

catbuilder
10 years agoRelated Discussions
Coating only seams of Hardi with Redguard )
Comments (16)In my first post I mention to the person seeking advice that the waterproofing measures are a good idea but most likely not "Code Required". I add that it should be done. My Opinion. Then I remember the most important part and that is to talk about "Bond Breakers" then I showcase the how too with pictures. I'm thinking someone finding this link will like the pictures regardless if they choose Hydro Ban, Red Guard or Aqua Defense. No offense Aliceinwonderland but you are not a "Fan" of mine and if I'm reading your posts right your are a "Stay at Home Mom" who has done some renovations and spends a lot of time here on Garden Web passing out your professional opinion on construction. Yet another reason to understand where your DIY advice is coming from. I enjoy helping people out. People like to see how the Pros do it. I build bathrooms every week in Vancouver Alice. When was your last build? Please add some helpful info and stay off my back - I'm just helping and posting info on a public site. What we need around here is more "Pros" and less "Joe's" - I'll work on that as well. I know tons of guys online that can help with professional opinions from men and women who actually do this job for a living.... I have three gallons of Red Guard in my shop. I will showcase a Red Guard Shower for the next thread... JW...See MoreDurock/ redguard and Kerdi
Comments (5)Let me put it this way-- if you cut the pieces too small, you want the gap in the back, and then fill it with stiff thinset. Especially being that you're going to be waterproofing it, you want as clean an outcorner coming out of the niche as possible. It's alot easier to fill in the back corner than it is to fill in the outcorner and keep it nice and square. As for your Kerdi question, if you're using Kerdi, there's absolutely no need for any other waterproofing, including Redgard. You don't even need to tape any of the cement board joints because the Kerdi will do that for you, too....See MoreComplete IKEA Kitchen Renovation Before & After
Comments (54)@sushipup1 - yep! do you have an email address? I'll send you his contact info. I don't think he's on houzz, otherwise I'd just link his profile. @The Patchman Roofing Company- Thank you so much! @Oliviag- Thank you! Honestly, for the amount of time it took, I have absolutely no complaints. From demo to done, I think all in we were about four weeks and change, including waiting for countertop fabrication. It's hard remembering there was ever a different kitchen, honestly. It's so perfect for our aesthetic and our house - it was absolutely worth it!...See MoreWhats Missing? Kitchen Before and After.
Comments (30)You should be so proud of your new kitchen. You did a fabulous job! After I mentioned to you earlier about the missing hood, I decided I better go check on mine as it had been a while since I cleaned it. Maybe 6 months or so. OMG, the 2 removable mesh filters were super sticky with grease and dirt (and with a few dead knats stuck in it). Gross!!! Even the sides of the two flanking upper cabinets were totally greasified! I removed the filters to soak them in hot soapy water. I then had to wash my hands about 4-5 times with dish soap and I am not kidding my fingers still felt sticky. Please bear with my long story here. Haha! I have an expensive powerful Zepher hood that I thoroughly researched on gardenweb (now houzz 😢) for a good recommendation. I turn it on to at least medium high everytime I use the stove, even for just boiling water. I will disclose my hubby cooks too and he love, love LOVES to fry everything! I make sure he turns it full blast when he does. Ok, getting to the point already. So now imagine you have no hood, and you actually use your cooktop fairly often. Over time, where do you think all that grease that I just described is going to go? Remember that is WITH most of mine being sucked up and out by my powerful hood. Yep, in no time, those new pendant lights, the ceiling, vases, trinkets, everything within a certain distance will get a nice sticky film of grease. You might not see it until the dirt and maybe a bug or two gets stuck to it. Don’t get me started on the cooking smells eventually stinking up the curtains and furniture or the annoying smoke detectors going off. I guess a downdraft would be better then nothing, but from what I have read by the pros here, not all that much better. So my advice is to listen to your wife and get the hood. They have nice looking ones that have good task lighting in them. Ok, sorry for the rant. 🤐 Now as far as the backsplash, I really love the color paint you have there now. I think a tile in that color would look beautiful. I have a similar greyish green color backsplash. It really functions like a neutral. I can use any pop of color, even red, and it goes great. Mine is by jeffery court, breakwater, sea color. It is a close match to the BM paint color Sea Salt. Enjoy your kitchen and please post an update when everything is finished!...See Morecatbuilder
10 years agoMongoCT
10 years agonetrate
10 years agoMongoCT
10 years agoelfgirl
8 years ago PRO
PROBy Any Design Ltd.
8 years agolast modified: 8 years agoartemis78
2 years ago
A S
last yearlast modified: last yearartemis78
last yearlast modified: last year


Related Stories
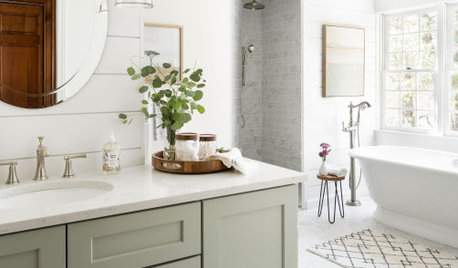
BATHROOM DESIGN14 Design Tips to Know Before Remodeling Your Bathroom
Learn a few tried and true design tricks to prevent headaches during your next bathroom project
Full Story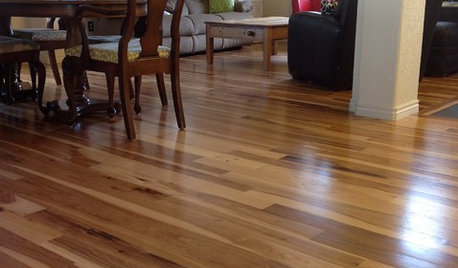
MATERIALSWhat to Ask Before Choosing a Hardwood Floor
We give you the details on cost, installation, wood varieties and more to help you pick the right hardwood flooring
Full Story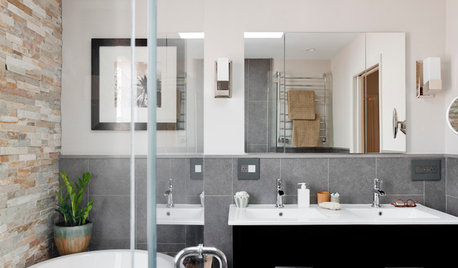
INSIDE HOUZZHouzz Prizewinners Take a Bathroom and a Laundry From Dated to Dreamy
Janine Thomson enters a Houzz sweepstakes and wins a $50,000 design package from Lowe’s. See the ‘before’ and ‘after’ photos
Full Story
LOFTSMy Houzz: A Modern Industrial Loft in Toronto
Before and After: DIY homeowners take on a labor of love to overhaul their loft, turning it into a stunning light-filled home
Full StoryBEFORE AND AFTERSSee a DIY Powder Room Transformation for $1,100
Determination, DIY skill and a stunning tile feature wall helped make this formerly dark and gloomy powder room feel spacious
Full Story
MOST POPULARRoom of the Day: A Dream Bathroom in 90 Square Feet
A master bathroom in an L.A. historic district features modern amenities and timeless details that tie it to past and present
Full Story
KITCHEN DESIGNBeachfront Kitchen Sets the Scene for Dinner Parties
An amazing Manhattan Beach view and a love of entertaining inspire a breezy, coastal-modern kitchen makeover
Full Story
LIVING ROOMSWashed Out to Knockout — See a Smart Living Room Makeover
Soaring stonework and nifty custom storage take a spacious living room in Washington from bland to beautiful
Full Story
HOUZZ TOURSHouzz Tour: From Shocker to Stunner in Houston
Once moldy and decrepit, this 1920s bungalow is now a neighborhood gem
Full Story
URBAN GARDENSGarbage to Garden: A Vacant Philly Lot Gets Some Green-Thumb Love
Transformed by an artist, this once-derelict urban property is now a tranquil garden with living walls
Full Story

MongoCT