


Complete IKEA Kitchen Renovation Before & After
bxev
6 years ago
last modified: last year
Featured Answer
Comments (54)

bxev
6 years agoRelated Discussions
Kitchen renovation - before & after
Comments (31)mcdermdj - Yeah, there must be some kind of built-in limit - I wouldn't think we've got low water pressure, since the sprayer is quite powerful. catmele - Thank you! We bought our countertops from a local shop in Lexington, KY. The quartz we chose (Walnut Luster by Hanstone) was $81/sq. ft. installed, and the total cost (including sink cutouts, edge beveling, delivery, and removal/disposal of old countertops) was $4700. Interestingly enough, though, I learned that most (if not all) of Hanstone's designs have been licensed to Lowe's and are sold under their Allen + Roth brand, albeit with different names - their version of Walnut Luster is called Kelsey Creek, for example. I'm not sure of Lowes' prices - though they should be the same from store to store - nor of the quality of their installation (which probably varies widely), but I know a few people who have had good results from them. Hope this helps!...See More85% Finshed French Ikea Kitch need help - before and after pics!!
Comments (13)Bonjour Belle cuisine ! Ooooooo La La. You have done a lovely job. A bright glass tile would be wonderful. Or super tiny octagonal tiles perhaps a few in the slate color you like but the rest in whites, grays, creams and a favorite color. Slate is beautiful but the gray might cool the room to much. You need more warmth. (birght colors)Yes Madame Hospital needs a little color. :) What colors do you and your husband love? What colors and style are you using for bar stools or perhaps kitchen curtains? Or maybe a frame pictures. Not too much color as you don't want to crowd the space I assume you like clean lines and simplicity. No Pendants it will fight with the hood. If you do use shelves be sure to pick items that would be lovely to see when sitting in the LR. Vases or nicely shaped coffee mugs. Something bright or warmer to add to the color you might be using as accents. Here are some pictures of small kitchens that might give you some ideas of how to finish off your beautiful space. Open shelves Idea. If you do not want clutter this may not work for you but it is one idea. This reminded me of your kitchen. The picture kind of pulls it together. The gray might give you the idea of slate if you did go ahead with slate. This backsplash brightens this kitchen up. It is hard to see but it is light blue green glass tile. this back splash might work for you too. See the open shelves to the left. So many ideas so many ways to be creative. Plants can also warm up a room without over powering it with clutter. Je souhaite que j'aie été en France aussi. Enjoy your home in France. ~boxerpups...See MoreDIY bathroom reno finally complete! Before and after pics
Comments (43)Just one side note, it was mostly DIY- all of the plumbing and tub installation was done by a plumber. And the plaster walls were resurfaced by a professional. They were pretty bad after removing the tile. And my husband wanted plaster not Sheetrock....See MoreIkea Laxarby Kitchen Reveal- Before & After- With a Blog Too
Comments (7)Cabinet #3, #4 drawer- flours, sugar, etc Cabinet #5, Top Drawer (burnable garbage & compost) Cabinet #5, Bottom Drawer, (recyclables/dump garbage) Cabinet #6, Top Drawer- Utensils Cabinet #6, Middle Drawer- Plates & Bowls Cabinet #6, Bottom Drawer- Mess of Tupperware and plastic containers (needs a divider) Cabinet #8, Odd-sized and infrequently used items Cabinet #9, Top Drawer- Kids drinking glasses, go mugs, water bottles (middle and bottom drawers are pantry overflow and junk drawer) Cabinet #10, Top Drawer- Breakfast station- bread/buns, wraps, Toaster, Peanut Butter and Honey. Cabinet #10, Middle drawer (no picture), has dish cloths, tea towels, and uses the 'hidden' drawer from Ikea. Bottom drawer is pantry overflow....See Morebxev
6 years agobxev
6 years agobxev
6 years ago PRO
PROBeth H. :
6 years agolast modified: 6 years agobxev
6 years agobxev
6 years agolshack17
6 years agobxev
6 years agobxev
6 years agobxev
5 years agoHU-608754501
5 years agoblondelle
5 years ago- PRO
Beth H. :
5 years ago bxev
5 years agosushipup1
5 years agobxev
5 years agosushipup1
5 years agolast modified: 5 years agobxev
5 years agosushipup1
5 years agoTony Montana
5 years agobxev
5 years ago


Related Stories
BEFORE AND AFTERSBefore and After: See a Complete Kitchen Remodel for $35,000
An expanded layout, new maple cabinets and granite countertops breathe new life into this family gathering space
Full Story
KITCHEN MAKEOVERSBefore and After: Glass-Front Cabinets Set This Kitchen’s Style
Beautiful cabinetry, mullioned windows and richly refinished floors refresh the kitchen in an 1879 Pennsylvania home
Full Story
MOST POPULARBefore and After: 13 Dramatic Kitchen Transformations
See the wide range of ways in which homeowners are renovating their kitchens
Full Story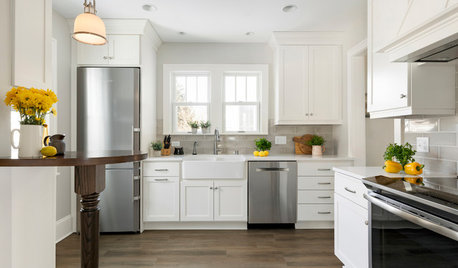
KITCHEN MAKEOVERSBefore and After: 11 Inspiring Kitchen Transformations
Look to these kitchen renovations for ideas and inspiration
Full Story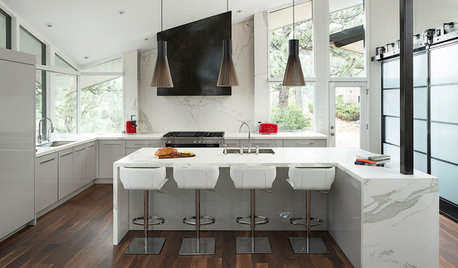
KITCHEN DESIGNBefore and After: 4 Black-and-White Kitchen Makeovers
See how the chic color palette adds contrast and drama to these renovated kitchens
Full Story
KITCHEN MAKEOVERSBefore and After: 3 Remodeled Kitchens With a Vintage Vibe
A hand-painted hood, a brick fireplace and patterned porcelain tiles add classic charm to these renovated kitchens
Full Story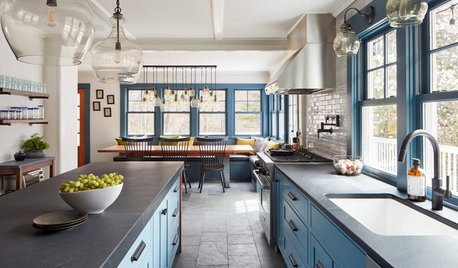
KITCHEN MAKEOVERSBefore and After: Clever Kitchen Redesign Draws a Crowd
A Massachusetts kitchen for a family of 11 gets a new configuration that provides more style, function and space
Full Story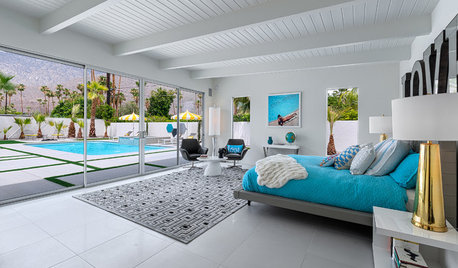
BEFORE AND AFTERSBefore and After: 4 Renovated Midcentury Gems in Palm Springs
These gorgeous homes in the California desert combine modernist style with updates for contemporary living
Full Story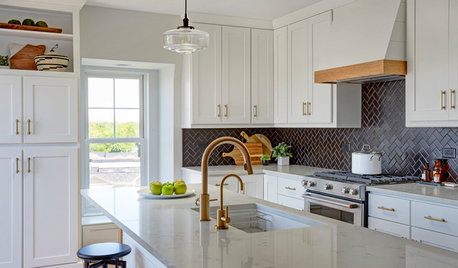
KITCHEN DESIGNBefore and After: 6 Kitchen Makeovers in 200 Square Feet or Less
See how pros used new layouts and finishes to make these kitchens work better for homeowners
Full Story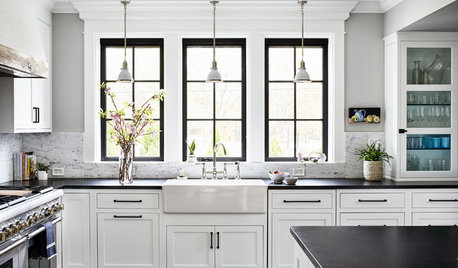
BEFORE AND AFTERSBefore and After: 5 Dramatic Kitchen Makeovers
See how remodeling made these kitchens a better fit for their owners’ lifestyles and design preferences
Full Story


cs929