


Refinance before starting renovation
ntruro
12 years ago
Featured Answer
Sort by:Oldest
Comments (7)

User
12 years ago
Olychick
12 years agoRelated Discussions
My bathroom renovation: Before and after. Many, many pics.
Comments (26)The paint color on the lower half of the wall is just a very light lavender. The upper half is more purple. I actually mixed the lavender myself, by adding a little of the purple paint to some white paint. The fake tile (sheet vinyl) floor came from Linoleum City in Los Angeles. I looked and looked and looked for that vinyl and Linoleum City is the only place that sells it. I called a salesman there and asked about it. He said they had a unique contract with Tarkett (I think) to produce this product and he didn't think it was sold anywhere else in the country. Their number one client is Hollywood. Set-building people buy it by the roll to use on the sets. The sheet vinyl creates the look of early 20 Century hex tile floor in a jiffy. :) The light fixtures and medicine chest are reproductions. The light fixtures came from Rejunvenation Hardware and the medicine chest came from Van Dykes Restoration hardware. All these years of writing about old houses and I finally got to use some of the resources I've been writing about. Thanks for all the nice comments. Rose Here is a link that might be useful: linoleum city link...See MoreI need HELP, before i have to refinance my house to care for my p
Comments (12)Ahhh...so you've used Baquacil for the last 6 years until now? Yes? You didnt' say that in your first post. And right now you're using chlorine tabs in your skimmer and shocking the pool with a chlorine or non-chlorine based product for sanitizer instead of the Baquacil peroxide "shock"? Just trying to get this all straight. Are you in the middle of a Baquacil to chlorine conversion? That is a specific process, and it takes some patience to do, during which you'll see different water colors and clarity as you convert. Of course, as you already probably know using an OTO test (which shows yellow in the presence of chlorine and tests up to 5 ppm of Total Chlorine only)...a brownish red color means that you have a much higher level of Total Chlorine (Free Chlorine plus Combined Chloramines)in the water. You'd need to use an FAS/DPD drop test to very accurately determine up to 50 ppm how much Free Chlorine, Combined Chlorine and Total Chlorine you have. I use this test on my own pool frequently and it's very easy to use. I still stand by my advice. There are detailed instructions and help on TFP for Baquacil users who need/want to convert to a less expensive product, as well as immediate help with your specific issues. Cheers and I hope you get your problem solved and get back to enjoying your pool!...See Morerenovation pics -before and during (w/pics)
Comments (19)The contractor is finished and there are just a few things for me to touch up. (find and install under cabinet lighting stain a couple of moldings, repaint door trim, change light switch, etc.) Now i am just waiting for a replacement to the front of the oven which was scratched in delivery and a new freezer door which was dented during shipping. New Entryway into kitchen (it used to be a regular doorway) Range corner Range side towards sink Sink Corner Fridge side angled counter Corner and fridge Here are the 99% completed pictures... Enjoy...See MoreStarting Lawn Renovation
Comments (14)+1 forsheems. As he sort of said, you sort of screwed yourself by mowing first and then spraying the RU. You can recover and really need to slow down. Start now watering 3x per day to sprout all the weed seeds you can. Water every day for a week. That will help bring back the grasses you scalped off and did not die the first time. Then after a week, spray with RU again. Ideally you would continue watering daily to spray RU again in 2 weeks, but you're already off this program. The idea is to kill everything including all the potential weed seeds sitting on your soil. Then you could run the slit seeder without seed to pick up all the dead stuff. Set the slits to scar the ground about 1/8-inch deep. As you run over it you will find low spots that the slitter doesn't hit. You will also find high spots. I suggest running over the high spots over and over to loosen that soil. Then use a push broom to move the high spot soil into the low spots. Try not to get carried away with that process and create new low spots. Walk on the low spot soil to press the fluffy new soil down onto them. This is the time to perfect your soil surface. The smoother you get it now the fewer problems you will have with drainage. Tilling with a hand held tiller makes it almost impossible to get a good surface at the top. Tillers hop up out of the ground when they hit a root, rock, or hard spot. They dig deep when they hit sand or other soft spots. There's no way you can fix that. The result is the underlying surface is uneven. When you level the top of the soil that leaves differing depths of fluffy soil on top of the untilled profile underneath. When the fluffy soil finally settles in 3 years, it will settle to match the profile of the uneven surface below. That settling starts immediately and ends in 3 years, so your soil starts out getting bumpy and ends up really bumpy. That's why you don't till. If you had a tiller on the back of a 10,000 pound tractor, you can control that, but hand held tillers are the worst. Getting back to the seeding, once you have run the slit seeder over the soil without seed, you could scatter the seed by hand into the scarred up soil and get about the same results. Up to you. Either way roll the seed down to push it against the soil. If the area is small enough, just walk on it to press it down....See More
weedyacres
12 years ago
Lynne Reno
12 years agoBilll
12 years agopricklypearcactus
12 years ago
Related Stories
CONTRACTOR TIPS10 Things to Discuss With Your Contractor Before Work Starts
Have a meeting a week before hammers and shovels fly to make sure everyone’s on the same page
Full Story
DECORATING GUIDESHow to Decorate When You're Starting Out or Starting Over
No need to feel overwhelmed. Our step-by-step decorating guide can help you put together a home look you'll love
Full Story
MOST POPULAR10 Things to Ask Your Contractor Before You Start Your Project
Ask these questions before signing with a contractor for better communication and fewer surprises along the way
Full Story
REMODELING GUIDESWhat to Consider Before Starting Construction
Reduce building hassles by learning how to vet general contractors and compare bids
Full Story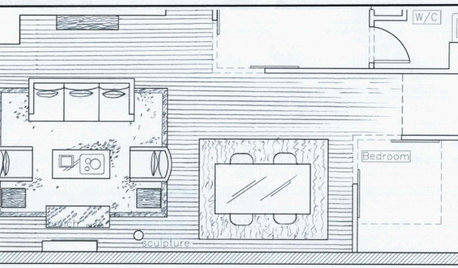
DECORATING GUIDES9 Planning Musts Before You Start a Makeover
Don’t buy even a single chair without measuring and mapping, and you’ll be sitting pretty when your new room is done
Full Story
HOUZZ TOURSMy Houzz: Raw Meets Refined in an Open Brooklyn Loft
Exposed brick and rustic elements mix thoughtfully with global art and textiles in a former warehouse
Full Story
REMODELING GUIDESFollow a Ranch House Renovation From Start to Finish
Renovation Diary, Part 1: Join us on a home project in Florida for lessons for your own remodel — starting with finding the right house
Full Story
HOUZZ TOURSHouzz Tour: Refined Casual Style for a Gracious Farmhouse
Once a rustic weekend cabin, this spacious Georgia home now comfortably accommodates the owners and their guests full-time
Full Story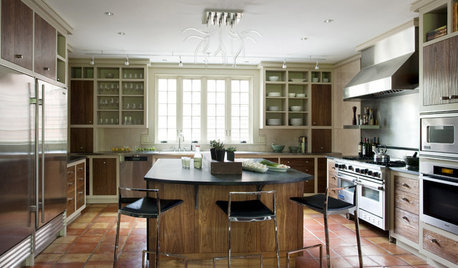
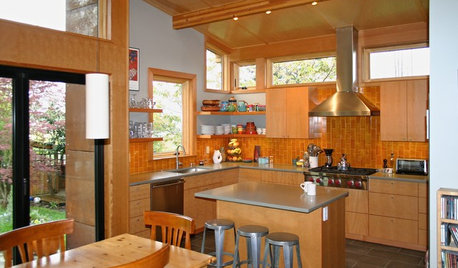
KITCHEN DESIGNKitchen of the Week: Simply Refined in Massachusetts
Luxe materials and practical layout creates a stunning, functional kitchen
Full Story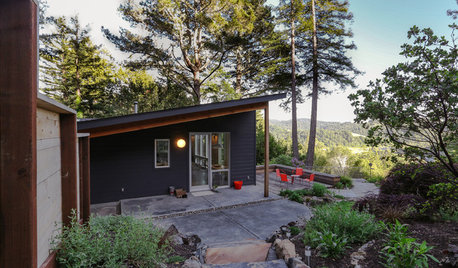
VACATION HOMESHouzz Tour: Rugged and Refined Beauty in Sonoma County
Opening up rooms and adding outdoor recreation areas makes a weekend home a real retreat
Full Story

helenab