


Refill Slab repair with Mortar instead of concrete? Need answer!!
mommielady
16 years ago
Featured Answer
Sort by:Oldest
Comments (9)

bill_vincent
16 years agomommielady
16 years agoRelated Discussions
HELP! Clay Soil in concrete block raised bed on concrete slab
Comments (5)I got your email, Louise - Sorry, I've been away at a bonsai show & visiting friends/family. This is a tough one. As I understand it, you have a concrete block planter constructed atop a concrete slab, with no way for the water to make its way into the sand below the slab. Drilling holes in the block walls won't improve drainage. The only 2 ways to effectively improve drainage would be to make sure there is a 'bridge' between the soil in the planter and the sand below the concrete so the water can percolate through the soil, or to make sure the soil you use is porous enough that it holds little or no perched water. This would mean that your soil particles would have to be large & stable, insofar as their structure is concerned. Even the soil you see me holding above would be inappropriate for your application because that soil depends on the wicking action of the earth (in RBs) to ensure it doesn't remain saturated after rain/watering. It looks great, but if you have high standards it would be a disaster in a container or in your app. I'm thinking that about an 80% fraction of a mix of all purpose sand and all purpose gravel and 10% each of pine bark fines and Michigan (reed/sedge) peat or good compost would probably be the direction I would head. In subsequent years, I think all you'll need to do is mulch with pine bark to keep the soil healthy. If expense isn't a major consideration, you could use Turface MVP as the base ingredient for your soil. Topsoil and fine sand just isn't going to drain w/o help. The alternative would be to remove the old soil and cut a hole in the slab so water can drain from the soil in the planter, but it would have to be a hole of considerable size - preferably at the lowest point on the planter's bottom. If you have pictures, it's possible that something else might be devised that will allow the water to move out of the soil via some sort of passive wicking mechanism that we/you could devise, but I'd have to see the application in order to envision the possibilities. There might be a way to employ a false bottom by placing FRP panel on top of cement blocks that are resting on the bottom & building it like a self-watering container in reverse - where you employ a wicking column of soil to REMOVE water instead of supplying it, but I don't know how far you want to chase the issue? ;-) AL...See MoreFlagstone patio--mortared vs. gravel/sand?????
Comments (64)I just built a quartzite patio in Reno, NV. I used the new product, polymeric sand and it worked great! I got the sand in 60 lb bags for $20 a bag from Home Depot. My patio is 9X27.5 and I used 5 bags. It looks like regular sand and sweeps into the joints. You then mist it 3-4 times waiting about 10 minutes between each misting. The water activates a weak polymer glue and locks the sand granules in place. We don't have much problems with frost heaves here, but if a stone moves you can pull up the sand in chunks and step on it or use a shovel to get it back to a granular stage, sweep it back in place and re-mist. Although the polymeric sand sets up pretty hard I don't think it would stand up to a leg from a patio chair, etc., so we plan on getting sled style chairs for the patio. It does do well with walking on it and the sand stays put! So far we are very happy with it. I'll let you know how it goes thru the winter. We get very little rain here but we do get snow....See Moreusing self leveling mortar?
Comments (7)This job CANNOT go as planned. You SHOULD NEVER install tile on plywood. Plywood is unstable and expands and contracts and your tile will literally pop off. Grout will crack and pop out. You need a STABLE surface (not just firm). You have a very very very unstable base as it is with the dricore and a thin layer of plywood will not help it at all. You need cut your loses, and make a decision here based upon financial loss and your desired finish. I see two routes...1)Go with the dricore and use another finishing product such as carpet or pergo, etc. or 2)Remove the dricore and install your heating mat and tile. I do not understand why you thought you needed dricore with heating wires. The heating wires will give you that warm feeling. Do you have a leaky basement? You must have spent a fortune...dricore is very expensive, and the heating wires even more so. I am sure you can sell either product on ebay depending on how you proceed. In my opinion, I would prefer tile and the heating mat. Tile is nice in a basement due to lasting ability with kids and pets. I did mine in tile but could not afford the heating mats. I instead lay out some area rugs in the winter, than roll them up in the summer....See MoreQuestion from a first-timer: concrete blocks vs. poured concrete
Comments (31)Anyone with any doubts about Superior Walls should use something else. I watched the setting of those for two houses before making my decision. The bolts installed when setting the panels hold the walls until the house floor structure is PROPERLY secured to the top of the walls. The basement floor slab keeps the walls from moving in at the bottom and if the builder chooses, the walls are secured to the slab to prevent outward movement for daylight basements. The backfill prevents outward movement at the bottom. Thinking things through from a technical perspective is helpful. Going on now with 12 years with my Superior Walls and am perfectly pleased. Concrete block probably comprises the majority of basement foundation construction and it is the poorest choice in my opinion. But that is not to say that it is a bad choice-- definitely not the best....See Morebill_vincent
16 years agobill_vincent
16 years agosombreuil_mongrel
16 years agoventupete
16 years agomommielady
16 years agobill_vincent
16 years ago
Related Stories
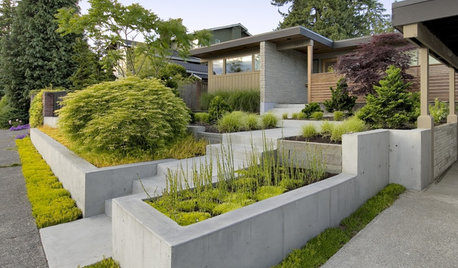
LANDSCAPE DESIGNGarden Walls: Pour On the Style With Concrete
There's no end to what you — make that your contractor — can create using this strong and low-maintenance material
Full Story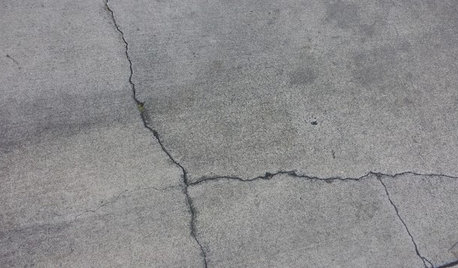
CONCRETEWhy Concrete Wants to Crack
We look at the reasons concrete has a tendency to crack — and what you can do to help control it
Full Story
GREEN BUILDINGConsidering Concrete Floors? 3 Green-Minded Questions to Ask
Learn what’s in your concrete and about sustainability to make a healthy choice for your home and the earth
Full Story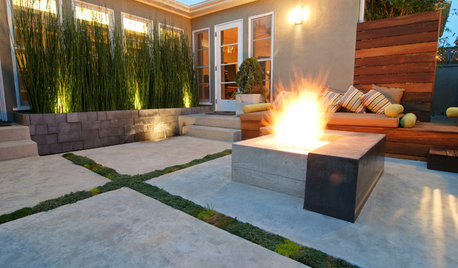
GREAT HOME PROJECTSHow to Tear Down That Concrete Patio
Clear the path for plantings or a more modern patio design by demolishing all or part of the concrete in your yard
Full Story
FLOORS5 Benefits to Concrete Floors for Everyday Living
Get low-maintenance home flooring that creates high impact and works with home styles from traditional to modern
Full Story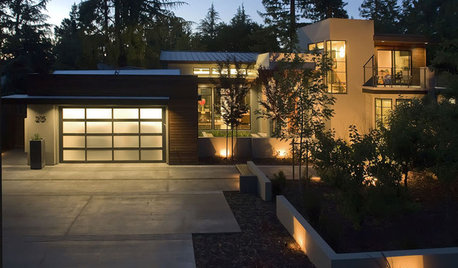
REMODELING GUIDESConcrete Driveways: Poring Over the Pros and Cons
Concrete adds smooth polish to driveways and a sleek look to home exteriors, but here are the points to ponder before you re-surface
Full Story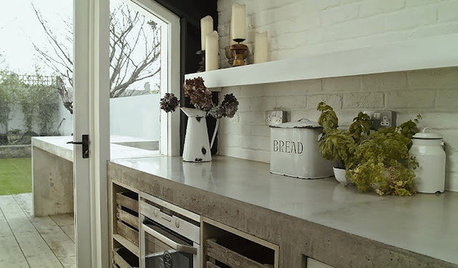
KITCHEN COUNTERTOPSKitchen Counters: Concrete, the Nearly Indestructible Option
Infinitely customizable and with an amazingly long life span, concrete countertops are an excellent option for any kitchen
Full Story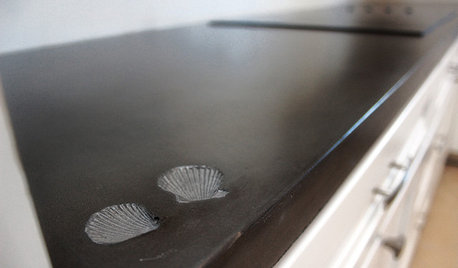
KITCHEN COUNTERTOPSElephants of the Kitchen? What to Know About Concrete Counters
Concrete countertops are beautiful, heavy and cool — and have their own peculiarities. And a lot in common with certain gray pachyderms
Full Story
GREAT HOME PROJECTSHow to Give Your Driveway and Front Walk More Curb Appeal
Prevent injuries and tire damage while making a great first impression by replacing or repairing front paths
Full Story
MATERIALS10 Modern Marble Looks
Marble has broken free of the standard kitchen countertop slab and is showing up on bathtub backsplashes, modern dining tables and more
Full Story


mommieladyOriginal Author