


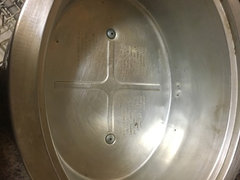
Melted plastic(bag) on cookware! Easy removal Please
User
16 years ago
Featured Answer
Sort by:Oldest
Comments (16)

rockpig
16 years agoRelated Discussions
Bagging Fruit
Comments (57)I will post some photos later but this year I tried bagging, apples, grapes and chums with either ziplocks or organza bags to keep the birds/bugs away. Organza bags being the nylon mesh bags used for wedding gifts and the like. I bought mine from: http://www.yourorganzabag.com/organzabag.htm. I used Moss Green as they are not visible in the foliage. I used the 6x9 bags but are they are a bit short for long grapes. Perfect for plums and apples and small bunches of grapes. I trimmed off the top of the ziplock just to the zipper part. Then at each bottom corner I cut off a triangle of plastic to leave about a 3/4 - 1 inch hole for ventilation. After 4 months there is a big difference. The ziplocks act like little greenhouses. There is nearly always significant condensation inside. The bags have a tendency to collapse and even with the drain holes there can be 5-10ml of cumulative water condensation inside. Earwigs like to crawl up via the condensation holes and hang out. The Organza bags have no issues. The are well sealed, no bugs get inside and ventilation is perfect. For apples, there does not seem to be a big issue with the heat/humidity. They seem to be growing and coloring up roughly the same no matter which bag. For the plums and grapes there are a huge difference. Once starting to turn color there is skin breakdown and rot formation in the ziplocked grapes. Coluration of the grapes also seems to be better in with the Organza bags. My Organza bags cost about $0.22 each vs $0.04/ziplock. However after 3 months they still look pretty much like new and as I am harvesting grapes I keep the bags for re-use next year. Another positive is the Organza bags have no perperation time (ziplocks you need to trim 2 corners + the tag) and are super easy to install. The Organza bags have a drawstring, you just open the bag, pull the string then tie a bow over the branch. For me, for the look (my trees don't look like they are covered in plastic), the ease of installation and the ventilation I will be using Organza bags from now on. Not sure for apples if you would see a difference with airborn fungus and scab but they work great for all insect and bird related problems. I think they would work awesome for peaches as they breath very well but keep the bugs/birds out. Just my experience up here in zone 4....See MoreUrea for Ice Melt
Comments (11)I see this question is several years old, and some answers simply don't address the initial question. I have used a urea product for over 25 years. Available in 50# bags, it was about $40 back then, maybe over $100 now, but I still have enough left from 12 years ago to fill several 1-gallon milk jugs. I keep one jug in car (also a kid-size plastic shovel neither of which I have ever had to use), another jug in garage for ease of application. How much you will use depends on how much concrete you have and how often you get actual ice as compared to snow. It works best if scattered on walks and drive PRIOR to icing up, and maybe several times during. Don't bother using it in snow--you're wasting money. Keep the bag tightly closed, it tends to clump but can be broken up without too much difficulty. It is worth the investment if you are planning to stay in your home for 10 or more years and don't want scaled concrete or the expense of replacing. Otherwise, go for the cheap....See MoreMelting medicine bottles???
Comments (9)I did some searching and found this. I haven't tried it though. Sounds fun! The site also lists a lot of different things you can try to melt! Here's what they said: MELTING ...or SLUMPING ...or SHRINKING plastics melting The general idea for making these (Rx or medical, amber or clear bottles) is to soften them into a flattened blob with colorful accents. .....The colors are achieved by either adding colored crayon slivers (shave the 'paperless' crayons with a vegetable peeler, etc.) &/or by adding small, colorful plastic beads (or bits of raw or baked clay, etc. or just anything that can stand the temp. of the oven or will melt in an interesting way). ..15 years ago, most prescription bottles were 'clear'...but amber ones should be fine too (but do go for the lightest amber you have) ...Remove any label residue (GooGone or WD40)....thorougly wash & dry ...stand the bottle upright on a non-stick, oven-safe flat pan (or could use aluminum foil?)...then fill each bottle 1/4 full with an assortment of your color filler ...bake (275 degrees or higher?) ...the process happens pretty fast so watch diligently....as soon as the bottles have become flattened blobs, remove tray from oven (if more softening is needed, quickly return tray to the hot oven) ...avoid overhandling the hot plastic shapes with oven mitts to avoid creating unsightly, raised marks. ...to make hanging holes after cooling... either 'melt' a hole using a heated metal skewer, or drill one (create holes from front to back). ...you can speed up the cooling of the plastic blobs by dumping them straight from the oven into a bowl of icy water; this sudden shock of hot to cold also might help to create some unusually curvacious pieces. Here is a link that might be useful: glass attic melting site...See MoreFoodsaver users -- please answer my easy questions
Comments (6)Linda is absolutely right about losing moisture in food by letting it sit in a freezer. That's why you'd never freeze anything for a few hours; that will form ice crystals which you don't want. The question had to do with vacuum sealing, and I've found it's best to only leave food in the freezer for as long as it takes to firm. For some foods that's 10 minutes; others could take 30 minutes if they have a lot of moisture. Some moisture is lost, which is what allows you to vacuum seal without pulling too much moisture from the food, since that is often what prevents the bag from sealing. There's a fine line; you'll have to figure out where that is for your particular freezer. The less time you leave it in the freezer, the better off your food. To maintain freshness it is best to allow as little air around the item as possible. Of course; that's exactly what the vacuum sealer is for. I freeze hamburger patties first, because beef that has turned dark just looks nasty to me (not fresh). I've personally never had a loss of moisture in the meat by doing this to the point I can vacuum seal it (15-20 minutes in the freezer). Again, I just don't want the juices to run into the machine. When I throw them on the grill after they've been thawed, at least they look appetizing enough to eat! No one I know wants to eat a grey, nasty looking hamburger patty. Again, with cookies, because they are vacuum sealed there is no moisture loss as there is no oxygen for ice crystals to form. Even if you cut the end off the bag to allow a little air into it, then simply fold it under the food while it thaws, there's no moisture loss. Opening the bag first keeps the food from being compressed as it thaws, so instead of a dense compact cookie due to lack of oxygen, you'll have one that expands a little and becomes more...uh, ''normal'', for lack of a better word, because of the air. I've eaten things from my freezer that were vacuum sealed as long as a year before and experienced no losses of flavor/color/moisture. That's why my vacuum sealer has paid for itself in a short amount of time; it's in the cost of food that's no longer thrown away. They're especially great for small households, just for that reason. In fact, I'm on my second one in 7 years, since I wore the first one completely out. When I was designing my kitchen, I realized the vacuum sealer was one of my most used appliances. Because it gets used at least 4-6 times a day, we never throw out food any more!...See Moreakrogirl
16 years agoUser
16 years ago
Fori
16 years agocpovey
16 years agoUser
16 years agogneegirl
16 years agoci_lantro
16 years agorgillman
16 years agoeteinne
16 years agoUser
16 years ago
Mostafa Mamdouh
7 years agoSusan Todd
7 years agoSusan Todd
7 years ago
Leah Green
6 years agolast modified: 6 years ago
Related Stories
HOUSEKEEPINGThe Simple Way to Remove Wax From Candlesticks
Before you make a mess of things, read these easy steps for removing melted wax from your candlesticks
Full Story
GARDENING AND LANDSCAPINGChoosing a Deck: Plastic or Wood?
Get the pros and cons of wood, plastic, composite and more decking materials, plus a basic price comparison
Full Story
HOUSEKEEPINGThe Quick and Easy Way to Clean a Microwave
All you need is water and a couple of other natural ingredients to get your appliance sparkling and smelling fresh again
Full Story
KITCHEN COUNTERTOPSKitchen Counters: High-Tech Solid Surfaces Make Maintenance Easy
Sculpted by heat and nonporous by nature, solid-surface countertops bring imagination and low maintenance to the kitchen
Full Story
FEEL-GOOD HOMEEasy Ways to Spruce Up Your Summer Vacation Rental
If your rented cabin, cottage or beach shack isn’t up to par, fear not. A few tweaks can make it more comfortable
Full Story
HOUSEKEEPINGHow to Remove Water Rings From Wood Tables
You may be surprised by some of these ideas for removing cloudy white water marks from wood surfaces
Full Story
MOST POPULAREasy Green: 23 Ways to Reduce Waste at Home
Pick from this plethora of earth-friendly ideas to send less to the landfill and keep more money in your pocket
Full Story
KITCHEN DESIGNDesign an Easy-Clean Kitchen
"You cook and I'll clean" might no longer be a fair trade with these ideas for low-maintenance kitchen countertops, cabinets and floors
Full Story
DIY PROJECTSLight Up Your Night With an Easy Outdoor Table Lamp
Hit up Goodwill and the hardware store to make this lamp for a deck or poolside patio in minutes
Full Story
KITCHEN DESIGNKitchen Counters: Stunning, Easy-Care Engineered Quartz
There's a lot to like about this durable blend of quartz and resin for kitchen countertops, and the downsides are minimal
Full StorySponsored
Your Custom Bath Designers & Remodelers in Columbus I 10X Best Houzz

ysop1016