


Insulation and no vapor barrier questions... help
dominogold
18 years ago
Featured Answer
Sort by:Oldest
Comments (19)

naturelle
18 years agoRelated Discussions
I'm about to tile - Insulation/Vapor Barrier question
Comments (0)We are in the process of re-tiling our bathroom and I have completed a complete gut of the existing shower space...well, almost a complete gut. I removed the existing tiled shower walls by cutting into the greenboard (I think) about 8 inches above the top row of tiles, and ripping out the entire wall of tiles. This exposed the studs behind...and also exposed the fact that there was nothing else there. No insulation (there aren't any exterior walls), no vapor barrier...nothing. Just a bunch of rusty nails! So after searching this forum for a bit, I learned about installing insulation between the studs, and the vapor barrier (6 mil poly) between the studs and the cement board. However, my question is the space above the gutted area that I left untouched since it won't be tiled and therefore did not need to have the greenboard removed (there's about 2 ft to the ceiling). Can I just add insulation/poly to the area that will be covered by cement board/tile, or will that just create more moisture issues above this area? Should I rip the remaining greenboard out to the ceiling and put insulation/poly/cement board all the way to the ceiling even if we don't tile the entire area? Or should I just install the cement backer board directly to the studs (no insulation, no poly) and take my chances? Any advice would be greatly appreciated. Thanks!...See MoreBathroom Wall Insulation & Vapor Barriers
Comments (11)First, the tuck tape. Look for "sheathing tape". It's usually sold in the box stores, sometimes it's red colored. You could use Tyvek tape as well. The vapor barrier is a bit tougher to diagnose. Your exterior foam, "expanded polystyrene" is usually quite leaky with regards to moisture transmission and is not a strong vapor retarder. "Extruded polystyrene" is a much tighter product, and it could indeed be a vapor barrier, probably a Class II barrier. If the exterior foam is indeed continuous on the walls and well detailed, then it might be best to omit the interior poly and just use the Roxul. Your walls may take in some vapor over time, but the vapor should also transmiss back into the bathroom during drying cycles. The biggest problems occur when you have two barriers and one or both are poorly detailed. Over time moisture gets in but has difficulty getting out. Thus the "sandwich" that you referenced. The "imperfect" in your system is the exterior foam. I'm a proponent of foam, but only if it is the right type and the proper thickness. With your exterior foam probably being a Class II on the exterior side of your wall, your best bet is probably to omit the interior poly and simply use other methods on the interior walls. You can use something like Hydroban in your shower (if the shower is on an exterior wall), it's a waterproof barrier but does allow vapor to transmiss through it. For the remainder of your walls, simply use two coats of latex paint over your interior drywall. Latex paint is classified as a Class III vapor retarder. As such, it'll slow moisture vapor transmission that wants to get into your wall, but if any does, it'll allow your wall cavities to dry out during a drying cycle. It's an imperfect solution for an imperfect situation. I'd be completely confident in my reply were your exterior foam thicker than it is and if I knew it was well-detailed. My concern is the interior side of the foam reaching dew point temperatures in winter and any moisture vapor within the framing cavity condensing on the interior surface of the foam, between the foam and the sheathing. That may not be a problem. But it is a consideration, especially since I tend to go towards the conservative side with an "over the internet diagnosis" such as this one. I'd certainly do more research if you can, you might get better information than what I'm offering. You are addressing moisture generation within the bathroom. That's good. Other stuff: 1) I do sometimes insulate interior walls, Roxul is good for that. 2) A simple yet effective sound deadener behind your washer and dryer is nothing more than a second layer of drywall over the first. 5/8" is better than 1/2" due to the added mass. Beyond that you can go fancier: 2a) sandwich a 1/2" sheet of homasote between the two layers of drywall. 2b) Use RC clips and metal channel between the studs and the drywall. 2c) Use green glue between the two layers of drywall. 2d) If you do research you'll probably see references to mass loaded vinyl, but I usually use that only when doing fully integrated sound deadening room "systems". I think you'd do better (and save money) with just using drywall....See MoreInsulation & vapor barrier questions....... whats right/wrong?
Comments (6)Here is my response to a similar question on one of the other boards. I reasearched this a lot, and though I'm not in a cold climate, most of the recommendations would hold for your situation: I had a similar situation. Some genius had put 3 inches of blown fiberglass in the attic (over the knob and tube wiring!) and that's it. The room was hot in the summer and cold in the winter. Here is what I did: - r13 on the floor between the soffits and the back of the kneewall - this was over conditioned space down below (I didn't cover it, but I could have if needed for storage)- rafter vents at the soffit-end of the insulation keep the soffits open - r13 kraft faced insulation on the back of the kneewalls (2x4 wall construction) - 2" isocyanate foam insulation (r14)with reflective surface on the angled portion of the ceiling, leaving 1.5" air space up to the unfinished part of the attic. My rafters were true 2"x6", so I didn't need the fancy channeled insulation. This insulation is R7 per inch, so I got R14 on the slanted portion. - R38 faced insulation in ceiling of the finished space, with eyebrow roof vents to keep air moving through there. - seal up all penetrations (electrical boxes, pipes, etc) with caulk or spray foam) The principles you need to follow are that you should insulate any of the unconditioned space where air from the outside is flowing. Any vapor barrier (e.g. the kraft facing)should face the INTERIOR - don't put insulation then vapor barrier, because then any moisture from the interior will reach the cooler air of the unconditioned space and condense, leading to mold. If you use the foam insulation, you have to cover it with a fire rated material (e.g. sheetrock). You could also consider using the new reflective sheets on the bottom of the roof sheathing - I didn't do this, but apparently it has a huge impact on heat gain. The impact - the upstairs is comfortable all year. It has no dedicated heat or AC, but never gets below 65 during the winter or above 72-73 in the summer. If it gets stuffy on the hottest days, I open a couple of windows to get a cross breeze. Hope that helps....See MoreVapor barrier/insulation on concrete slab under bathroom?
Comments (9)Be sure you understand the options. There are 2 kinds of crawlspaces allowed by the IRC: Vented and Unvented (aka "sealed"). The terms "unvented" and "sealed" are misleading because this type of crawlspace is not completely sealed or unventilated. The IRC code requires that both of these types of crawlspaces be "ventilated" so that moisture does not collect and encourage the growth of fungus (whether from the ground, condensation on the slab, etc.) by one of the following methods: 1) "Vented" Crawlspace - install vent openings in the exterior wall of the crawlspace 2) "Unvented" Crawlspace - inside the house supply to or exhaust from the crawlspace a small amount of air with a return air path to or from the house and insulate the exterior walls of the crawlspace. Both crawlspaces must have a vapor retarder at ground level and an access opening. For more information see IRC section R408.1, 2, & 3....See Moredominogold
18 years agoiinsic
18 years agonaturelle
18 years agodominogold
18 years agodominogold
18 years agoiinsic
18 years agodominogold
18 years agoamongu67
8 years ago PRO
PROResidential Productions
8 years ago
Scott Falconridge
7 years agoTed Amano
7 years ago
worthy
7 years agolast modified: 7 years agoScott Falconridge
7 years agoTed Amano
7 years agoworthy
7 years agoTed Amano
7 years ago PRO
PRO
Related Stories

HEALTHY HOMEHow to Keep Water Vapor From Ruining Your House and Your Health
We help you find out when it’s happening, what it means and how to fix it
Full Story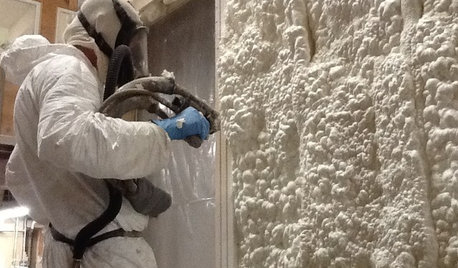
MATERIALSInsulation Basics: What to Know About Spray Foam
Learn what exactly spray foam is, the pros and cons of using it and why you shouldn’t mess around with installation
Full Story
REMODELING GUIDESCool Your House (and Costs) With the Right Insulation
Insulation offers one of the best paybacks on your investment in your house. Here are some types to discuss with your contractor
Full Story
GREEN BUILDINGInsulation Basics: Natural and Recycled Materials
Consider sheep’s wool, denim, cork, cellulose and more for an ecofriendly insulation choice
Full Story
GREEN BUILDINGInsulation Basics: Heat, R-Value and the Building Envelope
Learn how heat moves through a home and the materials that can stop it, to make sure your insulation is as effective as you think
Full Story
GREEN BUILDINGInsulation Basics: Designing for Temperature Extremes in Any Season
Stay comfy during unpredictable weather — and prevent unexpected bills — by efficiently insulating and shading your home
Full Story
GREEN BUILDINGEcofriendly Cool: Insulate With Wool, Cork, Old Denim and More
Learn about the pros and cons of healthier alternatives to fiberglass and foam, and when to consider an insulation switch
Full Story
GREEN BUILDINGConsidering Concrete Floors? 3 Green-Minded Questions to Ask
Learn what’s in your concrete and about sustainability to make a healthy choice for your home and the earth
Full Story
BATHROOM DESIGNHow to Choose Tile for a Steam Shower
In steamy quarters, tile needs to stand up to all that water and vapor in style. Here's how to get it right the first time
Full Story
STANDARD MEASUREMENTSKey Measurements to Help You Design Your Home
Architect Steven Randel has taken the measure of each room of the house and its contents. You’ll find everything here
Full Story
formulaross