Tomatoes in Oklahoma: Part II, Soil Prep/Planting
Okiedawn OK Zone 7
16 years ago
Featured Answer
Sort by:Oldest
Comments (12)
sheri_nwok
16 years agolast modified: 9 years agoOkiedawn OK Zone 7
16 years agolast modified: 9 years agoRelated Discussions
Toamtoes in Oklahoma: Part III, Successful Growth
Comments (8)Hi Terrence! I hope that you and Mrs. Plantermunn are doing well. And thanks for the "good reading" comment. I LIKE Bloody Butcher. It produces lots and lots of tomatoes per plant and they are pretty early. They have good tomato flavor. Someone told me once that they thought Bloody Butcher and Fourth of July were essentially the same, but I don't think that is true. I think Bloody Butcher tastes a LOT better. The fruit are small (ping pong to a little less than tennis ball size) but you get lots of them! Cherokee Purple. I had trouble the first two years I tried to grow this one, but from the third year on, it has been great. WONDERFUL flavor. If I could only grow 5 varieties every year, one of them would be Cherokee Purple. By the way, I also grow Cherokee Green and Cherokee Chocolate. They all taste the same--the difference in them, I guess, is just the color of the skin. Christmas Grape is just an typical red grape-type tomato. I don't mean that in a negative way either--it is very productive and has the usual grape tomato taste. Yellow Pear is a very pretty tomato. It looks great in a salad, especially when mixed in with cherry or grape tomatoes in other colors. Its flavor is mild and sweet and it produces nonstop in my garden. Sometimes it has so many fruit that I get tired of picking them. It is not my favorite small yellow tomato, but it is worth growing. People seem very divided on it--either they love it or they hate it. My DH's boss loves it, so I grew it just for him for years and years. Now, I'd rather grow Ildi. For what it is worth, some years (the wetter years) yellow pear tomatoes split a lot, but not so much in drier years. If you've never grown SunGold, I think it is much better than Yellow Pear, with a sweeter, richer flavor. Garden Peach is a unique tomato, with an almost fruity flavor. Kellogg's Breakfast is very good, but in my garden, the similar Nebraska Wedding has superior production and flavor. It is interesting that most people who love KB won't even talk about NW and vice versa. I don't know why. This year I am going to grow them side by side and do a serious comparison. (Most years I have grown one of them one year and the other the next year. I want to taste them as grown side-by-side and see which one "wins".) Golden Jubilee has been a real winner in my garden. It has everything you want--great disease resistance, great flavor, the ability to keep pumping out tomatoes in our hottest weather, and the golden tomatoes are so pretty to look at too. Delicious was one of the biggest tomato-growing disappointments in my life. Maybe you will have a better experience. I wasn't trying to grow a record-setting tomato like Gordon Graham's, but just thought that a tomato named "Delicious" had to taste good. Well, as grown in my garden in an admittedly wet year, it was not that delicious in flavor, and I never grew it again. You'll have to let me know how it does for you. Green Zebra was interesting to look at, but I wasn't really crazy about the flavor. The only Green-When-Ripe tomato that I truly adore, though, is Aunt Ruby's German Green. It has a really unique, almost spicey flavor that is hard to describe. Maybe it is just me, but green-when-ripe tomatoes always seem to be less tasty than I'd expected. Well, Cherokee Green is an exception, because it tastes JUST LIKE Cherokee Purple....the only difference being the skin color! I haven't grown Fuzzy Peach so cannot comment on it. This year I am growing Wapsipinicon Peach. Keep in mind, Terrence, that what tastes good to my taste buds could taste entirely different to yours. Also, I think different varieties taste differently when grown in different soils and even different growing conditions. To me, too, tomatoes grown in hotter, drier weather always have better flavor. I hope you have a great tomato crop this year. Which tomatoes are you going to make juice out of? Dawn...See MoreTomato diagnosis needed - Part II
Comments (1)While it is normal for the cotyledons to yellow, die and fall off, this pic has nitrogen burn on the leaves - the black necrotic tip tissue - and also shows signs to too much watering and aphids (which are attracted to all the nitrogen). From the fertilization schedule you list I can understand why ;) - way too much fertilization for young seedlings. Their needs are really quite minimal: 1/4 strength of a mild food such as your 6-4-4 1 time before going to the garden. Young roots just can't tolerate anything stronger than that in my experience. Problem is it is now all in the soil so they can't recover while in it. I would suggest that you transplant the plants to new containers with a new, quality, pre-moistened but not wet soil-less mix in it - try to remove as much of the old soil as possible first with a light spray rinse of the entire plant under tepid water. This will also remove the aphids. Transplant them deeply to just below the first set of leaves or remove them if they are damaged too and plant even deeper. This will allow new roots to develop along the stem above the damaged area. Then no more feeding and only minimal water until they begin to perk back up. Hope this helps. Good luck. Dave...See MoreSupermarket Tomatoes Plants II
Comments (48)Yeah . We know you are Daniel. I did my first spray On May 1st. I am going to do the second application on 14th, when the rain stops. But it will there will be chances of rain starting May . Even then, the forecast is calling for 10 to 20% chance of rain for the following week. But I,ll do it any way. Our rains are very gentle and drizzly, Nothing like back East when it rains, it pours. I have fully mulched : : BLACK PLASTIC. Sey...See Moreprepping potting soil for next season, would like better results
Comments (4)Thanks, @chadinlg Zone 9b Los Gatos CA It's helpful to hear, I will look for compost sources here, and the soil looks like it's able to drain fine. Yeah, I had to water daily, but doing so helped me observe what was going on daily and learn. I am going to try reusing this soil, at least, for a winter crop and see what happens. My descriptions of the situation were summarized and "averaged" to keep things simple. For example, one of the bags I used wasn't homemade, instead it was a beach bag that was probably around 15 gallons. The vine was one of the larger ones (exceeding 8ft in length), and produced the heaviest tomatoes. Vines grew from flower stems, one of the flushes exhibited extreme curling, and the first fruits had BER. All of this was corrected when I halted the fertilizing for two weeks, then reduced quantity, and supplemented with DL dissolved in vinegar. This particular plant also had a small root system, could easily fit into a 3 gallon container. Nearly all my tomatoes exhibit the symptoms of too much nitrogen fertilizer noted here: https://extension.msstate.edu/content/what-causes-tomatoes-become-mealy-or-soft...See Moresheri_nwok
16 years agolast modified: 9 years agoOkiedawn OK Zone 7
16 years agolast modified: 9 years agosheri_nwok
16 years agolast modified: 9 years agoOkiedawn OK Zone 7
16 years agolast modified: 9 years agochickencoupe
9 years agochickencoupe
7 years agoNancy RW (zone 7)
7 years agoMelissa
7 years agoAmyinOwasso/zone 6b
3 years ago
Related Stories
GARDENING GUIDESHow to Stop Worrying and Start Loving Clay Soil
Clay has many more benefits than you might imagine
Full Story
GARDENING GUIDESCommon Myths That May Be Hurting Your Garden
Discover the truth about fertilizer, soil, staking and more to keep your plants healthy and happy
Full Story
GARDENING GUIDESSouthwest Gardener's September Checklist
Cool weather's coming, so prep for the first frost, swap out plants and get bulbs for spring in the ground now
Full Story
GARDENING GUIDESGreat Design Plant: Milkweed
Quit cringing. This not-weed plant is a sight to behold in the garden, has a delicious vanilla scent and is a magnet for butterflies
Full Story
FARM YOUR YARD6 Things to Know Before You Start Growing Your Own Food
It takes time and practice, but growing edibles in the suburbs or city is possible with smart prep and patience
Full Story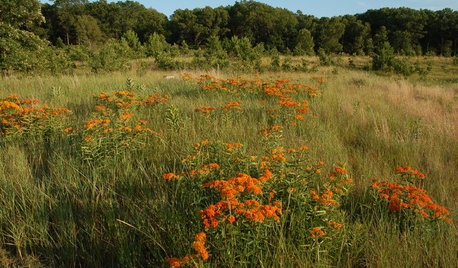
GARDENING GUIDESThe Art of Green Mulch
You can design a natural garden that doesn’t rely on covering your soil with wood and bark mulch
Full Story
KITCHEN DESIGN8 Ways to Configure Your Kitchen Sink
One sink or two? Single bowl or double? Determine which setup works best for you
Full Story
FALL GARDENING5 Ways to Put Fall Leaves to Work in Your Garden
Improve your soil and yard the organic way with a valuable garden booster that grows on trees
Full Story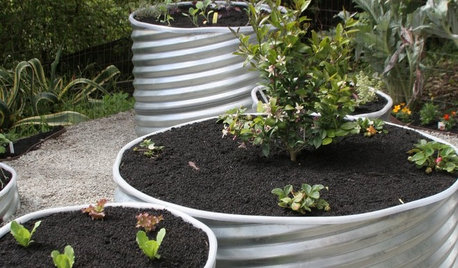
GARDENING GUIDES8 Materials for Raised Garden Beds
Get the dirt on classic and new options for raised vegetable and plant beds, to get the most from your year-round garden
Full Story
SAVING WATERHouzz Call: Are You Letting Go of Your Lawn?
Many facing a drought are swapping turf for less thirsty plantings. If you’re one of them, we’d like to hear about it
Full Story


Okiedawn OK Zone 7Original Author