


Help Me to Understand Bottom Watering
my4cowboys
14 years ago
Featured Answer
Sort by:Oldest
Comments (11)

jonas302
14 years agoRelated Discussions
[Basil] Please help me understand what happened here.
Comments (6)The non-potted ones drowned; toss 'em. They are not even edible at this point. There IS hope for the potted one, but get it OUT of standing water as Zackey suggests. Never allow any potted plants to stand in water. (But do not let it dry out entirely, either! The light mix the nursery uses, once dry, is almost impossible to re-hydrate.) The basil in the pot is actually 5-6 plants -- way too many for that size pot. In the garden or good-sized container, one basil plant can get a couple of feet tall and at least a foot wide. It would be chancy to try to separate them at this stage of their growth but you could try cutting each one back just above the lower sets of leaves and try rooting the cuttings in water. But you must not allow any of the leaves to sit in water or they will rot as the Harris Teeter plants did. If they do send out roots (sometimes they do, sometimes they don't), once the roots are about an inch long you could carefully pot them separately using a seed-starting mix (NOT backyard dirt or even potting soil--those are too heavy). Seeding mix is peat, vermiculite and perlite. Don't use fertilizer at this point. If you can get some good compost or worm castings, mix some of that in. The potted plants are "leggy" -- too tall because they are not getting enough sunlight. Even a south window (especially if screened) does not provide the sun a basil prefers for good growth. With luck, your plants will survive long enough to plant into a larger container and go outside when the weather is totally warm (consistently above 50 degrees at night). And if you want success at growing plants, start reading & learn how to do it! Tons of good info on the Web. Good luck....See MoreHelp me understand zones and design my kitchen accordingly
Comments (23)First, thanks again for all of your replies; they are great! I put some thought into your comments and tried to revise the drawing with two sinks to help the zones function better. Still not perfect at all, and I have a few concerns and unanswered questions. (E.g., where should the glasses go? We get water from the refrigerator, but that's opposite side from the dishwasher.) Does this look better? In response to a few other comments/questions: We placed the desk, mud, and laundry on that "bottom" of the drawing because we can easily close off these "messy" areas with a pocket door when company is over. The top of the drawing, however, is the powder room. We thought it would be better for guests to see a pantry than our laundry mess. But a very good point was raised about people coming in/out from deck or garage and easier access to refrigerator would be at bottom of drawing. Other downside is unloading groceries from the car, but we have internalized that as a once-a-week situation and all grocery bags will be placed on island for sorting and storage. Here's the revised version:...See MorePlease help me understand - Seller pays 6%
Comments (25)We finally wrapped this up with the relo company on Friday. Relo required that the 6% be written as a dollar amount, not a precentage, otherwise they had no problem with it. For those wondering how this relo stuff works, the relo co is agreeing to buy the house from us for the price the buyers and us agreed to. Relo company then is responsible for everything here on out, including closing. The only thing we would have to do is participate in any negotiations coming from inspection repairs and be out of the house one day before closing. If the deal falls through, it's up to the relo company to find new buyers - we would still get the same sell price as we have now, but relo company would get the new sales price (whether the same, lower or higher). There was a TON of paperwork involved, for us, for buyers and for our agent. It was frustrating for all, but it did enable the buyers to get a very good price and is allowing us to quickly move forward with moving and buying our new home. My house hunting trip to Denver starts next week. Wish us luck!...See MoreHelp me understand this pattern please
Comments (33)Ill start near the beginning (minus the cutting out of pattern pieces, although that in itself was an ordeal since I realized as I went along that I hadn't cut out all the pieces required...). I hate to bore the experienced sewers, but there may be people out there learning, like me. : ) I had no idea that I was going to have to hand-sew anything. lol. Oh, how naïve. I mean, when looking at the pattern in the store, how did I figure those spools of thread were going to magically 'get the thread on them? So imagine my surprise when the pattern instructions told me to baste. You want me to what? The only thing Ive ever basted before was a turkey. Then I had to trace the cat out on the fabric. That was do-able. Then I put the appliqué cut-out onto the fabric and ironed it on (Ill spare you the ironing part). (The cat in the photo below was not in its correct place yet, by the way.) I peeled off the paper the next day, and presto it looked like a cat! Wow. Then, I applied the things that went onto the cat. I actually enjoyed the whole process of applique, and look forward to doing it again. I found out I have an applique stitch on my machine, so I used that around the cat and the spools. I used straight stitch on the nose and stripes. Then oh then, I had to put the embroidery thread onto the spools. I went to bed that night with only one spool finished, and I woke up at 3 am and couldnt sleep, so I did the other two in bed. Later on, I would find that the threads are very delicate and would have to repair two of the spools. I just tied any broken threads into knots near the surface of the spools, and you cant really tell. I doubt they would survive the washing machine. I also did the whiskers that was enjoyable (really)! And the buttons. I have at least 500 buttons now bought two bags-o-buttons. But, I digress. Then came time to add the back of the cover. The cat seems to be looking up at it wondering, wussup? Then came the piping. I know someone had mentioned using fabric cut on the bias, but I missed it the first time since I was so confused about everything. I followed the pattern instructions (and the pattern piece) and it didnt mention anything about cutting on the bias. So, I didnt. When I googled sewing in piping, it mentioned it there, too. So, by now I was concerned the piping wouldnt work correctly. I had minimal problems making the piping I used the zipper foot because my selection of feet is minimal. It did the job, though although not perfect. I figured the unevenness of my stitching would be hidden in the end any way (and it was/is). But, it was sewing in the piping onto the sides, front and back that gave me a huge headache. I tried the zipper foot it wouldnt work. The piping was almost ½", and it was just too big for the zipper foot to handle. Mainly, I couldnt get the stitches close enough to the piping, so it just didnt work. I ripped it out at least 4 or 5 times before I gave up and decided to HAND SEW (gasp!) the piping in on both sides of the cover, and then I hand-sewed the sides to the front and back. Oh the inhumanity. My hand-sewing is nothing to write home about, believe me, but you cant really tell from the outside. And, I was so delirious by the time I got the sides attached, that I ended up cutting some of the piping TOO SHORT because I read the diagram incorrectly (or the diagram was confusing). I came up with a fix by cutting out small pieces of matching piping fabric, and patching up two of the ends. You can see where I added on some piping fabric: By this time, after appliquéing, sewing teensy threads onto spools, sewing in piping; making the liner was a day at the beach. That went smoothly and without incident. Thanks to the internet, I was able to figure out how to get the lining into the cover. I admit, it took me a few minutes to understand how putting the cover *into* the lining will eventually lead to the lining being inside the cover. *confused for minute or two* Then after I got the lining in, I figured, ah, now all I have to do is sew the bottom, and Im finished!. Uh, no. I had to slip stitch. : / Slip stitch? What is that? And why cant I just skip that part? But, I knew better. For some reason they wanted me to slip stitch, so I did. More hand-sewing. That turned out ok, though. Then I finally sewed the topstitching on the bottom of the outside. There were a few tense moments when I doubted my foot could get over the piping humps, but with a little pushing and pulling, and flattening, I got it done. And on my sewing machine. Now I'm going to make another one. : )...See Moresleepy33
14 years agomy4cowboys
14 years agoheirloomjunkie
14 years agomy4cowboys
14 years agoheirloomjunkie
14 years agovikingkirken
14 years ago
digdirt2
14 years agovikingkirken
14 years agodigdirt2
14 years ago
Related Stories

LANDSCAPE DESIGNTo Manage Stormwater Sustainably, Understand Your Site
Follow this guide to learn how water moves through your landscape and how best to manage it
Full Story
LIFE21 Things Only People Living With Kids Will Understand
Strange smells, crowded beds, ruined furniture — here’s what cohabiting with little monsters really feels like
Full Story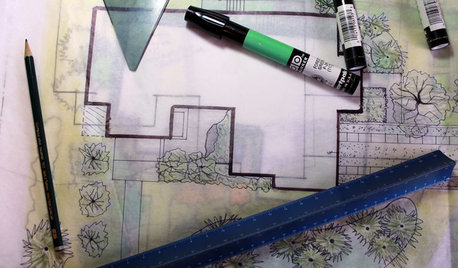
WORKING WITH PROSUnderstand Your Site Plan for a Better Landscape Design
The site plan is critical for the design of a landscape, but most homeowners find it puzzling. This overview can help
Full Story
KITCHEN DESIGNKey Measurements to Help You Design Your Kitchen
Get the ideal kitchen setup by understanding spatial relationships, building dimensions and work zones
Full Story
ORGANIZINGDo It for the Kids! A Few Routines Help a Home Run More Smoothly
Not a Naturally Organized person? These tips can help you tackle the onslaught of papers, meals, laundry — and even help you find your keys
Full Story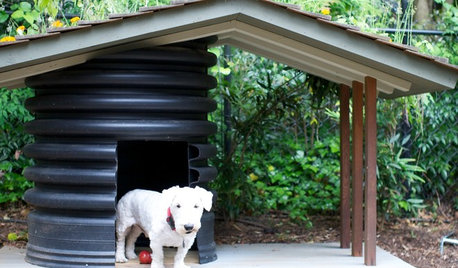
PETSHow to Help Your Dog Be a Good Neighbor
Good fences certainly help, but be sure to introduce your pup to the neighbors and check in from time to time
Full Story
LANDSCAPE DESIGNNative Plants Help You Find Your Garden Style
Imagine the garden of your dreams designed with plants indigenous to your region
Full Story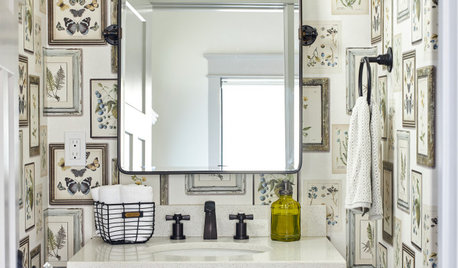
BATHROOM DESIGNKey Measurements to Help You Design a Powder Room
Clearances, codes and coordination are critical in small spaces such as a powder room. Here’s what you should know
Full Story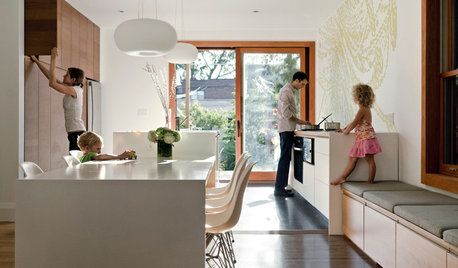
GREEN DECORATING8 Questions to Help You See Through Green Hype
With the ecofriendly bandwagon picking up some dubious passengers, here's how to tell truly green products and services from the imposters
Full Story
DECORATING GUIDESThe Most Helpful Furniture Piece You May Ever Own
Use it as a table, a seat, a display space, a footrest ... and indoors or out. Meet the ever-versatile Chinese garden stool
Full Story
digdirt2