

First time in over 40 years.
5 months ago

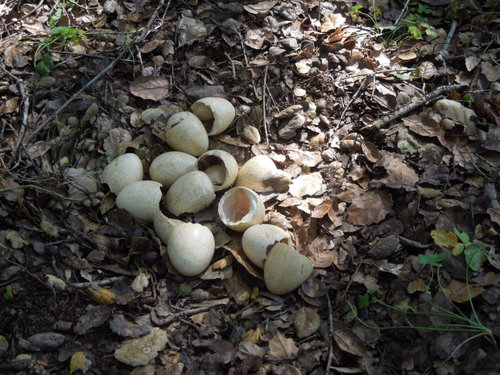
Featured Answer
Sort by:Oldest
Comments (56)
 5 months ago
Related Discussions
Decided to shut it down for the first time this year
Comments (11)Toofast, I'm over to the other side of London,Ontario, so not so far from you and our winters are much the same. I don't run the main pumps over winter, I'm wary of ice dams being created and water being diverted away from the pond. I shut the waterfall and statuary pumps off for the winter, but, because of where my bottom drain sump is located,I run a small 500 GPH pump all winter to circulate the pond water and create a vent opening in the ice. The 500 GPH pump is located in the 50 gallon bottom drain sump, and pumps water through a 1/2" hose to the pond, where it keeps the surface water moving and allows for gas exchange. I have a 1200 watt deicer as a stand by in case of pump failure. I also totally cover my ponds over, first with a leaf net for a month or so, then with a translucent tarpaulin supported on a frame, for the winter months. That keeps the cold winds from blowing across the water surface. Your plan to use an aerator and a small deicer, with your large wattage deicer as a stand-by sounds great to me. As far as keeping your pump in a bucket of water, there is no need to do that, as mag pumps,unlike oil filled pumps do not have seals that will crack, if they are allowed to dry up over winter. But that is up to you. March would be a tad too early for start up,I should think. I push the envelope a bit by getting going at the beginning of April. And that is dependent on weather conditions. The main clean out the pond, I do in the Fall, rather than in the Spring. That way I'm not stirring up the "nasties" from the bottom of the pond, when the fish are still very susceptible to disease after going through a hard winter. You mention a check valve "sticking out of the water". As long as it is not filled with water, that could freeze and cause the valve to split open, it should be okay. If you could remove it and take it apart for cleaning and then store it, that would be a safer solution. Check valves should be cleaned out at least once a year, as the are a real collector of gunk and that can cause them to stick open or closed. The same goes for your pump. Take the impeller cover off and clean it out before storing for winter, whether it is kept in water or not. The gunk inside the pump can [and will] set up like cement over winter and cause the pump to overheat and possibly burn out when you try to use it next Spring. Hope this helps. "Horton"...See MoreSears air compressor engine won't run when plugged in
Comments (7)1. I would suggest isolating the compressor from the pressure switch which might allow you to use the compressor if the contacts to the starting capacitor and starting capacitor are working. If you add a male plug to the end going to the pressure switch you will be able to use a short extension to power the motor. <?xml:namespace prefix = o ns = "urn:schemas-microsoft-com:office:office" /> A. You should hear the contacts click to verify their contact and the compressor should power up. B.If no click and good power, ck the contacts in the end you see off to see they are clean to make good contact. If they appear clean, rem the starter capacitor on top of the motor and get an electric motor repair shop or electrician to test it. 2. If the motor and compressor works well w/o the pressure cut/off switch it can be replaced. Before spending too much time, ck the bottom of the tank to know that it has not rotted to bad to repair, “since you mentioned leaking”. My initial leak after a yr in 1973 was just a pin hole. That a sheet metal screw and rubber O-Ring has worked on since then. Bang on the bottom good testing because if it has not been drained it could be bad. 3. Attached is a motor that pulled in too much dust vs paint and stopped until I cleaned it....See MoreFirst time in 9 years :)
Comments (18)FD ... my children are old enough not to be yelled at if they do not do their homework or clean their rooms guess what when they were younger they were taught to clean their room and do their homework. See I instilled those principles when they were very young so I wouldn't have that problem when they became teenagers. Would have enough to deal with teenage issues didn't want to deal with childhood issues when they were teens. And they are old enough to know if you don't clean your room it gets nasty if you don't do your homework teachers yell at you too. I parented my children I didn't let them tell me what to do I told then what to do. SD was told to stop doing what she was doing or she was going to bed... and she told hubby I am going to tell DSS you were threatening me. (she seems to think she is in control) I was on the phone with a male co-worker talking about work and SD listened in on the whole conversation after my phone call I went in and said I didn't appreciate it and she said I wanted to make sure you weren't cheating on daddy. (she seems to think everyone cheats on their spouses) When I told her she couldn't have pie before we ate dinner she called her mother and told her mother I was mean and she hated me. (Guess she thought mom was going to come in my home and cut her a piece of pie) Called her mother to come get her she hated it here because ...her uncle wanted to watch basketball game in the living room and she was watching disney channel and hubby changed it (I guess mom was going to make hubby change the channel)...See MoreThining about Roses for the first time in many years
Comments (21)Thanks Steve; keep me posted and maybe we can work it out would be happy to reimburse you for any efforts! Sheila, I did find them on Corn Hill's site, but when you click through there is no option on either to put them in the cart. I did order other stuff though. I'll contact Leonard on the FB group too; thanks!...See More 5 months agolast modified: 5 months agocaflowerluver thanked murraysmom Zone 6a OH
- 5 months ago
 5 months agolast modified: 5 months agocaflowerluver thanked carolb_w_fl_coastal_9/10
- 5 months agolast modified: 5 months agocaflowerluver thanked carolb_w_fl_coastal_9/10
- 5 months ago
- 5 months agolast modified: 5 months agocaflowerluver thanked murraysmom Zone 6a OH
- 5 months agolast modified: 5 months agocaflowerluver thanked murraysmom Zone 6a OH
- 5 months ago













Related Stories

HOUZZ TOURSMy Houzz: Collecting Over Time in Canberra
Artwork, secondhand finds and collectibles mingle exuberantly in a newly bright and open Australian home
Full Story
ARCHITECTUREGet a Perfectly Built Home the First Time Around
Yes, you can have a new build you’ll love right off the bat. Consider learning about yourself a bonus
Full Story
GARDENING GUIDES10 Easy Edibles for First-Time Gardeners
Focus on these beginner-friendly vegetables, herbs, beans and salad greens to start a home farm with little fuss
Full Story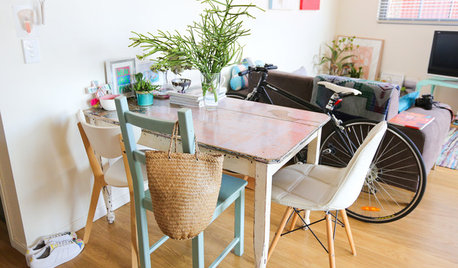
LIFEWorld of Design: Discoveries of 10 First-Time Homeowners
See how people around the globe have shaped their starter houses and made them their own
Full Story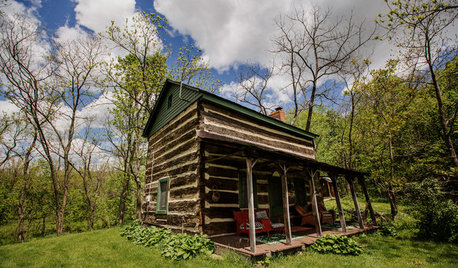
FEATURESA First-Time Mom Finds Life Remade in the Family Cabin
Living in a strange, new and confining space unexpectedly shapes a writer’s experience of becoming a mother
Full Story
HOUZZ TVThis Light-Filled Tennessee Dream Home Was 40 Years in the Making
A retired couple used Houzz to find design professionals to help build a spacious home that can easily host 100
Full Story
INSIDE HOUZZData Watch: Renovation Spending Up for Younger, First-Time Buyers
The 2017 Houzz & Home survey asked 107,000 Houzz users about their renovation projects. Here’s what they said
Full Story
TRANSITIONAL HOMESHouzz Tour: Designer’s Home Has Evolved Over the Years
An Atlanta family’s townhome is layered with special heirlooms, an art collection and favorite vintage finds
Full Story

ECLECTIC HOMESMy Houzz: First-Time Cincinnati Homeowners Take On a Modern Rehab
Exposed brick walls, salvage finds and bursts of fresh color update a couple’s 19th-century home
Full Story
Ally De