

Home again, home again, Jiggity Jig Jig!
2 years ago
last modified: 2 years ago
Featured Answer
Sort by:Oldest
Comments (15)
Related Discussions
Wood countertop question--Mongo again?
Comments (3)Drop in sink or undermount? I'm not sure if you're using a memoirs sink or not. If drop-in, use the template to locate the sink. The hole can be rough cut, as the sink will hide the cuts. Using a drill bit larger than your jig saw blade, drill a couple of pilot holes on the waste side of the templated cut line, then use a jig saw to cut the hole. Finish the countertop and set the sink and you're done. For undermount you want the edges of the hole to look purdier. I take the template and put it on a sheet of 1/2" mdf, trace it exactly, then use a jig saw to cut just touching the waste (the waste piece being the sink bowl circle) side of the line. I then use a sander to sand to the line, keeping all curves fair. I then place the template on the countertop and use a pencil to trace an exact line on the countertop. I then trace another line, but I trace this second one about 3/16" inside the inside edge of the template. Example; if the finished hole was to be 10" by 20", I'd trace my first line right on the template edge to get a 10" by 20" trace. My second one would be about 3/16" inside this, so the second tracing would be about 9-5/8" by 19-5/8". I then drill a couple of pilot holes inside this second line and use a jig saw to cut on this second line, removing the waste piece. I then place my 1/2" MDF template back on the countertop in it's exact location and clamp or double-sided tape it so it will be secure. I use a top-brearing pattern bit in a router and using the inside edge of the template as a guide, I use the router to waste away the remaining 3/16" of countertop around the perimeter of the opening. Depending on the thickness of your countertop and the height of your bit, it might take more than one pass. Now your countertop should have a perfectly smooth and properly sized opening. You can chuck in a roundover (or even a profile) bit if you want to ease the top and/or bottom edges of the opening, or you can just use sandpaper to ease the edge. Then you need to stain/seal the countertop. If you're installing a memoirs top like I did in my bathroom, then you just need to eyeball the location of the sink on the countertop and waste the countertop wood away. It's easier to cut too little wood and have to make a second pass than to cut away too much in your first attempt. If you want me to measure the size of the cutout let me know. It'll give you a ballpark estimate at least. Yours may vary due to how the sink and countertop blend with the backsplash, and the relative thickness of the backsplash. I've done several memoirs sinks this way, some sit flatter than others, they're not all perfect after they come out of the kiln. Meaning when you get it on the countertop it might wobble a bit. If it's minimal you an use shims and then caulk (100% clear silicone) and that will lock the sink in place. If the wobble is significant, you can use a wood chisel to pare a bit of wood away under the high corners of the sink to drop it down a bit and still use shims, or you can pare enough wood away so it sits steady. Or you can return the sink and try for a flatter one. Regardless, After dry fitting the sink, I use blue tape to locate where the perimeter of the sink touches the wood countertop. I then pull the sink. I use a dab of silicone to "glue" the shims in their locations, then I run a bead of silicone just inside the blue tape. If your sink was really wobbly you can make that a heavy bead of silicone. Then I drop the sink into place, resetting it in relation to the blue tape. If needed I then add another bead of silicone tol fill any gaps, then tool the silicone. Any excess silicone will be caught by the blue tape, preventing it from smearing all over the countertop. I then pull up the blue tape. I'll let the silicone sit overnght before I connect the plumbing under the sink. Oh, and for what it's worth, if the extra weight and ability to maneuver the sink aren't compromised, you can save a bit of trouble by installing the faucet and drain on the sink prior to setting the sink in place. And offer your husband a "welcome back to The World" from me....See MoreHome again, home again jiggity jig
Comments (8)glad everyone is on the mend! Holy smokes that is very very high blood glucose readings, was he diabetic? Good thing he was in the hospital with readings that high those are stroke levels. I am diabetic, mine have never gone over the mid 200 range in a flare up but even that scares the heck out of me. I would probably give my self a stroke if I got a 575 LOL good luck to him on getting that controlled!...See MoreBuy jig or reciprocating saw?
Comments (21)darthjenn, did you clamp that threshold to your table? That's key to safety. Your hand shouldn't be holding the material, so it can't be available to the blade. (I love my Kreg face-frame clamp, because it will reach into the piece by several inches, and I don't have to worry about whether I have the piece close enough to the edge of the table to get the clamp to hold it) Like you, I live in an apartment, and I'm going to need to come up with some sort of cutting table to use w/ my spiffy new cordless circular saw. One that's heavy enough to not tip, but also easy to store in my highly limited space. (Or, one that can do double duty as a sewing-machine table, maybe.) Also--on the question of which tool is safer: the RIGHT tool is safest. The right blade, the right setup. And control is safest. When you have the right tool, you have control. Sort of like, a dull knife is more dangerous than a sharp one. You push harder w/ a dull blade, and it slips. Personally, I think that once I come up with a cutting table that's got support for the wood and a stable base, a circular saw is probably safer. Mine has two handles, so I'm supposed to use two hands to use it. That means my wood has to be clamped--and my hand won't ever be anywhere near the blade. I also think that taking the battery out between cuts is going to be easier to sustain than unplugging the corded saw. And that's an important safety step. Since I won't ever be doing high-volume cutting, I'm figuring my little cordless will be enough for me. But like you, I'll need to school myself to just wait for the saw to do the work, and to only guide is, and not so much force it forward. That patience you were talking about. Having used a jigsaw, I will say this: in terms of cutting wood, my corded Skil jigsaw was slower than my dad's 7-1/2" corded circular saw, and it was harder to be patient. I'm eager to get started, but I need a cutting table I think is safe....See MoreWe missed it again.
Comments (29)This is how it worked this time. I hadn't checked any matches for several months. Last week a guy that I've "known" for a couple of years did the test and came back matching me but not my aunt. So I knew he was from my mother's side. I had made a tree using possible parents for my great grandfather. On paper it was pretty darn good but I didn't have any document to connect them. Getting his DNA match gives me hope that someday I can find something that says, yes, you have the right ancestors. But anyway, since he emailed that news and then asked if another name was in my list I went to check and while I was there saw that my match list was huge and they were 4th cousin matches. Close enough to work with! So I emailed 2 of them and they both answered right away. One I was able to connect and the other didn't have her tree back far enough for me to work with. Our "in common" ancestor is very dead! We use GEDMatch and FTDNA to match. It seems like the people who really want to trace their family upload their DNA there and they answer emails. ancestry.com not so much. I was "talking" to another cousin about my good luck and she said check hers at ancestry to see if any of my new matches were there. Of the first page of 50, 22 had no tree, 4 had 2 generations, 4 were locked. So that's 30 out of 50 that we can't even look at. We could contact them but I suspect they won't answer. If you have done a DNA test but you don't have a tree, your tree is locked or you have you and your parents......?? What can we do with that? After you get your test results back your work is just beginning. That's when you have to look at both trees and go backwards until you find the same person in each tree. The match I had from the guy I already knew was easy because we had discussed it at great length for 2 years. We both had an extended tree so it was "easy" to go backwards and find a family name we knew. We had done that already. Getting the DNA match was proof that I was on the right track. The new guy I really had to work at finding the match there. His surname was my maiden name so I knew there had to be an ancestor in common. It took me all day but I got it. I had to build my tree out more on that branch but once I got the first lead it was pretty easy, just time consuming to add another 100 people to my tree. Findagrave had almost everyone linked and when I saw that name I was looking for I knew I was almost done. It isn't always that easy. It's hard. Experience does matter. Practice pays off. The gal who didn't have her tree built out far enough to show 4th cousins will have to work on her tree before I can find anything. Building to 5th or 6th would be even better. You need everyone; all the siblings, all the spouses, all the kids and their kids....See More- 2 years ago
 2 years ago
 2 years ago
 2 years ago
- 2 years ago





Related Stories
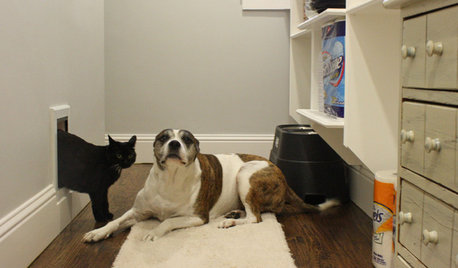
PETSPet-Proofing Your Home: A Room-by-Room Guide
Not all pet dangers are obvious. Keep furry friends safe and sound by handling all of these potential hazards
Full Story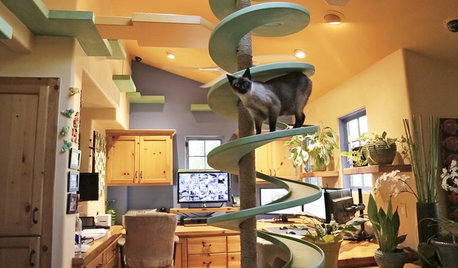
PETSIncredible Home Catwalks Make for Purr-fectly Happy Felines
Walkways and tunnels custom built to the tune of about $35,000 keep a homeowner’s 18 cats on cloud nine
Full Story
SHELTERING AT HOME9 Ways to Have Fun at Home While Socially Distancing
Throw a (virtual) party, get your hands in the dirt, tackle an organizing project or explore a creative pursuit
Full Story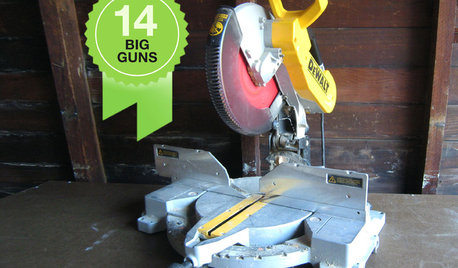
DIY PROJECTS14 Power Tools for the Home Shop
Want the thrill of building it yourself? These "big guns" help the handy homeowner tackle just about any job
Full Story
FENCES AND GATESModern Fencing for a More Secure Home
Deter would-be burglars without robbing your home of style, by installing a modern fence like one of these
Full Story
DECLUTTERINGHow to Declutter Your Home and Keep It Tidy
Need help to reclaim your space? Discover the tricks of the trade with this expert advice
Full Story
ADDITIONSWhat an Open-Plan Addition Can Do for Your Old House
Don’t resort to demolition just yet. With a little imagination, older homes can easily be adapted for modern living
Full Story
KITCHEN STORAGECabinets 101: How to Get the Storage You Want
Combine beauty and function in all of your cabinetry by keeping these basics in mind
Full Story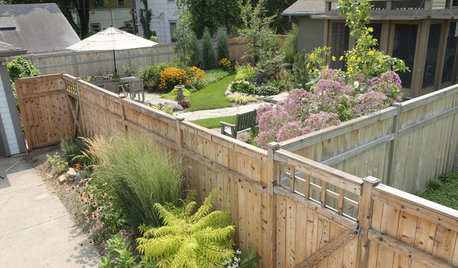
FENCES AND GATESHow to Install a Wood Fence
Gain privacy and separate areas with one of the most economical fencing choices: stained, painted or untreated wood
Full Story
HOUZZ CALLShare Your Sheltering-in-Place Accomplishments
Let’s celebrate small victories and say how we’ve managed to pass the time at home
Full Story

Annie DeighnaughOriginal Author