


How to Install a Wood Fence
Gain privacy and separate areas with one of the most economical fencing choices: stained, painted or untreated wood
Matthew Ankeny
May 28, 2014
Houzz Editorial Staff
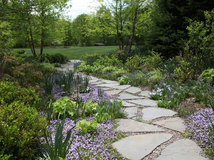
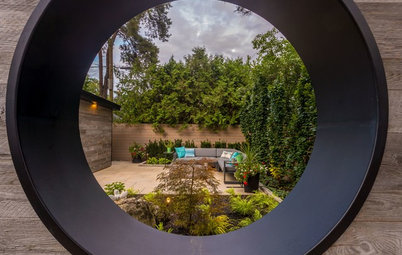
Each frame speaks to the masterpiece it contains, and in your home’s yard, the way you surround your landscape can be both an accent and a solution to needs for containment and privacy. A wood fence is a versatile choice, offering picket pageantry and modern styling, as well as endless opportunities for customization. It also happens to be one of the most economically viable ways to wrap your yard, and an achievable DIY project. I talked with Bridget Lowing of Fence Consultants of West Michigan to find out how to install one right.
Project: Installing a wood fence.
Why: You want privacy, semiprivacy or the peace of mind that your kids and pets are safely corralled in your yard. And there’s the perk of added visual appeal and a clear property line to your yard.
Who to hire: A fencing company can help you put up a fence quickly, or if you’re up for the project, you can also do it yourself.
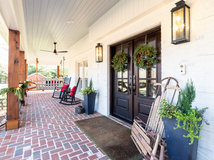
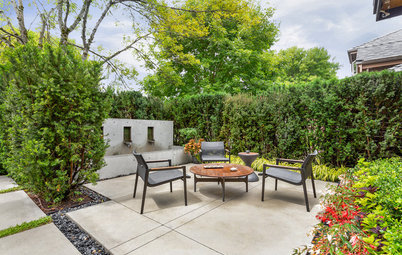
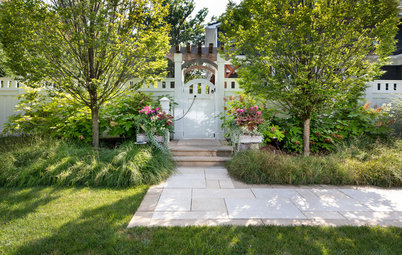
Shown: A 6-foot privacy fence dividing two properties. The gate features a small trellis detail at the top.
Why: You want privacy, semiprivacy or the peace of mind that your kids and pets are safely corralled in your yard. And there’s the perk of added visual appeal and a clear property line to your yard.
Who to hire: A fencing company can help you put up a fence quickly, or if you’re up for the project, you can also do it yourself.
Shown: A 6-foot privacy fence dividing two properties. The gate features a small trellis detail at the top.
Cost: Fence Consultants advises to anticipate a cost of $20 to $60 per linear foot, depending on the wood type and the intricacy of the fence. With some contractors this will include one gate. But, as with many projects, regional pricing will vary, as wood types and availability change.
If you’re tackling the project on your own, the cost will largely be decided by the wood you choose. The additional materials for a basic fence, like concrete and fasteners, are relatively minimal.
Typical project length: Building the fence usually takes three days (one to set the posts, one for the concrete to settle and one to add the rails), but if you are going with a contractor, anticipate potential project wait times, especially during the busy season for fencing (spring and summer).
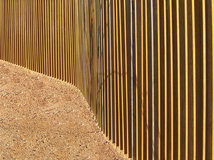
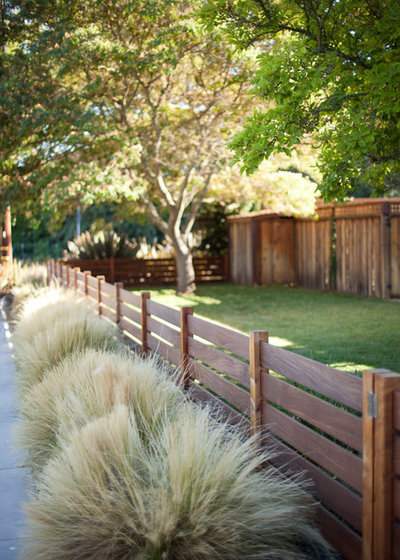
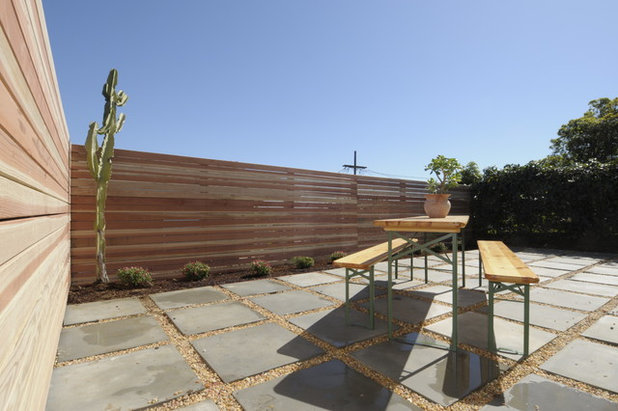
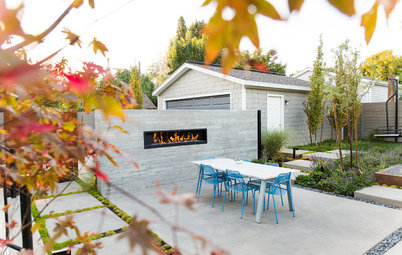
Shown: A 4-foot horizontal fence with rails embedded into the posts
If you’re tackling the project on your own, the cost will largely be decided by the wood you choose. The additional materials for a basic fence, like concrete and fasteners, are relatively minimal.
Typical project length: Building the fence usually takes three days (one to set the posts, one for the concrete to settle and one to add the rails), but if you are going with a contractor, anticipate potential project wait times, especially during the busy season for fencing (spring and summer).
Shown: A 4-foot horizontal fence with rails embedded into the posts

Best time to do this project: A fence can be added year-round, but most people install fencing in the warmer months, when they are more likely to use outdoor living spaces.
Permit: Check with your homeowner’s association, if you have one, and with your local municipality. Nearly all cities and towns have fence regulations, and many require a permit for building a fence.
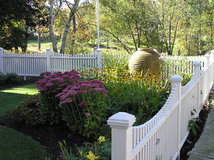
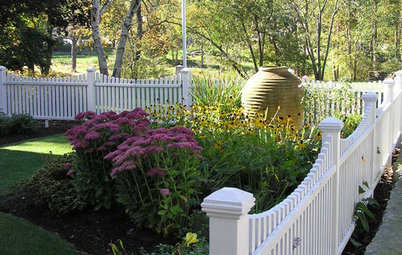
Shown: A 4-foot stained picket fence with copper caps on the posts
Permit: Check with your homeowner’s association, if you have one, and with your local municipality. Nearly all cities and towns have fence regulations, and many require a permit for building a fence.
Shown: A 4-foot stained picket fence with copper caps on the posts
Things to Consider
Ask permission, not forgiveness. While Robert Frost once penned, “Good fences make good neighbors,” there have been major battles fought involving neighbors, homeowner’s associations, municipalities and fence builders.
Talk with your neighbors. Make clear your fencing intention and see if they’re interested in partnering in the construction. Lowing often sees neighbors collaborate on building projects so the fence is “the same age, same style, and same material, and they’re all saving money,” she says.
If they’re not collaborating, hopefully your neighbors will at least give you the thumbs-up for the project. If not, you can still build your fence, but be considerate and respect the property rights of your neighbors.
Shown: A solid vertical privacy fence with the good-neighbor side facing inward
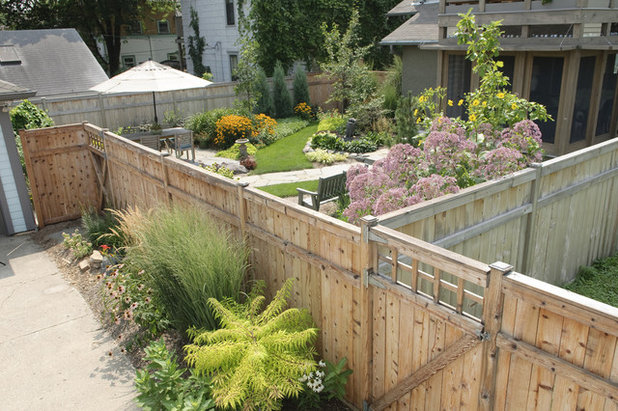
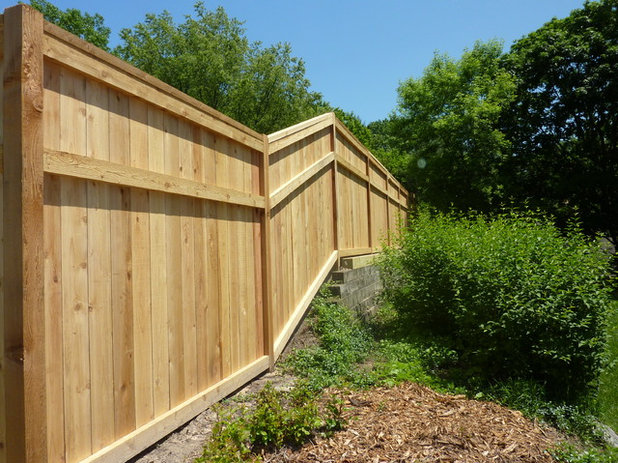
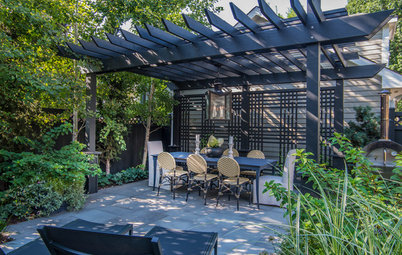
Build a friendly fence. In some areas there is a good-neighbor requirement for fencing, meaning the posts are visible only on the interior (the side facing the fencing owner’s home). If you prefer to not have that visual, you can construct a shadow box fence or solid board fence to provide a clean look on both sides of the fence.
Know your limits. Before building, make sure you know exactly where your property line is. If you’re not confident, hire a surveyor to map it out. Also, you’ll want to check for underground utilities before digging to set your posts.
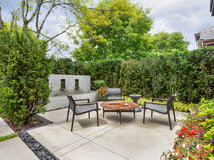
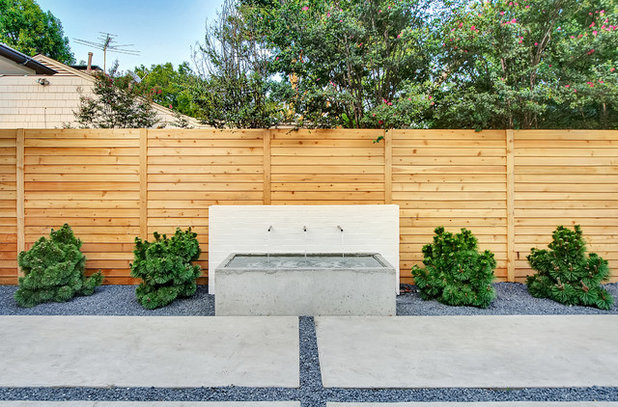
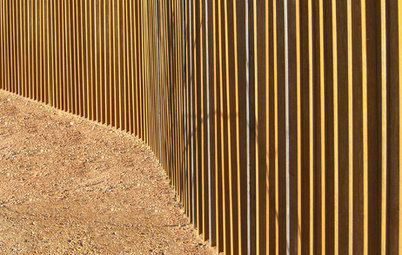
Shown: A horizontal privacy fence, with the boards set at angle to imitate beveled siding
Know your limits. Before building, make sure you know exactly where your property line is. If you’re not confident, hire a surveyor to map it out. Also, you’ll want to check for underground utilities before digging to set your posts.
Shown: A horizontal privacy fence, with the boards set at angle to imitate beveled siding

Consider topography. Wood fences that are premade can be racked to accommodate slope, or if you’re building them onsite, you can fasten the boards on a stagger. If you want a clean line on the top of the boards, measure and cut once the boards are secured. For steep changes in elevation, you may have to stagger sections, securing them at different heights on the shared post.
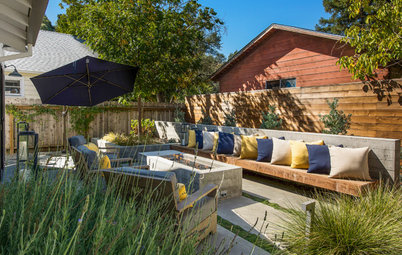
Think like an animal. If you’re fencing in a pet, consider escape. Gaps below boards (especially on a slope) can be avenues of escape, and a low fence can be leaped over. Lowing advises, “If you’re getting a fence for containment of a dog, think about the type of dog you own. Some dogs can dig under fences and chew and scratch the boards, and eventually break them.” So, for your animal and your fence, consider your security needs.
Shown: Another angle of the 4-foot horizontal fence
Quality counts. Your choice of wood for your fence will depend on your area, but Lowing emphasizes that not all boards are equal. The western redcedar that Fence Consultants uses is ¾- to 1-inch thick, whereas some store-bought boards come in at ⅝ inch thick. The small difference makes a big difference, especially in the longevity of the boards. Also, consider your wood’s worth. Cedar is a popular option because it is naturally resistant to insects, is extremely solvent with stains (which requires more stain, but the stain will last longer) and holds form well in variable temperatures.
When fastening the boards, use stainless steel screws or galvanized nails, to better resist rot. The investment up front will lead to a fence that lasts, which, in the long run, saves money.
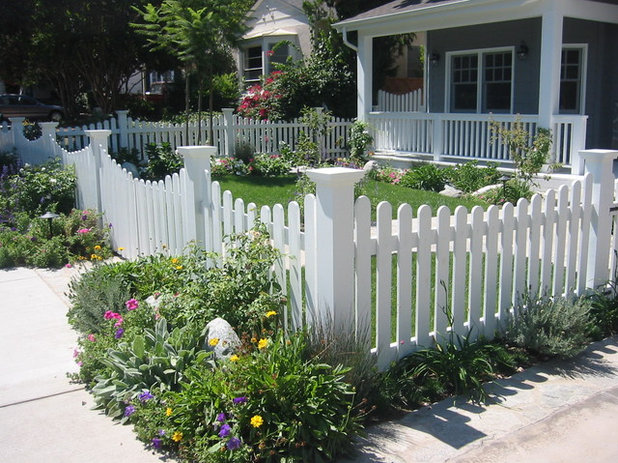
Shown: A 4-foot painted white picket fence
When fastening the boards, use stainless steel screws or galvanized nails, to better resist rot. The investment up front will lead to a fence that lasts, which, in the long run, saves money.
Shown: A 4-foot painted white picket fence
Don’t forget the golden years. “Wood is a natural product,” Lowing says. “It will do what it wants at times.” A wood fence should last about 20 to 25 years, depending on wood type and maintenance, but there’s always the chance of a stray board’s warping and needing to be brought back to rights (or replaced). Staining your fence can maintain the wood’s clarity and a desired color or shade, and stains usually last about five years. An unprotected fence will turn silver or gray in about a year. Painting is also an option, but consider you’ll need to repaint every year or two, as the paint will peel and flake.
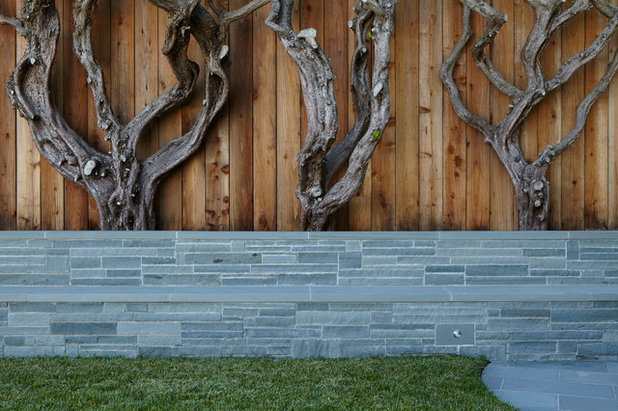
Shown: A horizontal fence with long rails to accentuate the wood’s grain
Shown: A horizontal fence with long rails to accentuate the wood’s grain
Fence Terms
Posts: The 4-by-4 (or larger) boards that are set in concrete and anchored into the ground. At least one-third of the height of the post should be buried underground (for example, for a 6-foot-tall fence, a 9-foot post should be buried 3 feet deep).
Rails: The horizontal supports running between posts. Rails are attached at the top and bottom, and sometimes in the middle.
Bay: The area between two posts. Styles can vary from solid, fully private infills to spaced infills, like those found on a picket fence.
Gate: The door that provides entry and exit. Gates are mounted to posts and can swing in one direction or both directions. Most gates have latches, and for added security you can add a latch that locks.
Shown: A western redcedar vertical privacy fence with the good-neighbor side facing outward. The fence features decorative rails at the top and bottom.
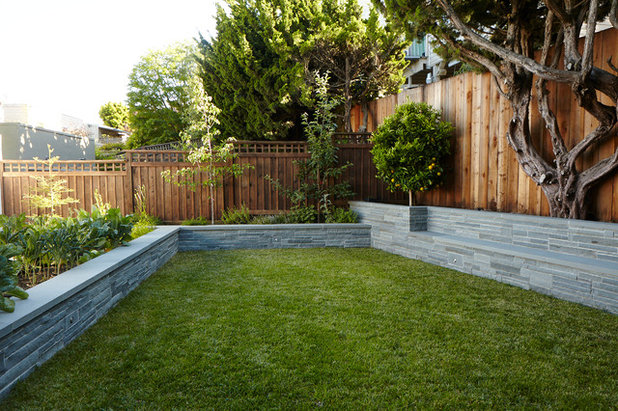
Shown: Across the yard is a board and batten fence with a trellis top. On the right is another angle of the vertical privacy fence.
How to Build a Fence
If you’re going to install a fence yourself, there are three main steps (and one optional step). Before you get started, think about what kind of fence fits your wants and needs, then research the best installation techniques. Broadly, your process will be:
1. Dig post holes and set boards with concrete. After inserting a post, add gravel or native dirt at the base of the hole (to allow the post to breathe). Then, if you’re planning to cover the top with soil, leave 1 or 2 inches at the top to backfill over the concrete. Give the concrete 24 to 48 hours to set.
2. Attach the rails and the boards (or premade panels). Use stainless steel screws or galvanized nails for extra durability.
3. Build a gate and add caps or other ornamental features. It’s also good to consider where water may gather and lead to rot. Caps on posts can add a nice touch to the design and also help in shedding water.
4. Stain, paint or waterproof your fence. Depending on your desired look, add (or don’t add) a protective coat to the wood.
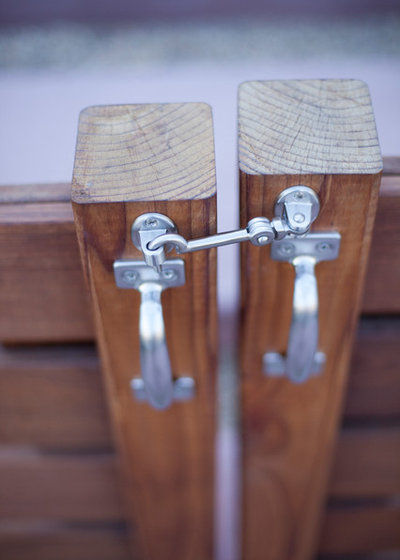
Shown: A simple latch holding a gate shut
If you need help: Find a fencing expert in your area
If you’re going to install a fence yourself, there are three main steps (and one optional step). Before you get started, think about what kind of fence fits your wants and needs, then research the best installation techniques. Broadly, your process will be:
1. Dig post holes and set boards with concrete. After inserting a post, add gravel or native dirt at the base of the hole (to allow the post to breathe). Then, if you’re planning to cover the top with soil, leave 1 or 2 inches at the top to backfill over the concrete. Give the concrete 24 to 48 hours to set.
2. Attach the rails and the boards (or premade panels). Use stainless steel screws or galvanized nails for extra durability.
3. Build a gate and add caps or other ornamental features. It’s also good to consider where water may gather and lead to rot. Caps on posts can add a nice touch to the design and also help in shedding water.
4. Stain, paint or waterproof your fence. Depending on your desired look, add (or don’t add) a protective coat to the wood.
Shown: A simple latch holding a gate shut
If you need help: Find a fencing expert in your area


For more than 35 years, Re-Bath® of Pittsburgh has helped homeowners convert worn, outdated bathrooms into... Read More
What are you working on?
Related Products


Related Stories
Gardening and Landscaping
Landscape Detail: Do Fence Me In
For security and privacy or just a sweet backdrop to the begonias, a fence in your garden or yard is the finishing touch
Full Story
Landscape Design
10 Creative Fence Designs
Unique materials and imaginative applications turn this yard staple into a powerful outdoor accessory
Full Story
Landscape Design
How to Create Privacy in Your Yard With Plants and Structures
By Kate Burt
Whether you have neighbors above, live on a busy street or want to reduce noise, explore these screening solutions
Full Story
Landscape Design
Why You Should Consider Adding a Hedge to Your Yard
Discover how planted boundaries and screens can provide beauty, privacy and wildlife benefits to your outdoor space
Full Story

Landscape Design
What to Know About Adding a Garden Arbor
Discover how an arbor can help define and enhance your home and landscape
Full Story
Landscape Design
Why You Should Consider a Landscape Screen for Your Yard
Find out how this versatile outdoor element can serve as both a design feature and an outdoor problem-solver
Full Story
Landscape Design
What to Know About Adding a New Gate
Learn about how to create a hardworking and stylish entry to your home and garden
Full Story
Landscape Design
What to Know About Adding a New Fence
Learn about how this utilitarian outdoor feature can be a beautiful addition to your home and yard
Full Story
Landscape Design
4 Gardens With Creative Outdoor Room Dividers
Screens, hedges and walls help define garden spaces, edit views and guide movement
Full Story
Landscape Design
4 Yards Gain Pretty Views With Creative Privacy Screens
See backyards and side yards that avoid unattractive views with effective fences, walls and plantings
Full Story
Love it...
I love this a lot
@ ala565626 , we have the same problem with our daughter's recently bought house. On top of being ugly, the chain link fence is only 4ft tall. If it were 6ft, she'd be able to at least weave vinyl strips to achieve some privacy, but at 4ft it's really too low. Chances are not all of the 3 neighbours would even want to replace the fences at the same time and in the same way.
I suppose she could build a proper wooden privacy fence on the inside of her property (and lose a foot all around), but then the price to her would be double than if the neighours all shared it. But then again from our own experience with our house, getting all neighbours to agree and share the cost is difficult, nearly impossible.
In the meanwhile I've advised her to grow some vines on the fence to add a little privacy.