KA (King Arthur) No-Knead Harvest Bread Question
2 years ago
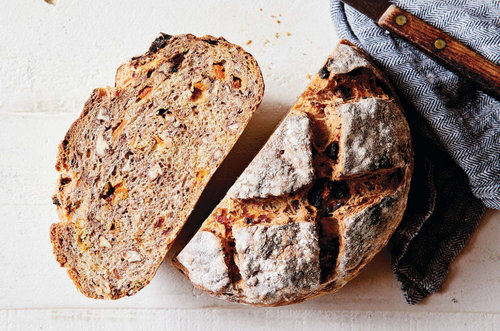
Featured Answer
Sort by:Oldest
Comments (10)
- 2 years ago
Related Discussions
KA mixer better way to make my bread?
Comments (35)We bought this built-n Bosch mixer instead of the counter model. There is no danger of it walking away anywhere no matter how unbalanced a load you end up with. It was risky because the concept models are discontinued but not having to give up any counter or cabinet space for a bulky drive unit made it worthwhile. So far we are happy with it. It serves as a food processor (not a great one, it's on the small side and it doesn't autopulse like my old Braun multisystem, but it's okay) a slicer/grater/Julienner, a mixer, including a very heavy duty all-steel dough hook, a blender (superb performance out of that), and a stone grain mill. The pulser on the thing is kind of awkward, requiring you to twist the spring loaded knob to the left, and it only pulses to high speed, which can get messy when you are dealing with liquids, but overall, it works out great and saves me a lot of room in the cabinets. Again, this is discontinued and probably more for the appliance geek, but since you are posting on here all the time, asolo, I am thinking you ought to at least know about it....See MoreKA's Buttertop Bread recipe
Comments (5)Pat, that looks really, really good. My trick, when I'm putting butter on the top of bread that is just out of the oven, is to peel back the wrapper from a couple of tbsp worth of butter (room temp) and then just rub the stick over the surface...melts in right away. Nancy...See MoreBread machine questions
Comments (15)CC, my Zo does not have an adjustment for the first rise, I'm assuming the thermostat automatically adjusts to the internal temperature of the machine, and that's only an assumption. FOAS, what would you like for a basic bread recipe? Something like a plain french baguette? Or a sweeter eggier farmhouse white? Even honey wheat? How I bake the loaves depends on the crust I want. If I want crusty baguettes, I shape the loaves and bake them freeform on a hot baking sheet. Many here use baking stones. If I want a tender crust and some white sandwich type bread, I use Grandma's old farmhouse white recipe, with milk and eggs or Sol's recipe for Hnoey rolls: Personally, I really like honey wheat, so that's what I make most of and sometimes I make free formed round loaves with lots of crust and sometimes I bake it in loaf pans for sandwich slices and toast. If I want a soft crust I brust with melted butter when it comes hot from the oven, if I want a crusty loaf I spritz it with some water a couple of times while baking. I know Ann T sprays her oven with water, and she uses a stone to get the proper heat and humidity. Anyway, for what it's worth, here are the recipes I use for those basic things: HONEY WHOLE WHEAT BREAD INGREDIENTS: 3-1/2 to 4 cups all purpose flour  2-1/2 cups whole wheat flour  2 pkg. active dry yeast  2 tsp. salt  1 cup milk  1 cup water  1/2 cup honey  3 Tbsp. oil  1 egg PREPARATION: In large bowl, combine 2 cups all-purpose flour, 1 cup whole wheat flour, the yeast, and salt and mix well. In saucepan, heat milk, water, honey, and oil until a thermometer reads 120-130 degrees F (warm) Add liquid mixture to flour mixture and stir to combine. Beat this batter for 3 minutes. Then, gradually stir in rest of whole wheat flour and enough remaining all-purpose four to form a firm dough. Sprinkle work surface with flour and knead dough, adding more flour if necessary, for 5-8 minutes until smooth and satiny. Place dough in a greased bowl, turning the dough in the bowl to grease the top. Cover and let rise in a warm place about 1 hour, until double in bulk. Punch down dough and divide into 2 pieces. On lightly floured surface, roll or press each piece of dough to a 14x7" rectangle. Starting with shorter side, roll up tightly, pressing dough into roll with each turn. Pinch edges and ends to seal and place dough, seam-side down, into greased 9x5" bread pans, making sure short ends of bread are snugly fitted against the sides of the pans. Cover and let rise in warm place until the dough fills the corners of the pans and is double in bulk, 30-40 minutes. Bake in preheated 375 degree oven for 35-40 minutes, until bread is golden brown. Remove from pans and cool on wire racks. I like to brush the bread with butter when it's still hot from the oven for a softer crust. BREAD (GRANDMAÂS RECIPE) 1/3 cup sugar 1 cup milk 1/3 cup butter 2 eggs 1 pkg yeast 1 tsp salt 4  4 1/2 cups flour vital wheat gluten (optional) Mix milk, butter and sugar, heat until butter melts and liquid is very warm. Add eggs, then beat in flour, salt and yeast until stiff dough forms. Turn onto floured surface and knead until smooth and elastic, 7  8 minutes. Turn dough into greased bowl and let rise in warm place until double. Punch down dough, shape into loaves or dinner rolls and let rise again. Bake at 350 until done (25 - 30 minutes for loaves, 12-15 minutes for dinner rolls) Makes 1 large or two small loaves or 18 dinner rolls BREADMAKER INSTRUCTIONS: Heat milk, butter and sugar. Place two eggs in bread pan, add liquid. On top of liquid place flour, salt and vital wheat gluten. Make a well in the dry ingredients and pour yeast in well. Do not allow it to contact wet ingredients. Process as for dough, or allow machine to bake. Honey Rolls 1 cup milk 1/2 cup honey 1/2 cup butter [1 stick] 2 teaspoos salt 1-2 tablespoons granulated sugar* 2 pkges. dry yeast 1/2 cup warm water [110º-115ºF] 2 large eggs, lightly beaten 6 - 6 1/2 cups AP flour Heat the milk, add butter and salt. Set aside while butter melts. Stir in the honey. In another bowl, combine the warm water, yeast and sugar. Let it sit until yeast is completely dissolved, about 6-7 minutes. Combine milk mixture with yeast mixture. And stir in the beaten eggs. Beat in 4 cups flour. Add enough remaining flour to make a soft, but not sticky dough. Place dough in greased bowl, turning to coat both sides. Cover and allow dough to rise 1 hour. Punch dough down, and allow to rise another hour. Punch down again, and shape dough into rolls. Let it rise again 45 minutes to an hour or until doubled in volume. Preheat your oven to 375ºF and bake rolls for 25 minutes or until a deep golden brown. For a very soft crust, brush rolls with melted butter as soon as they come out of the oven. Note: You could omit the sugar from this recipe altogether. I sometimes use about a teaspoon of the honey called for in the recipe to feed the yeast instead of the sugar. Finally, here's one that's especially targeted at the food processor, if you want to try it. It was simple, came out fine, but I liked the one I made with the bread machine better, the interior texture was "holier", if you get my drift. It goes without saying that I didn't proof the yeast, and I do have french bread pans. The dough is pretty "slack", so if you don't have french bread pans you'll need a "baker's couche". I understand that the canvas in a real couche absorbs some moisture and makes the bread crustier. I've used parchment paper to "prop up" the loaves and it works, and I've baked these freeform and it also works but my loaf tends to flatten out. I don't really care, but it's not the traditional shape, LOL. French Bread in the Food Processor 4 cups unbleached all-purpose flour 1 1/2 teaspoons salt 1 teaspoon distilled white vinegar 2 teaspoons active dry yeast (from a 1/4-oz package) 1 2/3 cups warm water (105-115°F) 1 tablespoon olive oil Pulse flour, salt, and vinegar in a food processor to combine. Stir together yeast and 1/3 cup water in a small bowl until yeast is dissolved, then let stand until foamy, about 5 minutes. (If mixture doesn't foam, discard and start over with new yeast.) With motor running, pour yeast mixture and remaining 1 1/3 cups warm water into flour mixture in processor, blending until dough forms a ball and pulls away from side of processor bowl, about 1 minute. Cover processor feed tube and let dough rise until it fills bowl, about 1 hour. Pulse several times to deflate dough. Generously oil bread pans with olive oil. Turn out dough onto a work surface and divide in half (dough will be very soft). Press 1 half into a 10- by 8-inch rectangle and fold in the 2 short outer sides to meet in the middle, pinching edges together. Turn over (seam side down), then roll and stretch into a 15-inch-long irregular loaf. Put loaf, seam side up, in bread pan and turn to coat with oil, leaving loaf seam side down. Repeat procedure with remaining dough. Let loaves rise, uncovered, in a warm draft-free place 30 minutes. Put oven rack in upper third of oven, then put a large roasting pan with 1 inch of water in it on bottom of gas oven or on lowest rack of electric oven. Preheat oven to 450°F. Make 3 shallow diagonal slashes down length of each loaf with razor. Bake loaves 30 minutes, then carefully remove pan of water from oven. Remove bread from pans and turn upside down on upper oven rack, then bake until golden and crusty all over, about 5 minutes more. Cool loaves on a rack. Good luck. Don't forget that if your water is too hot, you'll kill the yeast. If you think it the dough needs to be kneaded more, it does. More better than less, when kneading bread. Oh, and if you want to rip that end chunk off hot from the oven, go ahead. It's your bread, but there is a difference in taste and texture if you let it cool a bit. Annie...See MoreKing Arthur dough whisk
Comments (58)I never cared for her. In case you ever want to make the mash recipe: FULL RECIPE, THEN DIVIDE BY 8 FOR 1/8 RECIPE 1/2 cup dry black-eyed peas 1/2 cup dry pinto beans 1/2 cup dry kidney beans 1/2 cup dry split peas - a mix of green and yellow 1/2 cup dry garbanzo beans 1/2 cup dry black beans 1/2 cup dry soy beans 1 cup dry great northern white beans 1/2 cup dry wheat berry grain 1/2 cup dry pearl barley grain 1 cup dry wild rice Rinse the beans, grains and rice, then soak them overnight (8 hours or so) in a large pot, covered with about an inch of water. Do not change the water before cooking as you want to retain as many of the nutrients as possible. In the morning add or remove water as needed to cover the mixture with about one inch of water. Bring the water to a full boil and boil for 10 minutes. Reduce the heat to a simmer and cover the pot, continue to cook for 20 minutes more. Ideally there will be just enough water to cook the beans, with very little extra. 3 medium sweet potatoes 4 medium white potatoes Scrub, quarter and then slice these into 1/8 inch slices. Then steam these lightly in a steamer, stirring every few minutes to cook them evenly. 3 pounds frozen corn 3 pounds frozen peas 3 pounds frozen carrots 3 pounds frozen green beans I add these to the hot beans and potatoes. It cools them off and stops the cooking process while barely thawing the vegetables. I like to cut the carrots up a bit, just because my birds prefer the different shapes and I think that they tend to be a bit large most of the time. 1/2 pound fresh parsley 3 medium zucchini 4 large tomatoes 1/2 pound of mustard greens 6 large bananas 6 medium apples 4 peeled oranges 1/2 cup cranberries (fresh or frozen) 1 mango (peeled and pitted) 2 papayas (peeled, leave the seeds in) 1-1/2 pounds of green grapes I run these items through a food processor to chop them a little. Do not process them too fine, the birds prefer the chunks of things. An alternative Is to slice them up by hand (this will add more time to making the mash). 1/4 cup dried pumpkin seeds 1/4 cup sesame seeds 1/4 cup dry powdered kelp 1/4 cup alfalfa powder These things I just put in whole (or powdered as the case may be). I mix this all together thoroughly and then freeze it in sandwich bags in daily serving portions. I take one bag out of the freezer and thaw it in the refrigerator for 24 hours, and serve it the next day. I do not recommend the use a microwave to thaw or warm this mash, as this may destroy valuable nutrients and according to some researchers it can also change the molecular structure of the foods. I�m not sure if it does or not, but it�s easy enough to avoid nuking these foods. You can warm it by placing it in warm water. Posted by: "Adrianne" : 2 - 3 rinses before the initial overnight soak. Keeps the water clearer, removes toxins that the legumes produce as they soak/germinate and increases digestability. I also do not use red kidney beans, and have cut back on the black beans as well, as they are more difficult to digest. I use navy beans for the white beans and substitute adzuke (also called aduki or azuke) beans, mung beans and lentils, as they are much easier to digest....See More- 2 years ago
- 2 years ago
Related Stories
LIFESimple Pleasures: The Joy of Baking
Fill your house with a heavenly scent and your heart with cheer by making time to bake
Full Story
SHELTERING AT HOME15 Essentials for the Baker’s Kitchen
You can turn out delicious home-baked goods with ease when you own these utensils, tools and pans
Full Story
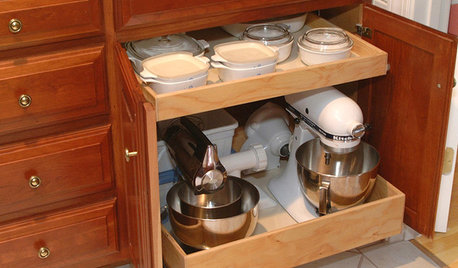
KITCHEN STORAGEWhere to Stash the Stand Mixer in Your Kitchen
Stand mixers aren’t huge, but they’re heavy. See storage ideas for keeping them accessible and easy to use
Full Story
KITCHEN APPLIANCESConsidering a New Kitchen Gadget? Read This First
Save money, time and space by learning to separate the helpers from the hassles
Full Story
MOST POPULAR8 Little Remodeling Touches That Make a Big Difference
Make your life easier while making your home nicer, with these design details you'll really appreciate
Full Story
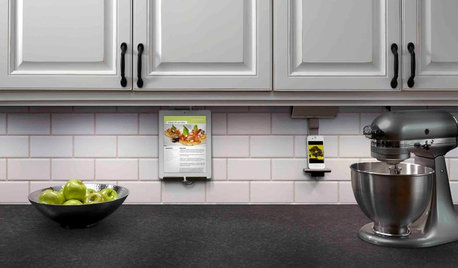
KITCHEN DESIGNHouzz Call: What’s Cooking in Your Kitchen?
Most of us turn to recipes, videos and culinary shows when we cook. Where do you set your cookbook, tablet or TV screen?
Full Story
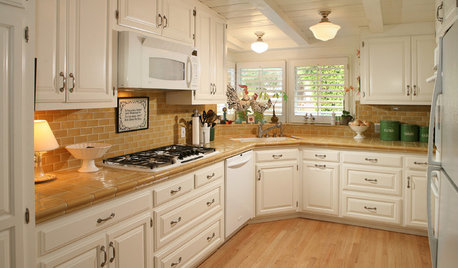
KITCHEN COUNTERTOPSKitchen Counters: Tile, the Choice for Affordable Durability
DIYers and budget-minded remodelers often look to this countertop material, which can last for decades with the right maintenance
Full Story
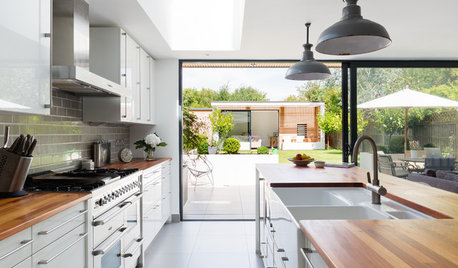
KITCHEN DESIGNA Designer Shares Her Kitchen-Remodel Wish List
As part of a whole-house renovation, she’s making her dream list of kitchen amenities. What are your must-have features?
Full Story
bragu_DSM 5