


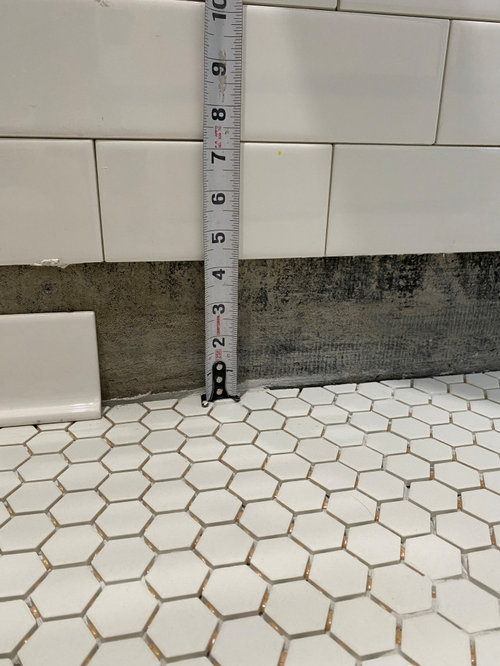
Tile wall and floor gap - what would you do?
Kendrah
last year
last modified: last year

Featured Answer
Sort by:Oldest
Comments (32)

Fori
last yearRelated Discussions
Tile border on irregular floor? What would you do?
Comments (7)I'm crazy for borders and whenever I do a floor, I incorporate some kind of a border. I can't help myself. In your bathroom I would run a border an equal distance from the wall, from the face of the vanity and from the tub and then I'd jog it into the hallway if you want it to feel like one larger room or not if you want to articulate the hallway as a separate little space . I think those idiosyncrasies of the border jogging are part of what makes them fun though. Here is a picture of my border following the shape of a knee-wall bumpout to accommodate plumbing (still not finished but close!): And my tiny potty room, yes, part of the border is concealed - I don't mind! better picture of the border, bathroom less finished: And my kitchen floor plan with the border following every corner:...See Moregap between porcelain tile on floor and door trim...what to do?
Comments (3)You do not want grout in that location. The company that makes your grout should be able to supply a matching latex caulk for this purpose. Typically however the trim is removed or cut away so the tile installs under it and this is never a problem....See MoreWhat to do with tile wall gap?
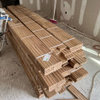
Comments (15)Our walls, window, tub . . . not as square as our tile guy wanted them to be. He laid everything out beautifully, then along the top where there was more gap down to almost no gap, he said he could cut tiles to fit . . . we also had matching pencil trim pieces instead of metal, so he installed them along the top, shaving down pieces where it narrowed. Our older house is WAY out of square as was the glass block window my husband previously installed. Our tile guy saw the problem and worked with it so that we have a great space with the 'out of square' problem blended in so that it is imperceptible. He actually spent some time considering alternatives to this before he began. We used 3x6 glass subway tiles in a stacked (not brick) pattern....See MoreWall tile to Floor Tile - Huge Gap
Comments (7)The walls were painted (drywall, not tile) and the floors were 1"x1" tile. The project was to replace all tile at tub/shower, add wall tile outside up to 4', replace floor tile. So, all new. I think I know what happened. They were supposed to rip out old floor tile. They did not and instead tiled over the existing tile. When I discovered, I insisted they redo. The wall was already done. Thus, now with just the one layer of floor tile, there's the gap. I'm not pro and never heard of 'sanitary base'. I'll do some digging to see what this looks like. They would be putting a layer tile at the bottom of the tiled wall, right?...See More
Kendrah
last yearFori
last yearKendrah
last yearKendrah
last yearcatbuilder
last yearartemis78
last yearlast modified: last yearKendrah
last year PRO
PROSabrina Alfin Interiors
last yearartemis78
last year PRO
PROMint tile Minneapolis
last yearlast modified: last year
cpartist
last yearcpartist
last yearKendrah
last yearcpartist
last yearartemis78
last year
millworkman
last yearartemis78
last yearlast modified: last yearKendrah
last yearlast modified: last yearKendrah
last yearartemis78
last yearcpartist
last yearKendrah
last yearcpartist
last yearKendrah
last year


Related Stories
TILEA Finishing Touch for Your Tile Walls and Floors
See how tile-edging trim adds graphic style to five bathrooms and kitchens
Full Story
DECORATING GUIDESDesign With an Edge: Leather Tiles for Floors and Walls
Leather tiles can warm up a floor or a wall, providing a fun design element. Best of all, they can be swapped in and out on a whim
Full Story
BATHROOM MAKEOVERSBefore and After: A New Tile Floor Unites a Divided Bath
Walls come down to give this California bathroom a bright new look with boho touches
Full Story
REMODELING GUIDESGet Floored by Creative Use of Tile
Don't get stuck in a subway-tile rut. Unlock the imaginative power of tile for floors and walls that will knock their socks off
Full Story
SHOP HOUZZTile, Wallpaper and Flooring
Add color, texture and style to your floors and walls
Full Story0
SHOP HOUZZStatement Floor and Wall Coverings
Add personality and style to your space with these new looks from Merola Tile and RoomMates
Full Story0
KITCHEN OF THE WEEKKitchen of the Week: Graphic Floor Tiles Accent a White Kitchen
Walls come down to open up the room and create better traffic flow
Full Story
BATHROOM DESIGNGet Creative With Your Bathroom Floor Tile
Add movement, definition and interest to a humble bathroom floor by sidestepping uniform tile in favor of an unusual design
Full Story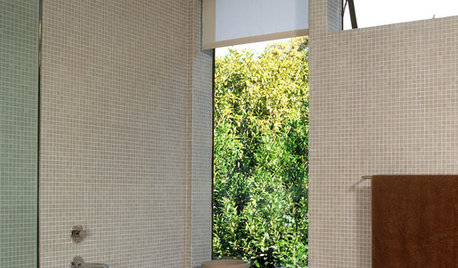
BATHROOM DESIGNFloor-to-Ceiling Tile Takes Bathrooms Above and Beyond
Generous tile in a bathroom can bounce light, give the illusion of more space and provide a cohesive look
Full Story
EVENTSThe Latest Looks in Tile, Stone and Flooring
Patterned tile, faux hardwood and natural colors were some of the trends seen at The International Surface Event 2019
Full StorySponsored
Professional Remodelers in Franklin County Specializing Kitchen & Bath

artemis78