


Another Recipe Question - Homemade Biscuits
amykath
2 years ago
Featured Answer
Sort by:Oldest
Comments (71)
Related Discussions
Homemade potting soil / soil science questions
Comments (60)Hi, Tom After I scanned your article, the first thing I did was follow the link to the OSU research you cited. As I read through it, I didn't see anything different than what is contained in an article I wrote back in '94. The wording and discussion is actually so close to what I wrote, that I tried to find out whether that article was written after mine. I think that initially, adding a small fraction of perlite pumice, Turface, things that you usually consider as drainage material to a large fraction of peat, increases drainage, but only until the peat compacts/nests around the 'drainage' material. Perlite is normally included in commercially packaged soils at less than 10% of the whole. Doubling its presence isn't going to increase drainage or reduce the ht of the PWT, though it will reduce the total volume of water the medium is capable of holding. Illustration: start with 10 parts of fine sand that supports a 4" PWT. Add 1 part of BBs. Does the flow through rate change? How about the ht of the PWT or volume of air in the medium? Technically, on a per volume basis, there is a decrease in the % of air in the sand/BB mix compared to only the sand w/o BBs. All that changes is the 'volume' of water in the PWT. Peat may be slightly different because it's interlocking fibers may not compact to the degree that sand will, but remember that the fiberosity exhibits the same properties whether or not there is drainage material present. If peat compacts when there is no drainage material, it will still compact when there is. In order for drainage material to improve flow-through rates, it has to affect gravitational flow potential. In order to do that, it must great pockets where water molecules can adhere to themselves, increasing their collective mass. These large droplets then depend on cohesion to keep them together as gravity acts to move them down and out of the container. If drainage material can't create 'puddles and channels' within the media, it's not going to be effective. I want to comment on some of the things you mentioned as though we're conversing, so I'll make your offerings bold and my reply will be in default type: Drainage though is a bit of a false goal, or a goal based on an assumption. What we really want is to partially dry out the core of the mix at intervals between watering, which prevents that sour core-rot where roots won't live. My focus has always been on aeration, though I recognize the direct/converse relationship between drainage and aeration. The soils I build and suggest are based on the assurance that they will retain ample volumes of air for extended periods - that they are structurally sound. Of course, drainage automatically comes along for the ride. I don't think I would say "What we really want is to partially dry out the core of the mix at intervals between watering". My view is that there is no 'core' to speak of, because water that is not tightly bound to or in media particles moves down to occupy the PWT, which is actually the bane of most commercially prepared container media. Moisture locked in and on soil particles situated above water in the PWT moves quite freely through media by diffusion, so there is never a saturated 'core', only the PWT if the medium supports one. What we really want, is for the PWT to disappear as fast as possible, so a favorable volume of air can return to the soil ASAP. Roots in soggy media begin to die very quickly, often within a few hours or less at temperatures above 60-65*, so PWTs are a decidedly bad thing. Remember please, that here we are looking at media from the plant's perspective. I acknowledge that a PWT can be a necessity to accommodate our ability or our prioritization in terms of how often we can water, but that doesn't change the fact that media that do not support a PWT and need more frequent watering offer greater opportunity, within the limits of other cultural factors, for plants to grow to their genetic potential. That's an important consideration, because if we knowingly use a soil that supports a PWT because it's more convenient, we are sacrificing some degree of growth and vitality on the altar of that convenience. I try to build my soils to maximize water retention and still have no (or very little) perched water. The cyclic death and regeneration of fine rootage exposed to the anaerobic conditions of media that support PWTs is very expensive from the perspective of energy outlay. Energy that might have gone into blooms, fruit, foliage, or just increasing biomass, must be directed to root regeneration subsequent to each time we dare allow our planting to be irrigated to container capacity. Surely drainage helps and is good generally, but you are assuming it is the only way. I think you can see from my offerings that how I approach container media is more complex than only a single narrow perspective would allow. Al I've seen in your other posts where you refer to capillary action of soils as a negative. I couldn't disagree more. Capillary action is the savior of a soil mix; it's the vehicle that brings wet core water & water from the perched water table you described up to the drying surface, and balances moisture throughout the pot. It eliminates the perched water table. Peat has it and bark doesn't. I've never referred to capillary action as a negative. It just is what it is - the product of adhesion + cohesion - no more friend or foe than gravity or diffusion, which is something you didn't consider. Plants absorb water a molecule at a time, and water readily diffuses in media of large particles due to superior gas exchange. Here again, it's kind of a personal choice. You may prefer a soil with good wicking capabilities, but along with that comes the fact that the better they wick the more perched water they support. I, on the other hand, prefer a soil with good gas exchange (diffusion) and no PWT. The price I'm willing to pay is a strengthened watering can arm. ;o) Bark and peat feel dry to the touch when they reach about 40% moisture content, but plants can still extract water from media particles down to about 30-25%, so 'feels dry' isn't necessarily dry. There's a cush there. I understand what's required for wicking SWCs and how water retention in wick-irrigated media varies from media watered from the top, so we can save that talk for another time. Water starts to perch in containers when the soil particles are something just a little larger than .1". As particle size decreases, the ht of the PWT increases inversely. Whether or not bark holds perched water depends on it's size. Obviously, bark the size of Sugar Pops will hold no perched water, but bark ground to the consistency of peat will. Peat may initially hold more air and water than composted bark, but we all know that compaction is a considerable issue for peat; and conifer bark breaks down at roughly 1/4-1/5 the rate of peat, all cultural influences equal. I point to the fact that I always suggest partially composted or uncomposted bark in the soils I use, in sizes up to 3/8" to ensure no or minimal perched water. The grower can then add finer particulates as he/she sees fit to adjust the water retention of the media. When you start with fine particulates, it's very difficult to amend them to increase drainage/aeration, though as noted above, you CAN add materials like perlite that decrease the volume of water the soil can hold. It just makes more sense to me to approach this from the perspective of building a soil that holds no perched water, but is capable of holding an adequate volume of water in micro-pores, leaving macro-pores largely open, than it is to adopt a soil that, at container capacity, always has a significant fraction of available macroporosity clogged with water. Again, it has much to do with trade offs and what we are willing to do insofar as watering frequency (convenience), but the more highly aerated soil with better gas exchange, which occurs partially because we need to irrigate more frequently, offers better potential. I've grown extensively in both, and if the results weren't significantly better, I'd probably still be growing in a peat or compost-based soil. As always, YMMV. Good talking to you Tom. Al...See MoreRecipe for Homemade Noodles
Comments (20)Rusty, I thought you were looking for "egg noodles". The type of noodles served in soups or with stroganoff, etc.. My pasta recipe is one given to me by a friend's Italian momma. Similar but with slightly more egg and a little olive oil. Perfect for ravioli. Hand rolled and cut: Home Cookin Chapter: Recipes From Thibeault's Table Homemade Pasta ============== I watched a friends Italian Momma make her pasta one day. (She did it all by hand) I make it following her directions but I use the Food Processor to mix and knead. 1 egg for each cup of flour( plus an extra egg for every 3 cups of flour, ie. 3 cups flour = 4 eggs, 6 cups flour = 8 eggs. Salt 1 tablespoon of olive oil, per three cups of flour. Put the flour on a large board and make a well in the centre. Crack the eggs into the well and sprinkle with salt and oil . Use your fingertips to mix up the eggs and then start to incorporate the flour into the eggs. Eventually it will all come together. (add 1 to 2 tablespoons of water if necessary) Knead dough until smooth and elastical. Let sit covered for 15 or 20 minutes. Divide dough into smaller portions and run through a pasta rolling machine or roll out by hand. Let dry slightly and then cut into desire widths. Leave out to dry or use fresh. When dried she always stored it in a wax paper lined box, in a cool place. You can also mix and knead this in the cuisinart, which is what I do when I make it. My friends mom would make 12 and 15 egg pasta at a time and give it to all of her family members (and me, a would-be family member). After she cut the pasta she would lay the strands flat. She would have it spread out everywhere there was a flat surface and also hang it from a broomstick strung between two drawers. Once it was dry she would gather up the stiff pieces and put them in boxes. Because I don't make that much at a time, I just lay it all over my table and counter. NOTE: Depending on the flour and the eggs, sometimes you will need more eggs...See MoreHomemade Pickle Question
Comments (22)Lpink, thanks for all the info. You actually answered one of my questions in your last post. I was wondering how long a refrigerator pickle is safe to eat. I've seen recipes that say no more than a week, and that's what I was guessing. I'm assuming that the very short time they're safe is what prompted people to go one step further and freeze them. That way you could make a bunch of pickles when the cucumbers are in season, freeze them, and use just one container at a time. Not as efficient as canning but at least you'd have some sort of pickley thing available all year round. I have another question, this time about seasoning. About the same time as the pickling cukes are on sale at farmers markets, dill heads are also on sale. But sometimes they look pretty run-down. If I can't find good looking dill heads, could I substitute some dill seed? I realize the pickles would not be exactly the same, but would they be awful?...See MoreHome-made bread question
Comments (12)I agree with Linda C. If you are using bakers' yeast, not fresh cake yeast (which has a more yeasty taste than dry bakers' yeast), it sounds like you are over-proofing the dough at one or more stages of the development, AND/OR, you aren't doing a good job of punching the dough down after the first rise. Get a dough-rising bucket so you will accurately KNOW how much the dough has risen. I get my dough-rising (aka food storage) containers from the local restaurant supply store, but the link below will show you what they look like. When I pat 1-quart of dough into the dough-rising bucket and snap the lid on it, it's the perfect environment for rising dough. When the dough has risen to the 2-quart line, I know it has doubled in bulk. No more guess work, playing peek-and-boo under the cloth covering the bowl, and guessing exactly what IS double when dealing with a slant-sided bowl. The straight sides of the dough-rising bucket, as well as the graduated markings on the side will allow you to see exactly how much dough you place in it, and to double that amount to know when your dough has doubled in bulk. I generally use a 2-quart size container (up to 2.5-pounds of dough), but have several sizes for larger recipes. Because today's flour is no longer bromated, it no longer has the extensibility it once had, and allowing dough to rise to "just under double" is best. Dough doesn't rise to the clock, but rather to the strength of the yeast used, the ambient temperature, and the amount of moisture in the dough and humidity in the air. Your dough may double in 25-minutes, not that one hour listed in the recipe. If the temperature is cold, it may take much longer than the recipe suggests. Rising times in recipes, as the flour amounts, are just a good (or bad) guess based on traditional amounts, or what happened in the test kitchen. Are you using the correct size pan for the amount of dough? Many times people use a 9x5-inch QUICK bread pan for 1-1/2 pounds of bread dough, which isn't enough dough for that pan size (it holds 2-pounds of dough). This allows for too much rising time (over-proofed dough) to fill the pan that is too large for the dough amount. Another mistake that leads to over-proofing is allowing the dough to rise more than double in the pan - even when using the correct size pan for the amount of dough. You never allow the dough to rise to the height you want the baked loaf - that's over-proofing it. The log of dough is approximately 1/3 the size of the finished loaf. You allow it to double in bulk in the pan, and that represents 2/3 the size of the finished loaf. Oven-spring, the amount the dough continues to rise after it it's in the oven, accounts for the last 1/3 of the finished loaf size. Jumbo Loaf - 10x4-1/2-inch - 4-5 c. flour - 2# plus dough Quick Bread Loaf - 9x5 - 4 c. flour - up to 2# dough Standard Loaf - 1-1/2x4-1/2 - 3 c. flour - 1.5# dough Med. Loaf - 7-1/2x3-1/2 - 2-1/2 c. flour - 1# dough Punching dough down not only de-gasses it, but it redistributes the yeast. If done incorrectly, you can have pockets of yeast which could account for a yeasty taste. How to: With an oiled fist/hand, gently punch down through the center of the dough. Then grab the dough at the outside edge and pull it into the center. Do this all the way around the dough. You have now essentially turned the dough inside out. The warmer inside dough is now to the outside, and the cooler outside dough is inside. Once the dough is punched down, turn it out onto the counter/board/Silpat (whatever you use). Divide the dough, if necessary. Round the dough (form it into a tight ball), to keep the gasses from excaping through the ragged edges and get the gluten strands smooth and going in one direction. Then cover the dough ball (I use plastic wrap, then use the same piece to cover the panned loaf) and allow it to sit 10-15 minutes to relax the gluten strands before forming. -Grainlady Here is a link that might be useful: King Arthur Flour - Dough Rising Bucket...See More
User
2 years ago
amykath
2 years ago
Kswl
2 years ago
Annie Deighnaugh
2 years agoamykath
2 years agoamykath
2 years agoUser
2 years agolast modified: 2 years agoamykath
2 years ago
terezosa / terriks
2 years agoUser
2 years agoJudi
2 years agoterezosa / terriks
2 years ago
Eileen
2 years agoUser
2 years agolast modified: 2 years ago
Bunny
2 years agoUser
2 years agoBunny
2 years agoJudi
2 years agoBunny
2 years agoUser
2 years ago

Related Stories

APARTMENT LIFEWarm Up Fall With an Apple Pie Party at Home
A pie enthusiast shares a recipe, ideas for pretty crusts, and tips on how she makes the most of her rental kitchen
Full Story
KITCHEN DESIGNA Cook’s 6 Tips for Buying Kitchen Appliances
An avid home chef answers tricky questions about choosing the right oven, stovetop, vent hood and more
Full Story
LIFEHow to Get Along With the Neighbors — and Live Happier at Home
Everyone wins when neighbors treat one another with kindness, consideration and respect
Full Story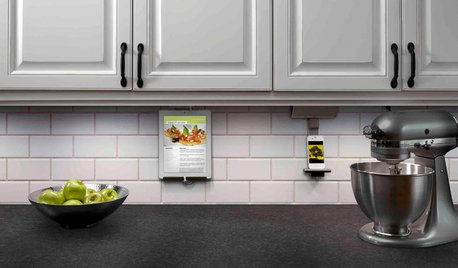
KITCHEN DESIGNHouzz Call: What’s Cooking in Your Kitchen?
Most of us turn to recipes, videos and culinary shows when we cook. Where do you set your cookbook, tablet or TV screen?
Full Story
FARM YOUR YARDHow to Grow Vegetables in Containers
Get glorious vegetables and fruits on your patio with a pro’s guidance — including his personal recipe for potting mix
Full Story
DECLUTTERINGLiving With Less: Do You Have Too Much Stuff?
To help her clients pare back, a professional organizer asks them 3 questions about the things they own
Full Story
WHITEWhat to Know Before You Paint Your Walls White
A coat of white paint can do wonders in one room and wreak havoc in another. Here are tips for using the popular hue
Full Story
HOUZZ CALLHome Cooks: Show Us What You Love About Your Kitchen
What’s your recipe for the perfect cooking- and baking-friendly kitchen?
Full Story
FUN HOUZZHouzz Quiz: What's Your Decorating Style?
Answer these 9 questions to find out what decorating style suits you best
Full Story
KITCHEN DESIGNKitchen Luxuries: The Wood-Fired Pizza Oven
If you love homemade pizza and are (ahem) rolling in dough, a wood-burning oven may be just the right kitchen investment
Full Story
bbstx