


Warm Up Fall With an Apple Pie Party at Home
A pie enthusiast shares a recipe, ideas for pretty crusts, and tips on how she makes the most of her rental kitchen

Homemade apple pies are the perfect fall treat for holidays, family and friend get-togethers or an intimate, cozy night in. Boston baker and pie enthusiast Mackenzie Whiteley gives us some pro tips on making and serving this delicious dessert, along with advice on how to amp up its style.
Whiteley enjoys adding an artistic and custom flair to the crusts of her desserts, which she bakes in a 63-square-foot kitchen in her family’s rental apartment. She fulfills requests for custom pies from friends and others in her community who hear about her baked goods. “Apple pie is my specialty and my personal favorite flavor,” she says.
Whiteley developed a love for baking at a young age thanks to her mother, who was known for her homemade apple pies. “Growing up, I looked forward to those special occasions with the excitement of a child anticipating their birthday. In fact, that’s exactly what I did. Pie, not cake, was the dessert of choice on my special day,” she says.
Whiteley developed a love for baking at a young age thanks to her mother, who was known for her homemade apple pies. “Growing up, I looked forward to those special occasions with the excitement of a child anticipating their birthday. In fact, that’s exactly what I did. Pie, not cake, was the dessert of choice on my special day,” she says.
Pictured here is one of Whiteley’s fall-themed apple pies. “Pie dough can have a peek-a-boo effect with the filling, 3D shapes with braids and weaves or characters and messages. The sky really is the limit,” she says.
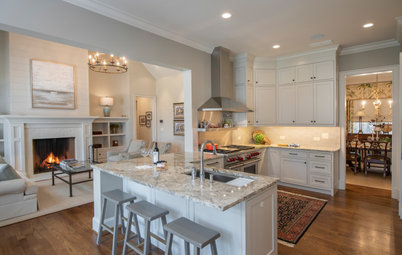
Whiteley’s family of four lives in an 843-square-foot apartment with two bedrooms and two bathrooms. In such a snug rental, she gets creative when it comes to having enough space to create her pie art.
“I don’t store anything on the counter space where I roll out my pies. I need every square inch, so I keep small appliances tucked away in the cupboard,” she says. “I also keep my large serving dishes on top of my cabinets since they won’t fit inside. Since my husband and I are both tall, we can still easily reach those fragile items, and they’re safe from little hands.”
“I don’t store anything on the counter space where I roll out my pies. I need every square inch, so I keep small appliances tucked away in the cupboard,” she says. “I also keep my large serving dishes on top of my cabinets since they won’t fit inside. Since my husband and I are both tall, we can still easily reach those fragile items, and they’re safe from little hands.”
Having a small kitchen means they’re short on storage space, so they added an open shelving unit. This also helps make certain items accessible for their kids, Blythe, 7, and Lucas, 4.
Hooks on one side of the shelving unit and on the adjacent walls hold aprons, a broom, a mop and a step stool. “The collapsible step stool has been a lifesaver. Since the kitchen is so small, bringing in a chair takes up half the room,” Whiteley says. “The stool provides the step up that my kids need without taking up tons of room. The best part is that it is collapsible and hangs nicely on a hook at the kids’ level.”
Find utility shelving
“Everything I know about pie, I learned from my mom,” Whiteley says. “She taught me to never use Golden or Red Delicious apples. They’re not good baking apples. Gala, Fuji, McIntosh, Granny Smith or Honeycrisp all work great.
“It’s just a matter of personal preference,” she adds. “McIntosh is my go-to for pies, while Honeycrisp is my favorite raw. Each kind provides something different to the filling.”
“It’s just a matter of personal preference,” she adds. “McIntosh is my go-to for pies, while Honeycrisp is my favorite raw. Each kind provides something different to the filling.”
Sue’s Apple Pie From Mackenzie Whiteley
A 9-inch pie serves eight (generous slices).
Follow along as Whiteley shares how to put together a tasty holiday pie party in six steps. She also has other home baking tips, including how to speed up the pie-making process and how to warm and serve pie in a way that keeps it from falling apart.
A 9-inch pie serves eight (generous slices).
Follow along as Whiteley shares how to put together a tasty holiday pie party in six steps. She also has other home baking tips, including how to speed up the pie-making process and how to warm and serve pie in a way that keeps it from falling apart.
Step 1: Make Filling and Crust
Filling ingredients
Canning your own apples can speed up the process as well. “My mom would buy apples in bulk and can them. Using canned apples makes them softer, and all you need to do is add the seasoning,” she says.
Filling ingredients
- 6 apples
- 1 cup sugar, plus more for sprinkling crust before baking
- ⅓ cup flour
- 1 teaspoon cinnamon
- 1 teaspoon nutmeg
Canning your own apples can speed up the process as well. “My mom would buy apples in bulk and can them. Using canned apples makes them softer, and all you need to do is add the seasoning,” she says.
Filling directions
1. Peel and slice apples and put them in a large bowl.
2. Add sugar to sweeten, flour as a thickener, and cinnamon and nutmeg for flavor.
3. Mix ingredients together.
1. Peel and slice apples and put them in a large bowl.
2. Add sugar to sweeten, flour as a thickener, and cinnamon and nutmeg for flavor.
3. Mix ingredients together.
Crust ingredients
Family secret: Apple cider vinegar is the secret to the success of this recipe. It helps break down the egg and makes the dough easier to handle. You can substitute lemon juice if you don’t have the vinegar.
“The apple cider vinegar and egg are different from most pie crust recipes but really give it a savory, unforgettable flavor,” Whiteley says. Adding an egg to the dough makes it flexible, which helps in the crust design process.
- 3 cups flour, plus more for dusting countertop and rolling pin
- 1¼ cups salted butter, plus an optional 3 tablespoons for topping the filling
- 1 egg
- 1 tablespoon apple cider vinegar
- 4 tablespoons water
Family secret: Apple cider vinegar is the secret to the success of this recipe. It helps break down the egg and makes the dough easier to handle. You can substitute lemon juice if you don’t have the vinegar.
“The apple cider vinegar and egg are different from most pie crust recipes but really give it a savory, unforgettable flavor,” Whiteley says. Adding an egg to the dough makes it flexible, which helps in the crust design process.
Crust directions
Whiteley bakes with an all-butter crust, so before starting, she lets the butter come to room temperature. “If the butter is too cold, it won’t combine well with the flour, and if it’s too runny, it will make the dough too sticky, so having room-temperature butter is essential,” she says.
1. In a bowl, combine 3 cups flour and 1¼ cups butter with a pastry cutter or a fork until mixture forms pea-size lumps.
Tip: Do not overmix, or your crust will turn out very tough. Do the bare minimum to get it mixed together.
2. In a second bowl, combine egg, apple cider vinegar and water until frothy.
3. Carefully stir egg-vinegar-water mixture into flour-butter mixture until the dough forms a ball. If the dough is too dry, add another tablespoon of water.
4. Put the dough in the refrigerator to chill.
“Working with chilled dough is more efficient than working with room-temperature dough, as warm dough is soft and fragile. If it is slightly chilled, creating unique designs is easier,” Whiteley says.
Tip: Refrigerate dough and filling overnight if you don’t have time to make the pie all at once. Whiteley often does this when making multiple pies at a time to save time and space in her rental kitchen. “I take the dough out in the morning, and it is ready to roll out by the early afternoon.”
Find baking tools
Step 2: Put Pie Together
“After the dough and filling are made, it’s time to assemble, which is the fun part!” Whiteley says.
1. Preheat oven to 400 degrees Fahrenheit (200 degrees Celsius).
2. Divide dough into two balls for the top and bottom crusts. Technically, this recipe is supposed to be enough for two double-crust pies, but Whiteley’s family likes thick crust, so she usually makes one pie and uses any leftover dough to make pie crust cookies.
3. Dust the countertop with flour. Coat your rolling pin with flour as well. Roll out dough to desired size. It should be about an inch larger than the bottom of your pie pan. “If the bottom crust is too small, it’s no problem, as you can easily add pieces and push them into the pan. It will be covered with the filling, so it doesn’t have to be pretty,” Whiteley says.
4. Using a spatula, carefully lay the flattened dough inside the pie pan, letting the edges hang over.
5. With a fork, poke holes in the bottom layer.
6. Add apple filling.
5. With a fork, poke holes in the bottom layer.
6. Add apple filling.
Family secret: Add slabs of butter to the top of your filling for a more succulent flavor.
“Adding 3 tablespoons of butter on top originally was an accident. I think my mom used to stir it in with the filling but forgot one time so just slapped them on top and thought it worked well, so it stuck. Butter makes everything taste better. It’s richer, more savory and succulent. Some people use tart apples to have a light, almost sour, pie. Mine are sweet, rich and full of savory flavor — thanks to the butter,” Whiteley says.
“Adding 3 tablespoons of butter on top originally was an accident. I think my mom used to stir it in with the filling but forgot one time so just slapped them on top and thought it worked well, so it stuck. Butter makes everything taste better. It’s richer, more savory and succulent. Some people use tart apples to have a light, almost sour, pie. Mine are sweet, rich and full of savory flavor — thanks to the butter,” Whiteley says.
7. Roll out second crust and place it on top, cutting off extra pie crust and crimping the edges.
8. If you’re doing a closed-top pie, poke four or five holes to allow steam to vent. “I often use a toothpick in very discreet places, as to not distract from the design,” Whiteley says.
If you’re doing a design like lattice or with cutouts, there are enough natural vents in the design that venting won’t be a problem.
Step 3: Decorate
At this point, Whiteley says, “I then begin painting my canvas.”
“My pie crusts really feel like art pieces to me, and I look at each new pie as a blank canvas. They can be customized for any occasion and used to express creativity.”
One option for a decorative pie crust is to add a first “blank” layer to serve as the background. Simply place the flat, rolled-out dough on top of the filled pie. Then cut off excess dough surrounding the pie.
There are a lot of fun tools you can use when it comes to decorating your pie. Whiteley says, “I use any tool I can think of: spoons, forks, knives, cookie cutters, toothpicks, embossed rolling pins, pie crust design cutters and my fingers! But never scissors. The dough isn’t strong enough. You don’t have to have expensive or multiple tools to create a beautiful pie. There are many designs you can make freehand.”
In addition to regular-size pies, Whiteley also enjoys making personal-size pies, pictured, especially for her children.
“The whole process of making pies was something special. I grew up in Washington, where apples grow abundantly. In the fall, Mom would often grab apples by the box from nearby orchards and work hard to peel, slice and can those ruby beauties. Then, during the cold winter months, she would open one of those Mason jars to begin the magic of pie making. The sweet aroma would soon fill the entire house and instantly made everything seem cozy. Mom also taught us to make pie crust cookies from the leftover dough, and cold pie is a favorite of mine to this day.”
To make your own pie crust cookies, simply cut the leftover dough into strips or other shapes and sprinkle with equal parts sugar and cinnamon. Place on a lightly greased or parchment-lined baking sheet and bake at 400 degrees Fahrenheit for about 15 minutes or until they look done. “Keep an eye on it though. Smaller pieces will bake faster,” Whiteley says.
Find pie and tart pans
“Some artists work with paints and brushes. Others use clay or frosting. My medium of choice is dough, and pie crust is my canvas,” Whiteley says.
“I love creating works of art and designs that cater to each individual. These are my favorite because I know they bring extra joy to the person eating it. Adding a name for a birthday, a logo or a favorite object to a comforting dessert makes it more intimate.”
“I love creating works of art and designs that cater to each individual. These are my favorite because I know they bring extra joy to the person eating it. Adding a name for a birthday, a logo or a favorite object to a comforting dessert makes it more intimate.”
For this apple pie, Whiteley chose to use apples and leaves as a motif in the crust decoration. The three decorative layers add dimension to the design and make the pie much more elaborate than your typical Thanksgiving Day pie.
Step 4: Bake
Baste the crust with water and sprinkle it with sugar. Then bake for 30 minutes.
Family secret: “One of my big secrets is leaving the pie in the oven for 30 minutes after it has baked with the oven off. Once the timer goes off, I turn off the oven but leave the pie inside. This prevents the crust from burning but allows the apples to continue to get soft. You don’t want your apples crunchy.”
Tip: “The baked pie itself can be frozen too. I like to keep a pie in the freezer for last-minute dinner parties, potlucks or company,” Whiteley says.
“Just pop it in the oven for half an hour, and you’re good to go! Or you can eat it cold, and cold pie is my absolute favorite. Just let it thaw for a few hours and enjoy!”
“Just pop it in the oven for half an hour, and you’re good to go! Or you can eat it cold, and cold pie is my absolute favorite. Just let it thaw for a few hours and enjoy!”
Tip: “When reheating pie, always remember to put foil over the top. This will prevent the crust from burning or overcooking. After you have served your guests, put foil on the remaining pie and place it in a warm oven (lowest temperature).”
Step 5: Display
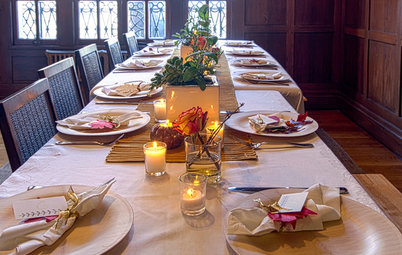
“Pie can be beautiful enough to feature as your centerpiece or complement a tablescape. Since its crust decor can be so versatile, you can really use it to your advantage. It can be a lovely accent to a theme or a perfect opportunity to show off and steal the show.”
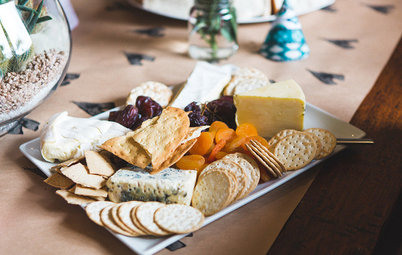
Whiteley decided to continue the apple motif of her apple pie as part of her fall party tablescape. Apples, fall foliage and flowers, and cinnamon adorn the table. Instead of sticking with only the traditional fall colors — oranges, reds and browns — she added blue as an unexpected highlight in her table runner and chargers. Cool apple cider fills the mugs next to the plates of pie.
“Pie can be beautiful enough to feature as your centerpiece or complement a tablescape. Since its crust decor can be so versatile, you can really use it to your advantage. It can be a lovely accent to a theme or a perfect opportunity to show off and steal the show.”
Whiteley decided to continue the apple motif of her apple pie as part of her fall party tablescape. Apples, fall foliage and flowers, and cinnamon adorn the table. Instead of sticking with only the traditional fall colors — oranges, reds and browns — she added blue as an unexpected highlight in her table runner and chargers. Cool apple cider fills the mugs next to the plates of pie.
Step 6: Serve
“If you try to cut and serve a pie straight from the oven, it will usually fall apart. Let it cool down for at least 10 minutes before serving in order for it to have a better shape.
“I have found that frozen pies that have been reheated hold their shape the best. If you’re trying to impress your guests with shapely and picturesque slices of pie, I’d freeze it first.”
Find table runners
Here, Lucas and Blythe get excited as their mom brings out ice cream to serve with the pie.
“The taste, atmosphere and tradition of pies are important to me. My mom was kind enough to share her recipes and knowledge with me, so I could continue the tradition with my husband and two children. Now, I love adding new features to familiar tastes and sharing them with others,” Whiteley says.
“The taste, atmosphere and tradition of pies are important to me. My mom was kind enough to share her recipes and knowledge with me, so I could continue the tradition with my husband and two children. Now, I love adding new features to familiar tastes and sharing them with others,” Whiteley says.
Add ice cream, whipped cream and sprinkles of cinnamon to serve.
“If you’re serving it hot with ice cream — no need to wait! Throw the ice cream on right away and let it melt over the top, creating a creamy, sweet mess.”
More
Jump-Start Your Kitchen With These Minimalist Essentials
Make Your Checklist for Entertaining Season
10 Ways to Get Your Kitchen Ready for the Holidays


The mother of two, homemaker and pie enthusiast takes that sentiment to heart when making her own creations. “I feel that pies are moving toward being as big as cakes and sugar cookies in their realm of creativity,” she says.