


Question on Butcher Block Island Top
Rory (Zone 6b)
2 years ago
Featured Answer
Sort by:Oldest
Comments (7)

Rory (Zone 6b)
2 years agoRelated Discussions
Islands with butcher block tops...love it or hate it?
Comments (6)I'm doing it too! I'm going for a walnut top, either edge grain or plank on a 3x8 island--also with stools and used for prep...but I have decided to waterlox it. Apparently, it's a very natural looking finish...not high gloss at all. With our habit of leaving giant messes overnight after gatherings, I figure it gives a little more protection and I used to have a butcherblock that I actually used for cutting...I loved the look, but once it was well used in areas...it never felt or looked that hygenic! I sanded it down well when we listed the place for sale b/c I knew it would be a problem...however, if you're a big chef, I'm sure you'll appreciate the convenience...as everyone seems to remind us here...go with what you love!...See MoreCraftArt Butcher Block Island Tops
Comments (3)I went with Black Walnut Homeowner DIY pieces from Craft Art. I got samples of Black Walnut, White Oak, and American Cherry. The American cherry was a yellow/red, white oak was medium brown with honey blonde graining, and the black walnut sample was a definite medium to dark brown and I could see part of a dark filled knot. And definitely do the homeowner version. It has any knots filled and comes with one coat of oil already on it. After I bit the bullet and bought it, I was really pleased with the look and color of the Black Walnut that I finally settled on. It was a true walnut and was a warm to dark brown. I didn't need to (or even want to) stain it to get a really nice deep color we were going for. I did go ahead and get the "waterlox sealer/finish" and the "waterlox satin finish" that they recommended in their instructions - and you do need both if you want to make it waterproof and fully sealed. Seriously, their instructions were really helpful - even to someone like me who sort of knows what I'm doing (aka over confident when I shouldn't be, haha I am man enough to admit it). They were written like a... recipe? Had a breakdown of items you need, time frame it takes to actually do and time frame including dry time, then detailed instructions including hints and tips and stuff. Way better than the instructions I found on the crazy Ikea finish that I tried to use on a different project. Things we considered: - What color are your cabinets? Ours are medium to light brown, but I think we may have them repainted to an off white to make the black walnut stand out more in the future. -What color is the paint in that room? I personally think our grey/green makes the walnut look more "cool" in tone - but if the room was the yellow color we almost went with, the walnut would reflect that and pick up those yellow tones and be even warmer looking. -Do you want to match or contrast? Or both?! We have "mullican solid wood - oak" from loews. It is a medium brown but has dark almost black grains. We decided that would work well to compliment the Black Walnut and that the White Oak would make it too consistently yellowish of a tone in the room. This is our floor: I hope that gives ya something to work with. I am certainly not a designer, but now that its all installed and done, we get lots of compliments so that has to stand for something! Ps. My finishing products (the waterlox ones I mentioned) came a couple days before the top did, actually. I had a chance to practice which was really nice. Highly recommend a quick practice run, even if its on plywood or a 2x4, the technique matters on the last coat. Oh and last thing, I was able to find how much product I needed to finish it so I'm including that so you won't have to look through their site: "For a 2 oz. pouch, coverage is approximately 7.5 square feet for one coat. For a pint the coverage is 60 square feet for one coat. For a quart the coverage is 120 square feet for one coat." This is a LOT like what mine turned out like (minus the edge profile): Here is a link that might be useful: craft art DIY stuff - and if you have a contractor doing the install, tell him to watch the install video on there, too. Helped us a lot....See Moreneed thoughs on wood topped island - not butcher block
Comments (39)I just checked the John Boos site. The 72x36 (6'x3') block of 1.5'' maple top is $576. We bought all our Boos countertop from Old World Butcher Block for the exact same price as that on the Boos site, plus a "crating" fee that was worth every penny. I know you said you don't want to cut on it, so I looked at the "varnished" finish as opposed to the oil. (oil is less expensive) We went with (are going with? what is it when the island isn;t installed yet?) Boos maple butcherblock on the island (almost 13 linear feet, in an "l" shape) I LOVE the way it looks. I am so looking forward to using the island as a working space, but I understand your wishes for a clean, non-cut upon space. Still, $3200 for a tabletop is an outrage. Here is a link that might be useful: old world butcher block...See MoreButcher block island top -- Advice needed!!!
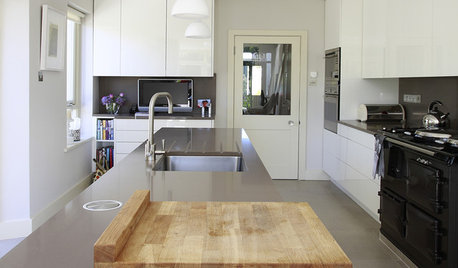
Comments (39)I have an thick end-grain square butcherblock that sits next to the sink and is the non-meat cutting/chopping worksurface we use on an almost daily basis. It gets wiped off several times and then gets a more vigorous cleaning at the end. I have another thinner board I use for cutting meat that is easier to scrub clean in the sink. When I first got the block I drenched it in pure tung oil thinned with citrus solvent. Let it soak in. Put more on. Repeat, repeat. Let it dry until it didn't smell. What happens over time is that the center area where I work the most starts to look "dry" like untreated wood. There's enough tung oil in it that I don't worry about it drying out or splitting but aesthetically it looks like a well-used block. Maybe twice a year I apply a coat of thinned tung oil over the whole thing to keep it sealed. I much prefer the soaked-in protection that the tung oil gives than the surface protection that frequently-applied mineral oil does. So to me there are two considerations: how well sealed is it to protect it from splitting and how does it look. The tung oil will give the best long-term protection but if you use it it will look used. If you want it to look "wet", then mineral oil and/or wax will give that look on the surface....See More PRO
PROStarCraft Custom Builders
2 years agolast modified: 2 years agoRory (Zone 6b) thanked StarCraft Custom Builders PRO
PROHaute Shoppe Studio
2 years ago


Related Stories
KITCHEN DESIGNButcher Block Makes the Cut for Holiday Kitchen Prep
Countertops and cutting boards will likely take a beating over the holidays. These butcher blocks have the chops to perform under pressure
Full Story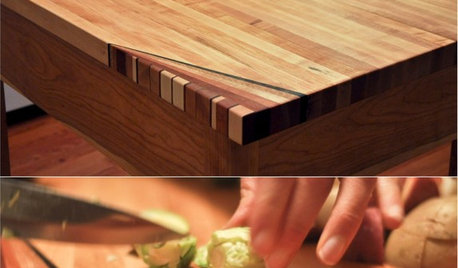
WOODWORKINGHow to Clean and Care for Your Butcher Block
Keep butcher block counters and boards looking sharp as a knife — and sanitized for safe food prep — with this advice from a pro woodworker
Full Story
NEW THIS WEEK7 Smart Ideas for the End of a Kitchen Island
Extend function in the kitchen by building in chopping blocks, appliances, storage and more
Full Story
TRENDING NOWThe Top 10 Kitchen Photos So Far in 2021
Get design ideas for cabinets, islands and other features from the most-saved kitchens this year
Full Story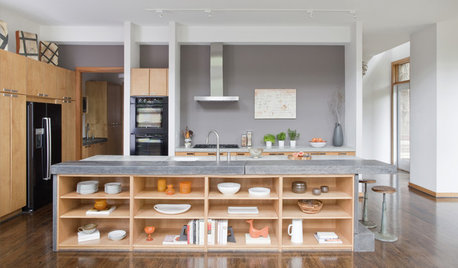
KITCHEN DESIGNHow to Design a Kitchen Island
Size, seating height, all those appliance and storage options ... here's how to clear up the kitchen island confusion
Full Story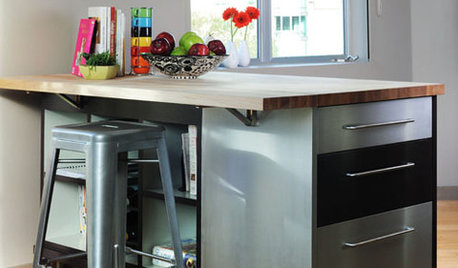
KITCHEN DESIGNSteel Yourself: Industrial Kitchen Islands Are On a Roll
Sleek mobile islands can make traditional built-ins seem downright outmoded. Find the right idea for your kitchen
Full Story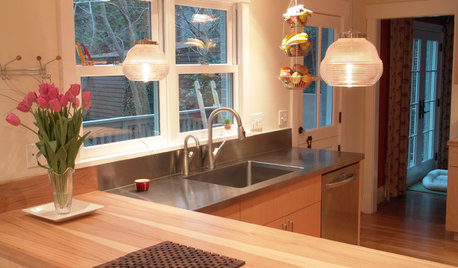
KITCHEN DESIGNKitchen Layouts: Island or a Peninsula?
Attached to one wall, a peninsula is a great option for smaller kitchens
Full Story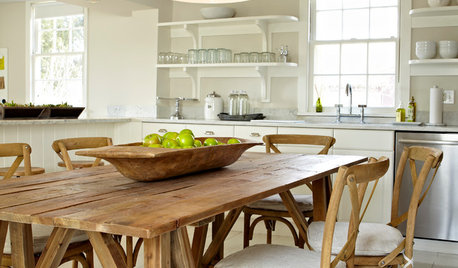
KITCHEN DESIGNGoodbye, Island. Hello, Kitchen Table
See why an ‘eat-in’ table can sometimes be a better choice for a kitchen than an island
Full Story
DESIGN DETAILSA Pro Offers Her Top 5 Function-Packed Home Improvements
Read an experienced designer’s take on remodeling, resale and renovations that just might stand the test of time
Full Story
KITCHEN ISLANDS8 Narrow Kitchen Islands With Function to Spare
Yes, you can fit an island into your small kitchen. These spaces show how
Full Story

Joseph Corlett, LLC