


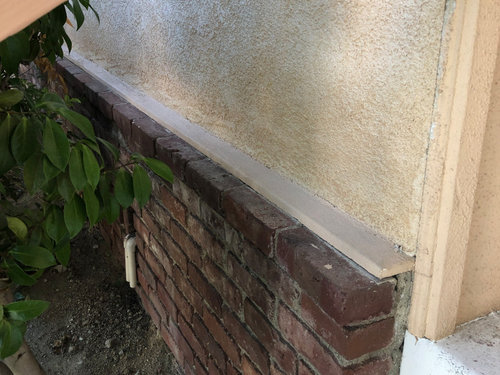
Remove brick wall behind the bushes or put stucco over it??
Kari C
2 years ago
last modified: 2 years ago

Featured Answer
Sort by:Oldest
Comments (14)

Kari C
2 years agoRelated Discussions
Recommend to Fill Gap Behind Bushes
Comments (25)I guess it's time for the "yes, but's". 1) first of all, thank you for explaining about opening up the view of the house. I took a walk around the neighborhood this morning, and (finally) could actually see the difference between those houses with "opened up" landscaping, and those houses looking "all boxed in". 2) I went to the gardening center this afternoon. Yes, perennials are on sale now, but shrubs are still expensive. I definitely have to do a lot of reading (I went to the library yesterday for some books) to see what plants I can consider. I want to plan carefully first. 3) We're going to move the sand cherry and Japanese yew to the backyard next weekend. 4) Reluctantly I will remove the arborvitaes - I'm guessing we'll just try to dig most of the roots out somehow after the trees are down. However, the ugly roof support columns (with the ugly 1960's metal swirls) will be visible until something manages to grow tall enough to cover them up - ugh. 5) I cannot bring myself to take a picture of the step up from the driveway - it is just too hideously ugly - old carpeting on the uneven concrete porch, ugly railing, ugly driveway, etc. When I can afford to change it, that porch and railing have got to go, but who knows when that will be. 6) I can demolish the buckthorn, but I have to leave a bed there. There is a gas pipe directly under that side of the house, and I can't dig down to get out the buckthorn roots, so we'll just lob it off as close to the ground as we can and put some plants there to hide any little bit of stump still left. 7) Here is a closer shot of that side of the house. The yellow lines show the arborvitaes of the neighbors - tall past the point of no return. The orange line shows their lilac almost touching my roof (which is fine with me, I like lilac). The white line shows my boxwood and the blue line shows yet another arborvitae. If we can get these 2 (the white and the blue) out without the gas pipe giving us a problem, we will do so. But a path has to stay clear on that side of the house so the guy can read the meter, so no, I can't extend the neighbor's flower bed. The green line shows the 3rd arborvitae. We were wondering, seeing as you've drawn in a tree for that side of the house, perhaps that arborvitae should be left in place to satisfy that requirement? Or should the blue, the white, and the green all go? As always, thanks for your continuing help....See MoreRemoving a window and patching stucco
Comments (1)I'm just a housewife, not an expert, but here is how I have patched my stucco. Use regular wood exterior sheeting to fill the hole. Attach two layers of 30# roofing felt. The one closest to the wood helps keep the wood dry, the second layer needs to be wetted down when you apply the stucco and is crucial in getting the stucco to cure properly. Over the felt attach galvanized self-furringt lath with fasteners no more than 12" on center. I'm assuming you have the same stucco recipe as mine. For the scratch coat use 1 part portland cement, 1 part hydrated lime and 2.5 to 4 parts sand. For the next, brown coat use 1 part portland, 1 part lime and 3.5 to 5 parts sand. For the finish coat use 1 part portland, 1 part lime to 1.5 to 3 parts sand. The finish coat is pretty thin and more just to texture the finish to match the rest of you stucco. I use a wallpaper brush to scratch up the first and second coats. Make sure you really wet down the surface before you apply each stucco layer and to keep it misted so it doesn't dry out too fast. If you are trying to match the exterior texture I would make a practice board and try some different techniques. Some old stucco's have pebbles in them but I could never find any small enough to match mine (mine has more of a mica in it). Those were thrown onto the finish coat and pressed in with a broom. When we put on our dormer I just textured with a sponge and broom since it was pretty far away from the older stucco. When we moved the four windows for the kitchen remodel it was on a newer (60 year old) addition and there were no pepples added. I used an sponge to texture the top coat and then loaded up a wisk broom with stucco and slung it at the wall for texture. It worked well. If your stucco is unpainted you can try to match the color by adding pigment but you need to do a tester board for this and to allow up to 60 days for the color to cure. If you are matching a painted stucco then prime the new stucco twice (after curing) and then paint the patch. Then paint the whole wall of the patch if possible. New stucco absorbs a lot of paint and if you don't get a few layers on the stucco will look different that the rest of the wall. DO NOT use house wrap (or stucco wrap) under the stucco. It will not dry out properly and it will lead to problems down the road. The Portland Cement Association has some stucco tips on their website and you should read those. I would also recommend that you verify what kind of stucco you currently have. You will have a failure in your patch if the composition is different than the existing siding. The site listed below should help with that. Here is a link that might be useful: how to figure out your stucco base....See MoreRemoving Window from Stucco
Comments (11)WindowDog, You're absolutely right. I do tend to over think things and explore every option before starting a project. Since I don't know much about windows, I'm trying to avoid making a mistake. It drives my husband crazy. He thinks we should leave the old window in and just proceed with tiling the shower which includes tiling around the window. If I understand correctly, what you're suggesting is to order a window with a block frame rather than a fin. The low expansion foam with reseal the window and re-stuccoing won't be necessary? It sounds like a good plan. We'll discuss this with the guy who will be dong the install and let him deal with it as you suggested. Thank you. Windowswashington, Thank you for your suggestion. We did consider the retrofit windows but our windows (especially this one) are too small for this option to work for us. We would lose too much glass. We plan to replace this window with one that is about six inches taller....See MoreMost durable & low maintenance: Hardie, brick, or stucco?
Comments (59)One shouldn't compare durability of old brick buildings to current residential practices. Old brick is usually structural, three bricks thick or more. The weakness of brick is in the mortar and old professional work usually featured better sands with sharper, more varied particle sizes. Masons these days usually just stick with cheap, readily available masonry sand. Unfortunately, masonry is a dying trade. The biggest problem is that most residential brick work is a masonry veneer, covering wood-based construction. Along with stone and stucco, most brick veneer projects use inadequate vapor barriers and flashing. The masonry may look great from the outside, but the finishes are hiding mold, mildew and deterioration of the wood structure. Sometimes, this happens surprisingly fast. Masonry is considered a moisture reservoir cladding. It will soak up moisture from rain or sprinklers and send it towards the inside as the sun comes out. This makes it a more risky cladding than wood, metal, composite or vinyl. Masonry is one of my favorite exterior finishes but it takes extra effort than what is common in current construction practices. If you go with masonry, ensure your construction team understands the details like minding the gap and weatherproof window installations. When I was in Germany, there was a lot of troublesome renovation happening to the very old timberframe structures that had been stuccoed during times when stucco was considered more fashionable. The lime stuccos inhibited the drainage and drying of the wood, speeding up the timbers deterioration....See Morehappyleg
2 years agoKari C
2 years agoKari C
2 years agoKari C
2 years agoKari C
2 years ago
elcieg
2 years agoKari C
2 years agopartim
2 years ago

Related Stories
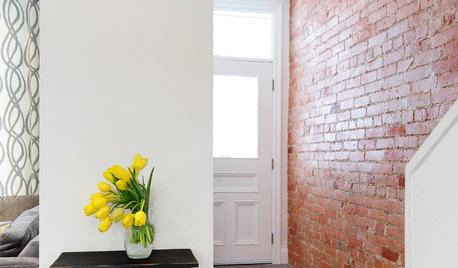
BRICKHow to Make an Interior Brick Wall Work
Learn how to preserve, paint, clean and style a brick wall to fit your design scheme
Full Story
MORE ROOMSWhere to Put the TV When the Wall Won't Work
See the 3 Things You'll Need to Float Your TV Away From the Wall
Full Story
ECLECTIC HOMESMy Houzz: Colorful, Eclectic Style in an 1890 Kentucky Brick Home
A musician and a designer get creative with the walls, lighting and flooring in their live-work house
Full Story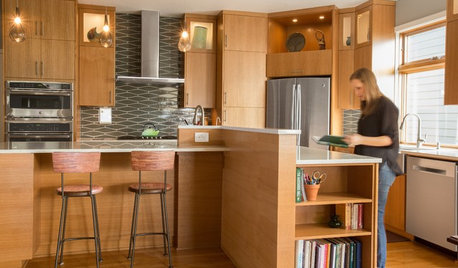
KITCHEN DESIGNWarm Midcentury Vibe Takes Over a 2002 Spec Kitchen
A family puts a spin on their lackluster kitchen to give it a contemporary-meets-midcentury modern personality
Full Story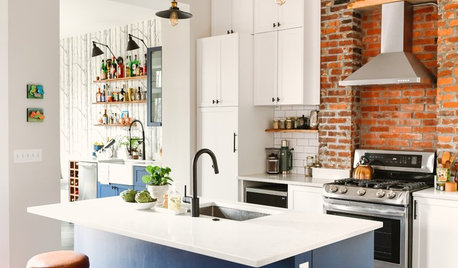
KITCHEN OF THE WEEKKitchen of the Week: Industrial Style in White, Blue and Brick
A major renovation uncovers an old fireplace that forms a warm focal point in this lively Pittsburgh kitchen
Full Story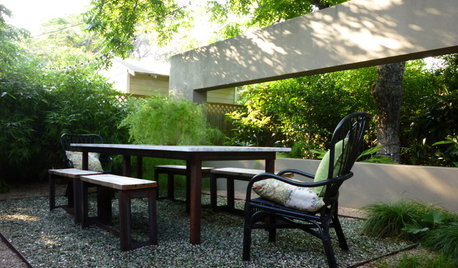
LANDSCAPE DESIGNIn Austin, a Backyard Wall Provides More Than Privacy
Designers solve a common privacy problem — and create some unexpected play — with a clever screening solution
Full Story
GARDENING GUIDES6 Plants That Beat Butterfly Bush for the Wildlife Draw
It's invasive, a nonnative and a poor insect magnet. Check out these better alternatives to butterfly bush in the garden
Full Story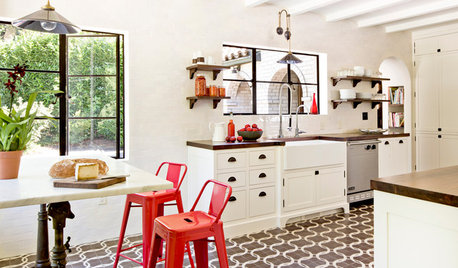
REMODELING GUIDESWhat to Know Before You Tear Down That Wall
Great Home Projects: Opening up a room? Learn who to hire, what it’ll cost and how long it will take
Full Story
REMODELING GUIDESYou Won't Believe What These Homeowners Found in Their Walls
From the banal to the downright bizarre, these uncovered artifacts may get you wondering what may be hidden in your own home
Full Story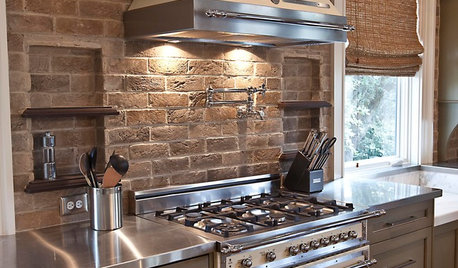
KITCHEN DESIGNYes, You Can Use Brick in the Kitchen
Quell your fears of cooking splashes, cleaning nightmares and dust with these tips from the pros
Full Story


apple_pie_order