

Tools - well used
5 years ago

Featured Answer
Sort by:Oldest
Comments (6)
Related Discussions
These Tools Are The Strongest I Have Used
Comments (11)I think Craftsman is still a great deal for the homeowner type. The Craftsman liftime warranty is not the only one available. But I have never had a hassle trying to exchange something at Sears (2 times). I would rather not go through the hassle of any of the other manufacturers, especially an HF special. Kobalt tools through HD might be worth a try. Ridgid through HD also seems to be a good deal. Snap-on is of course cadillac but too expensive and not enough need for me to buy them....See MoreWhat Buy For Ridding Yard of Deep Piles of Leaves/Tree Debris
Comments (3)If this was my yard, this is what I would do. - Cut down all unwanted trees and remove unwanted/dead branches from the remaining trees. - Rent a stump grinder and totally grind all stumps and large branch roots - Use garden rakes to rake up all remaining debris. - Arrange for a disposal box to be dropped off by a private hauler and then put all the above materials into it. Call the guy back and have the box removed. However, I would be inclined to rent a tiller and just till all that wonderful humus right into the soil. Then I would rake off any debris while levelling out the seed bed. Maybe a neighbour has a wood-burning stove or fireplace and would be happy to take away all the wood from the trees. The small branches can be cut up, bundled and put out for collection. All of this depends on budget and other factors. If the yard is full of shallow tree roots, then tilling might not be in the cards. Leaf blowers are rarely effective on wet, decomposing leaves so you might find one of those to be a waste of money for this task. This is going to be a labour-intensive task unless the tiller suggestion is viable....See Moreplanting in difficult soil - what tool should I use?
Comments (6)I have a 3' tire iron in the same place in my garage forever that just plows through clay tough soil to planr and for tough weeds and this is how I get the biggest rocks from deep in my gardens which I had alot when I was planting my rose beds or digging up old grass. Even the sharpest shovel won't get into that but I do have a pitch for that has helped me on many occasions especially with deep rocks which you have way down that eventually stunts the growth of everything. After digging the holes or just loosening the soil I ammend that soil with SuperSoil Ammendment and since my clay soil is such a hatd mess also mixed this with Supersoil Cactus some used coffee grounds and whatever else you have laying around but the Supersoil really has everything and this will keep the ground so nice for a couple of years till it begs for that again but it's usually fine and even weeds aren't as difficult to pull as in the past. Amazing amount of worms just love this mixture so you'll get great blooms. So grab the tire iron from your car or get on for your very best tool ever because it won't bend and is always sharp and heavy to get into those nasty grounds....See MoreDo you use tools in your bin?
Comments (14)Interesting discussion...I use most of the fore mentioned tools however a bit differently than most of you. The hand fork (cultivator tool) is a must for any vermiculturist, and you need not worry about harming the worms...they are tough enough to withstand all sorts of rough treatment, and believe me I've done them all in the past 50 plus years. I use a glass bowl blender to feed worms in my four indoor plastic bins, and trench alternating sides of the bins when feeding. The fork is used to incorporate peat moss, coffee grounds and the blended peelings, etc. Although worms do not like to be bothered, I do a thorough mixing of one side of each bin when feeding leaving a couple of inches on the bottom undisturbed. The bottom couple of inches is a good place to put some corn cobs which the worms really like for depositing their eggs. The kitty litter scoop and a plastic window scraper are used to remove the top layer of "spent media" as I prefer to call it. By using a florescent light fixture above my four indoor bins I get a half inch layer of this ready made germination or potting mix each time I feed my worms. This may not work for some of you since your media may be a lot more moist than mine. Worm activity on the sides of the bin or top cover (which I don't use) would negate this method of removal of the the spent media. I replace the removed, spent media, with soaked peat moss using the rubber kitchen gloves and a six inch aquarium net to ring out as much of the acetic water as possible before adding to the bins. Using a five gallon pail to soak your media weather peat moss, choir, cardboard, newspaper, etc., helps remove some of the impurities which your worms will appreciate, and it will allow you to control the correct amount of moisture content for mixing in with your vermicomposting media. I use a 1/4 mesh framed screen to grate my spent media, and a larger version for my six sunken raised beds which also serve as outdoor vermicomposting in the fall and winter months. Grating this material makes it really easy to work with when filling cow pots for garden seedlings, or larger potted plants like peppers. I was vermiculturing well before plastic tubs came along and ultimately switched to vermicomposting for gardening, The 18 gallon RubberMaid tubs (without holes drilled in them) are now by far my favorite means of indoor vermicomposting. I know many of you have the fancier versions which produce pure castings in a shorter amount of time than my methods, and there never seems to be enough of this material for all the things we like to plant. I have about 7,500 sq ft of garden area and I go through a lot of vermicompost each year, so I use the simplest and least expensive means and methods possible for my gardening operations. As a side note thirstypotato, I use a great deal if my outdoor vemicompost (aged cow or horse manure, grass clippings, ground cardboard, etc.) when planting my seed potatoes. I have six-60 ft rows for potatoes which are planted in trenches dug with a Mantis tiller and plow attachment. After trenching I use a post hole digger to make holes about a foot apart in the bottom of the trench where the seed potatoes are deposited. Then I mix some of the top soil with the outdoor vermicompost and back fill the trenches. I also dig 18 inch deep and wide holes for squash, cucumbers, pumpkin, and tomato transplants using the same composition for backfilling these holes. So as you can see there is never enough of this wonderful material to go around. But we can all thank our worms for making vermicomposting 17 times faster, and 4 to 5 times richer than just plain composting....See More- 5 years ago
 5 years ago


Related Stories

APARTMENTSHouzz Tour: Well-Loved, Well-Used and Homemade in Denmark
The art, the heirlooms, the jeweler’s castoff display case — everything in this family’s apartment has a story
Full Story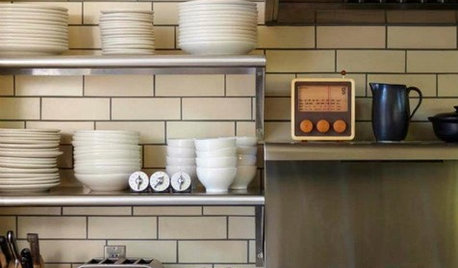
KITCHEN DESIGNCreate Your Own Checklist for a Well-Stocked Kitchen
Personalize the kitchen with your own must-haves from our list of top cooking tools, small appliances, pots, pans and more
Full Story
KITCHEN DESIGNPlain-Sight Storage for the Kitchen Stuff You Use Most
Turn essential cookware, tools and even spices into design assets by displaying them out in the open
Full Story
INSIDE HOUZZCover Your Floor in Virtual Tile Using Houzz’s Enhanced App
The updated View in My Room 3D tool lets you virtually cover your space with tile to see how new flooring would look
Full Story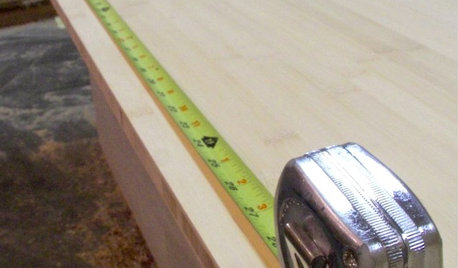
WOODWORKING7 Must-Have Measuring Tools for Woodworking
Whether you're a newbie DIYer or building cabinets from scratch, using the right woodshop tools makes all the difference
Full Story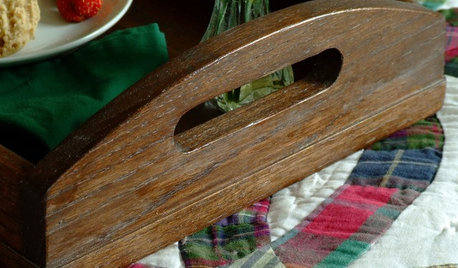
DIY PROJECTSGet a Grip: Create Handle Openings With Just 2 Tools
Show off your DIY skill by cutting a custom handle opening in a tray or furniture piece, using a drill and a jigsaw
Full Story
ORANGEColor Guide: How to Use Yellow Ocher
Earthy and warm, this ancient color evokes the sands of time as well as speaks to modern decorating sensibilities
Full Story
INSIDE HOUZZFind Products for Your Home Using Visual Search in the Houzz App
This tool helps you match furniture and accessories you see in the real world to similar products you can buy on Houzz
Full Story
DECORATING GUIDESHow to Use Mirrors for More Light and Style
A well-placed mirror gives a room sparkle, surprise and a bright, open feeling. Here are 15 clever ideas to try in your own house
Full Story
HOUZZ PRODUCT NEWSVideo: Houzz Pro Mood Boards Tool Helps You Share Design Ideas
Communicate your vision for a project to clients and help close leads with easy-to-use mood boards that save you time
Full Story0


bbstx