


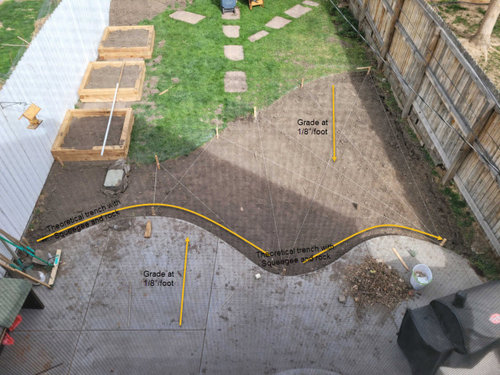
Drainage issue with Patio Extension
3 years ago
Featured Answer
Sort by:Oldest
Comments (6)
 3 years ago
 3 years ago
Related Discussions
water drainage issues
Comments (9)dunno to me thoughts of rising damp come to mind, when water sits around for so long that usually means the water table is quiet high, so literally the foundations of the house are sitting in constant water. putting a pond in might give the appearance of the visible water disappearing, but it probably won't take the issue away. now a french drain may work so long as you have an area lower area to feed the run off to, not the neighbours property. me i would be more interested in what a structural engineer might say? actually for me the attractive price and the lay of the land ie.,. is this block the lowest one around would have me walking away. if it is water table an extensive expensive french drain may not give the results desired. might be time to walk away? len Here is a link that might be useful: lens garden page...See MoreSoggy backyard with grade/drainage issues
Comments (26)If your main issue is standing water after it rains, you may want to consider the EGRP® system. It allows rainwater to travel straight into the ground, preventing any standing water from building up. Through the use of the EGRP® system, infiltration is enhanced by moving water more effectively and efficiently through the soil matrix and into the water table. Additionally, the EGRP® system helps re-balance groundwater conditions by establishing new ways water can move to, and through, the soil. To learn more about it, you may wish to search Parjana Distribution on Google and you will find a number of articles on how the EGRP® system was able to solve standing water issues. Please visit parjanadistribution.com to find out more information or feel free to get in contact with us by calling (855) 727-5262 or send an email to us at sales@parjanadistribution.com....See MoreDrainage Issues in Back Yard - French Drain
Comments (81)Dead branches on the Japanese maples. indicate that they were unhappy sometime in the past. No way, without a complete history, to know why. When arb foliage thins, it's not coming back. Doesn't matter at the bottom, back sides ... where it can't be seen. I've not heard of that artillery fungus before. Plants are phenomenal! I think from a ladder, using the pole saw, you can remove 1/3 of the limb at a time. If you used the pole chain saw, you'd cut through too quickly and instead of folding, it would drop wherever and whenever. You'll need to call a pro if you gauge it be too risky. The two Jap. maples in the recent pictures look like they may not be getting enough light. One looks like it suffered from the transplant operation. In transplant, there is always some risk. One just tries to do the best they can and hope for the best. For a transplant to elsewhere in the yard, first dig the receiving planting hole. At the plant to be moved, use a drain spade (long straight shovel -- I'm sure you have one :-) to cut around the tree/shrub, with it ending up as if you've cut it out of the ground using a cookie cutter. I usually go completely around 3 times, trying to make sure that all roots are cut. You'll want the cut line to be a circle that is enough distance from the trunk(s) that the resulting rootball is large enough to hold enough roots that the plant can live ... but not so large that it is too heavy and unmanageable, as soil is very heavy. You'll also want the shovel to be at an angle so the rootball can be extricated and is not so heavy. After you've used a drain spade to cut the sides of the rootball, you'll want to use a shovel, possibly two located at opposite sides of the circle, to gently pry the rootball from the surrounding soil. There may be roots connected at the bottom center. You'd need pry up with one shovel, while using the drain spade to stab under the rootball, trying to sever the roots. The main objective while performing the aforementioned operation is to NOT break up the rootball that is being removed from the ground. You want it to come out of the ground in one whole chunk, with the plant in it. Have a tarp or old sheet ready next to the hole to set the plant on, being careful not to break the rootball. It could either be carried by two people or set in a wheelbarrow and given a ride to the new location. I wouldn't drag it on the ground unless going slow and careful to a destination that was very close, as moving across bumpy ground will usually shake the rootball apart. When you get it to the new location, adjust the soil level of the planting hole to bring the thickness of the rootball to the right height (same as it was growing before or slightly higher, as there may be a little settlement.) Before backfilling, rotate the rootball for the tree's best appearance. If this is done during the growing season, I would add a handful or two of fertilizer to the planting hole/backfill soil. And trim the tree trying to reduce its foliage (so as to balance with the roots that have been removed. This would be removing any bottom branches that don't need to be there anyway, and as an overall haircut of the top portion....See MoreMiele plumbed steam oven drainage issue
Comments (8)>Does the proposal from the plumber make sense? No, not really. See below. >Because the water from the steam oven is so hot, I assume the extension has to be copper hose. Correct? The install specs I've seen for Miele CSO ovens always state "Only genuine original Miele hoses can be used with this appliance." And "Do not shorten or cut the supplied drainage hose." This clearly means do not use your own supplied copper tubing. A few things you wrote don’t make sense, probably because not all details are listed. The main thing is how you phrased what the plumber told you. Did the plumber a.) “suggest” this high loop after looking at your setup? Or b.) did he review the installation specifications and then “suggest” this? Based on what you posted my guess is he did not look at the installation specifications. I do not see that ‘high loop’ as satisfying the installation requirements and specifications. Here’s my suggestion: Get both of these documents (from the mieleusa.com website) for your exact oven model: a.) Operating and Installation Manual, b.) Specification Sheet. These are two different documents, and depending on the model and model year may use use slight variations on the document name. The first document is about 200 +/- pages and you want the section on drainage connections. The second document will be about 20 +/- pages and it will also have a section for drainage connections. Preferably find a different plumber than the one you talked to above. Tell the new plumber you have a problem with the drain connection on a high-end plumbed in steam oven, and you want to employ him to review the specifications for the oven and tell you if the plumbing on the install is done according to the manufacturer’s specifications. Because you suspect it is not. If new plumber grumbles or resists “we don’t need to read no specifications…” find another plumber. Good plumbers who do kitchen and bath remodels are used to researching things like this and will have no problem doing so. If the install already meets the specs and you still have a problem then it’s time to contact Miele service. Last point, suggest you question who ever designed your arrangement to find out if he/she followed the manufacturer's specs (it sounds like they did not), and if not why not? Isn't that what you paid him/her for? Why all this talk of and fuss about manufacturer’s specifications? Because no matter if you are talking basic drywall, regular old concrete, hardwood flooring, roofing and rain-gutter systems ... or multi-thousand dollar hi-tech ovens, having something installed correctly -- to exacting manufacturer specs -- is the key to long life, to full warranty coverage, and to minimize failures. Short translation: If you want your oven to work correctly make sure you follow the manufacturer’s installation specs....See More 3 years ago
- 3 years ago
 3 years ago
Related Stories
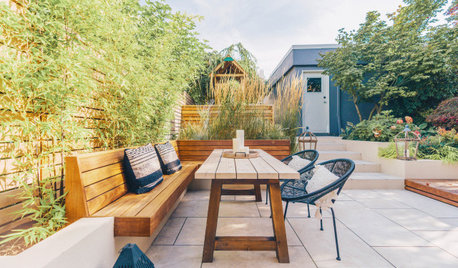
LANDSCAPE DESIGNPatio of the Week: Zones Create an Inviting Yard for a Family
A landscape design-build pro preserves existing trees while creating outdoor rooms and solving drainage issues
Full Story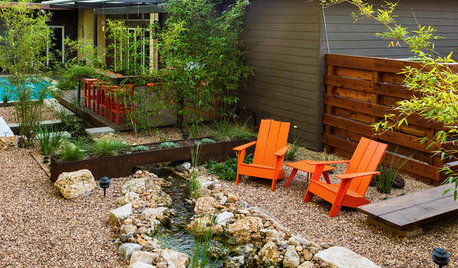
LANDSCAPE DESIGN4 Gardens With Creative, Earth-Friendly Drainage Solutions
See how designers have made the most of site conditions to manage runoff, catch rainwater and more
Full Story
MOST POPULAR10 Lounge-Worthy Patios, Porches and Decks
Little touches like lighting and a cushy spot to sink into can transform any outdoor space
Full Story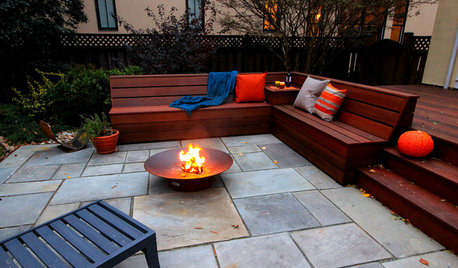
BACKYARD IDEASWhat to Know About Installing a Stone Patio
Planning to add a stone patio to your landscape next year? Here’s what to consider before getting started
Full Story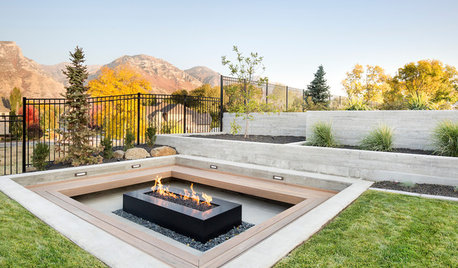
LANDSCAPE DESIGN10 Sunken Seating Areas Bring Drama to Decks and Patios
Boost your yard’s design by lowering a section of seating and gaining a new perspective
Full Story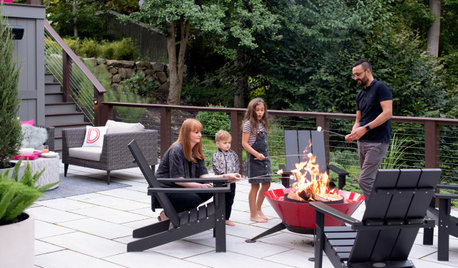
PATIO OF THE WEEKPatio of the Week: New Design Flows With Midcentury Architecture
A landscape designer found on Houzz provides spaces for dining, lounging, movie viewing and making s’mores
Full Story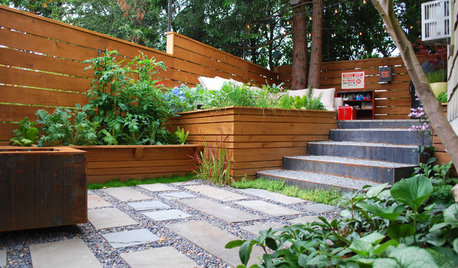
PATIOSPatio Details: Seattle Townhouse Gets a Taste of Outdoor Living
Working with cedar, steel, stone and planters, a landscape architect rethinks a backyard to make it a more inviting space
Full Story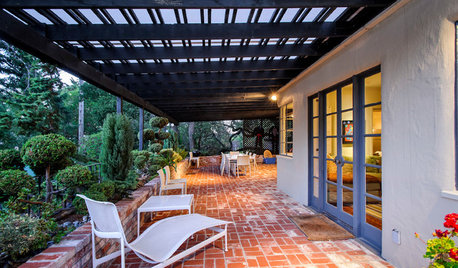
PATIOSLandscape Paving 101: How to Use Brick for Your Path or Patio
Brick paving is classy, timeless and a natural building material. Here are some pros and cons to help you decide if it’s right for your yard
Full Story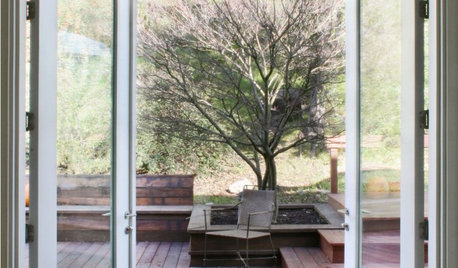
MOST POPULARFind the Right Glass Door for Your Patio
It’s more than just a patio door — it’s an architectural design element. Here’s help for finding the right one for your home and lifestyle
Full Story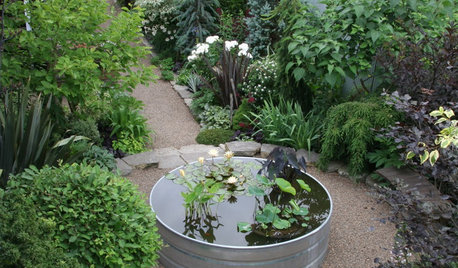
LANDSCAPE TRENDSStock Tank Style: The Garden and Patio Edition
Galvanized-metal water troughs bring hardworking style to patios, plantings, fountains and ponds
Full Story


Donna Collins