


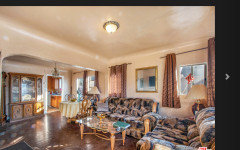
Spanish bungalow walls fixer upper - Smoothing Plaster walls
traciel
3 years ago

Featured Answer
Sort by:Oldest
Comments (16)
 PRO
PROPatricia Colwell Consulting
3 years agolast modified: 3 years agotraciel thanked Patricia Colwell ConsultingRelated Discussions
Can we talk about wall texture?
Comments (24)Interesting thread, thanks for sharing all your thoughts and experiences. My dad was a builder in S. Cal when I was a kid, and we always had walls more like what Kats pictured, with stucco exteriors. Up here in the PNW I've always had orange peel interior walls. My son's house is knock down and even that looks better to me, but maybe it's just the change. In my last house I lived with the orange peel for years and hated it. Finally, I sanded off (and probably ate) tons of orange peel so I could wallpaper. It was an awful job. Then I papered, not all rooms but most. Everyone who visited loved the wallpaper, or at least they said so. I finally really loved the look of my house in every room. Walls that had seemed cold and plastic warmed up like a big ol' hug and people loved being there. When I went to sell, the r.e. folks said the wallpaper had to go. So my son and I steamed and peeled off all the wallpaper (another awful job, including clear up to vaulted ceilings in the LR) and my son sprayed the orange peel back on the walls and then I painted everything in the whole house. The house looked brand spanking new, with new or refinished floors throughout. Turns out the folks who bought the house would have loved the wallpaper as their style of decorating was the same as mine. I probably could have just painted, too, without putting the texture back. Live and learn. Here in this house I have wallpapered only above a chair rail in my bedroom and just went right over the orange peel. It does show through a little but it's not too bad I guess. At least if I remove the paper I won't have to re-spray the walls. I still haven't decided if I want to keep the paper (a very subtle thin sage/white Ivey Leage stripe). I hate the orange peel texture. I just don't like the look of it. But my experience is so limited. Maybe if I had flat walls I wouldn't like them and would decide the orange peel is better, I dunno. At least it was heartening to read that some of you like the orange peel. I don't want to sand again in this house -- at least not whole walls, though if I do faux wainscot I will do the lower walls, and that will be only on the staircases. IF. My daughter's house had horrible old dark fake panelling in the master. I happen to absolutely adore painted panelling. She hates it. She troweled venetian plaster over the whole thing, another awful job. I had wainscot panelled my hallway and family room (a big job) with fake panelling in my last house, in a medium fairly heavy grained wood look. I loved it! I had some dogs at the time that would scratch themselves by leaning against the hall walls and walking down the hall and I was forever washing those walls (and bathing the dogs pretty often). To paint or wallpaper above the panelling one only had half the time, half the work, and half the cost, which was a wonderful bonus since the wainscoting never was painted, didn't show dirt and cleaned easily. When I got the house ready for sale on the r.e. agents' advice, I primed and painted the wainscoting plus all the woodwork in the house stark white. I painted the top of the family room and hallway in Navaho White. To my surprise, the subtle difference in the two colors looked absolutely fabulous! But I'll bet with her dogs the new owner is spending a lot of time with a scrub bucket in hand washing the white wainscot. However... I'm considering white wainscoting here even with my five dogs because I love the look of it. With the bottom panelled it makes the more limited amount of texture on the walls easier to live with and gives the walls a better overall look, IMO. Most of this house has white woodwork and I love the look but I'm forever washing it and repainting it. The rooms with their floor-to-ceiling orange peel drives me nuts. Sure sounds like people have strong opinions on wall texture, so at least I'm not alone in that. lol...See MoreTextured Paint over Plaster
Comments (6)Are you certain it's textured paint? and not textured plaster? We just bought a 1950's house, and all the interior walls are some sort of concrete wallboard (you can't drill through it unless you use a masonry bit) then they have been plastered over with a layer of textured plaster. It's lovely, and looks fantastic--we've painted some of the rooms. One room I wall-papered over the texture and the result is really nice. Other rooms, I've put up wallpaper boarders and they look fine, also. I think you need do more research before assuming it's paint, and not actual plaster. Secondly--you need to sit down with the sellers and ASK questions. They may be able to tell you when they painted--which will give you a good idea whether lead is an issue or not. Don't assume the walls of the house were painted in the 20's. The house we sold was a 1926 house, and back in those days, wallpaper was the preferred wall treatment. We bought it in 1973 and didn't have ANY painted plaster--we had layers and layers of wallpaper on all our walls, but no old paint. But you should talk to your sellers, and find out everything you can about the house, what they've done, how old various things are, if they have any touch-up paint they can leave you, etc. We had a great relationship with both the people we bought from, and the ones who purchased our house from us. I still see them all, and we socialize. One last question--did you request a lead paint test from your inspector? It's usually an extra, and costs more--unless you specifically ask that it be done, the report probably won't include that info. If you're really concerned, might be worth the cost to you....See MoreFixer Upper - Farmhouse of the Gaines family
Comments (55)"Startling lack of reading material, though I guess that is not surprising when her use of books is solely decorative." We don't have many books but I read a TON. My reading is either library books, which are in nightstand drawers or baskets in the living room, or I read on a Kindle or iPad. My husband doesn't read at home because he reads so much for work and he also works 60+ hours a week. Sadly, he just doesn't get pleasure out of reading at home these days. I hope no one would come into our home and assume something negative about us because they don't see loads of books. "I didn't know until reading this thread, that they have no TV--it seems to me that to say, "We're too busy, smart, morally superior, etc., to watch TV, but support us by watching our TV show," is the height of hypocrisy. Sorry if that's too negative." The TV thing came up during an interview (in BHG or Country Living Magazine or similar), when they were asked if their family watched their own show. They said they don't watch their own show at home because they don't have a TV. They didn't go into their reasons for not having one. I don't think not having a TV makes them morally superior, even if they do have a TV show. Because they have a show, they must now start watching TV?? That seems sort of silly, doesn't it? I don't know them, and I don't currently watch their show, although I saw the first season. I think it's surprising and a little sad that this group continues to bash them week after week. Hasn't it pretty much all been said?...See MoreProject: kitchen in a 1945 fixer--what would you do?
Comments (59)Swiss Chard Been there done - physically done the rehab on several houses from late 1890s - 1950s. And most of the posters suggestions are gonna blow past $6000, 8000+++ in a heartbeat, (Have figured out that it seems like most on Houzz have never lifted a paintbrush - let alone actually done the work like messing with a load bearing wall or reframing doors or wiring.) Start replacing those cabinets with even unfinished cabinets and you are already at $1000 for unfinished oak - and a lot of swearing and shimming and "you can 2 of the 3 - straight, level or plumb but not all 3." And dishwasher drawers...... shessh there goes another $600 -800 and that doesn't include the complicate plumbing runs to get to those. Now to come in at the low end of budget: (1) Leave the fridge where it is. Forget opening a load bearing wall and doing some build-out on the other side. Guarantee you are going to run into problems with support and getting the needed wiring in will lead to much -huge amounts of - cursing and "you want me to WHAT" from your husband. You would need to push a 31" deep fridge back 10 1/2" through the wall and into the adjoining room. Building a 6 1/2" deep bumpout (total depth 11 inches) into the adjoining room -and through a load-bearing wall to boot with removing/relocating 3 studs- would be a scary project. (And yeah we have opened up load-bearing walls and done the cross-beam support thing) Plywood walls .....now we are into "Nightmare on Elm Street" territory. You can just build a floor-ceiling wall on the open side of the fridge where it is- makes it look built-in and breaks it off from the dining room. Maybe there is room in the laundry for the fridge. Hard to tell how the laundry room size but from the one photo, it looks like there is no room to take up 11" of floor space with a bumpback wall - probably not enough room for fridge either unless there is (a) space across from the washer/dryer or (b) you go to a stackable washer/dryer setup or a clothes processor (only thing I have used for 15++ years -love it.) No way to put a fridge in that kitchen. The only space is only 20 1/2 deep and you would come through the back door and in one small step run smack into that 36" wide 31" deep moose sticking out in the traffic pattern. You might have been able to squeeze in counter-depth fridge there as it would only have stuck out 4 or 5 inches but to get one not more than 25" deep and 19 cu ft or more is way way way expensive - like over $7000. (2) To the left of the sink, you CAN fit an 18" Dishwasher if that is at least an 18" cabinet - just have to remove the shelves and the kickplate and face frame. An 18" DW is actually more like 17 1/2 - it is called an 18" because it needs an 18" cutout. (3) Leave the cabinets alone -just refinish. (a) You could give them a sand and restain and use real varnish (not poly) to seal or paint and seal with real varnish (no need to sand - just use Zinnser BIN or 123) (b) You can dress up the front of the cabinets by adding molding. This works nicely - not so tall coming out from the door that it is annoying but adds dimension. http://www.homedepot.com/p/DecraMold-DM-L58-7-32-in-x-17-32-in-Solid-Pine-Wall-and-Cabinet-Trim-Embossed-with-a-Button-Style-Design-10000108/100391978; http://www.homedepot.com/p/DecraMold-DM-L58-17-32-in-x-7-32-in-x-96-in-Solid-Pine-Wall-and-Cabinet-Trim-Moulding-10000107/100392983 If you want to get really fancy, you could add some birch embossings to the cabinet doors. Easy to do - put with some wood glue and small brads. Search for "Birch appliques" http://www.homedepot.com/s/birch%2520%2520appliques?NCNI-5 With a good quality gel stain (Old Village or Bartley) you can get the original doors and pine trim to stain to match. (BTW Old Masters is not that good - it will never get an even match with 2 different woods and Minwax is fit only for the trash bin.) (4) 3'5" wall next to water heater. You still need a home for a microwave. The space is 21 1/2 deep. You can make a pantry/microwave space by doing the following * get unfinished UPPER cabinets which are 12" deep - all big box stores have them. 1 row will make the base and 1 or 2 rows the top (2 if you want to go to the ceiling.) * get some 1x3x8 and some furniture feet (the 4 -4 1/2" bun feet would work.) * make a rectangular frame with the 1x3 to run under the bottom the lower cabinet run. Attach the furniture feet plates and then the feet. *attach the cabinet to the wall. The feet and the countertop will bring it up to 36" high -standard counter height. * top the lower cabinet run with some countertop -you can use plywood or particle board (3/4 " -2 thick) and tile or laminate or cutdown pre-made laminate counter or the concrete thing I describe below. Give the counter a 1" overhang. (Total counter depth 13" * GE makes several microwaves that are 12 3/4 deep. * Put an outlet there so that the microwave plugs in to its side and not straight back * Mount a matching run of upper cabinets above * Top the upper cabinets with a 12" edge-glued board (these are a true 12" - not the "called 12" but really 11 1/2" lumber. Add some molding to the from edge of the edge-glue board so it comes out past the cabinet. Quarter round works or this works http://www.homedepot.com/p/House-of-Fara-5-8-in-x-3-4-in-x-84-in-Hardwood-Panel-Shelf-Moulding-545/203362309 Paint or stain as you like. Now you have microwave home AND more cabinets for storage - a 12" deep pantry. (5) Counter - you have a few low-cost but better looking options than is there. (a) Strip the laminate and tile it. Lowe's has a white or cream 4x4 tile by American Olean for 16 cents a tile. You can use the fancy-schmancy countertop edge tile or you can do the same tile as the top on the front-edge cut so they fit under the counter tile (kind of a brick look pattern) . Probably a good choice - you have very little counterspace and need to be able toput down hot pans. (b) Strip the laminate and relaminate with material of your choice. Figure $60 -180 depending upon what you pick. (c) Strip the laminate. Do 3 coats of feather-finish concrete (sanding with 200 paper after each.) You can leave the concrete or paint it in a stone pattern if you like (lots of videos and instructions on the web for faux marble or faux granite.) Seal the counter with a 2 part bartop expoxy. Famowood Glazecoat works -Home Depot has it. (Just make sure that it is 75-80 degrees right at the countertop while the expoy is setting up - it needs a WARM area like that to set up. Definitely not a project for a winter day on counters on an exterior walls) Stripping the current laminate just means a heat gun and 5-1 painters tool - comes right up (6) Sink - just get a stainless steel. That looks like a standard 33" wide. 10" deep double bowl (50/50) is $107 at Home Depot. If you have an architectural salvage place in your area (Habitat for Humanity Restore or others (we have one called Odom Reusable Building Materials - love that place) check them out for materials. Cabinets will go for $30 -50 and stainless sinks for $25 -35 (And if you get lucky, you can even score a Kohler white cast iron double basin kitchen sink for $60!) BTW if you want to buy more space, dump the tank water heater and get a Bosch Tankless. Hangs on the wall. and is only 18" wide. With a tankless (gerat thing - never run out of hot water) you might be able to move the water heater the laundry and get rid of that closet - and thus add more 12" deep cabinet storage and counter. If you go to a tankless and keep the closet, you can cut down the water heater closet and use louvered door. (At a salvage place that louvre door you show would be about $35 - not the $200ish at a big box store.) (BTW, the picture you have of one door.....uh there is an never-used louvered door here in the garage just like that.....its looking for a home.) Total done like this = UNDER $1400....See Moretraciel
3 years agotraciel
3 years ago
RedRyder
3 years agoUser
3 years agotraciel
3 years agotraciel
3 years agotraciel
3 years ago


Related Stories
BEFORE AND AFTERSHouzz TV: See Recycled Walls and Cool Cassette Art in a Woodsy DIY Home
Walnut countertops join hardwood floors and pieces made from leftover framing in a bright Spanish colonial
Full StoryREMODELING GUIDESConsidering a Fixer-Upper? 15 Questions to Ask First
Learn about the hidden costs and treasures of older homes to avoid budget surprises and accidentally tossing valuable features
Full Story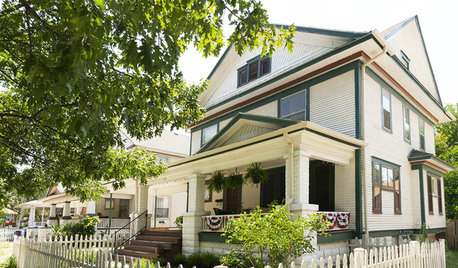
HOUZZ TOURSHouzz Tour: A Fixer-Upper Becomes a Labor of Love
A thrifty spirit and endless vision enable a hardworking Kansas couple to create a charming home on a small budget
Full Story
REMODELING GUIDESYou Won't Believe What These Homeowners Found in Their Walls
From the banal to the downright bizarre, these uncovered artifacts may get you wondering what may be hidden in your own home
Full Story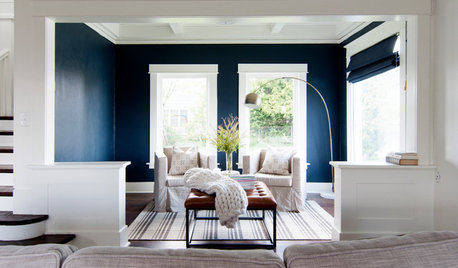
MY HOUZZMy Houzz: Soothing Blues and Organic Style in a 1912 Fixer-Upper
His carpentry skills and her eye for design help a Pacific Northwest couple redo their home on a budget
Full Story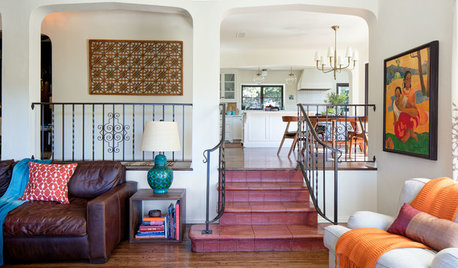
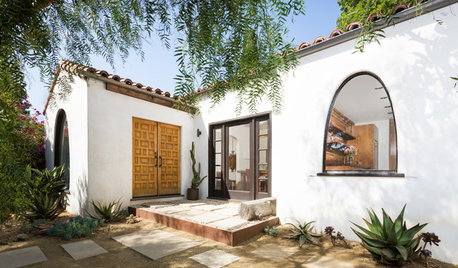
HOUZZ TOURSHouzz Tour: Redo Keeps 1930s Spanish Bungalow Spirit Alive
An architect preserves the Los Angeles home’s period character while opening up the kitchen and improving the layout
Full Story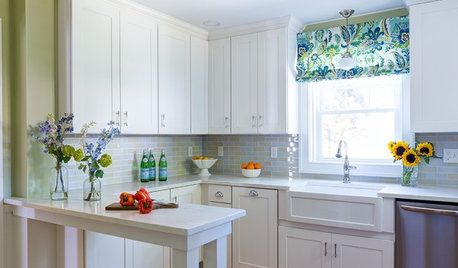
INSIDE HOUZZWhat’s Popular for Kitchen Counters, Backsplashes and Walls
White is the top pick for counters and backsplashes, and gray is the most popular color for walls, a Houzz study reveals
Full Story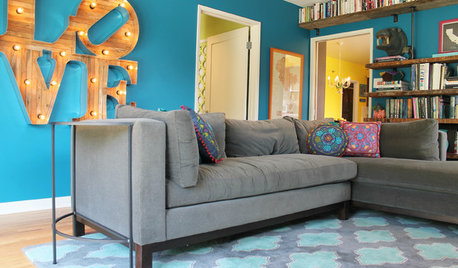
COLORFUL HOMESThe Best of My Houzz: 10 Living Rooms With Wall Colors to Love
Jet black, Meyer lemon yellow, mossy green — these spaces make a statement with bold color
Full Story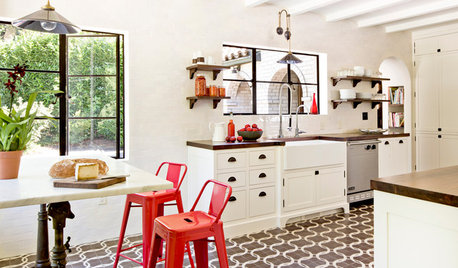
REMODELING GUIDESWhat to Know Before You Tear Down That Wall
Great Home Projects: Opening up a room? Learn who to hire, what it’ll cost and how long it will take
Full Story
REMODELING GUIDESCan You Handle That Fixer-Upper?
Learn from homeowners who bought into major renovation projects to see if one is right for you
Full Story


HALLETT & Co.