


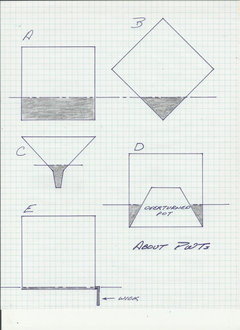
Gluing saucer to pot?
hobby_libby
3 years ago
Featured Answer
Sort by:Oldest
Comments (25)

gardengal48 (PNW Z8/9)
3 years ago
hobby_libby
3 years agoRelated Discussions
Pot saucers, where to find them?
Comments (1)Usually available at reasonable prices at K-Mart in among the Martha Stewart pots....See MorePot Saucer
Comments (3)yup....let the water run thru....roxanne...See MoreTeacup and Saucer Light Sconce Birdfeeder
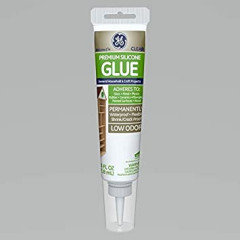
Comments (0)Image by: bouncingpig Teacup Birdfeeder - A Variation Teacup and Saucer Light Sconce Birdfeeder Member bouncingpig tell us how she made her teacup birdfeeder on a tree: The old brass light was found for 50 cents at a garage sale. I removed all the wiring from the light, spray painted it white and then using Pro-Series SF 450 heavy duty sub-floor & construction adhesive, I first glued the teacup to the saucer and then glued the saucer to the light. The light already had holes that worked perfect for the prisms. Then I just screwed it directly into our tree. It was so simple to make! (and it looks great too!)...See MoreAre Plant pot saucers necessary?
Comments (10)My experience with using the saucers has more to do with drainage and staining. Fertilizers and amendments can stain cool decks and patios so any containers standing on cement will have a saucer or some type of catch basin... even if the catch basin is another plant. I'm a big fan of watering-thru. Some plants are on stands and as they drain the water drips onto another plant below. Most of my roses are in containers and they're placed over the root zones for trees so the water drains from the roses to the shrub or tree roots below. During summer I move the containers to the in-ground rose beds and the water from the containers supplements the irrigation system and they all provide some shade and additional moisture retention for each other. The biggest issue I have with using saucers is the mosquito breeding ground the can develop. All of my containers are planted with a layer of weedcloth over the drainage holes then 2-4 inches of loose drainage material, such as redwood bark, pine needles, charcoal or gravel. This allows the soil to stay in, the water to drain out and keeps grubs, cockroaches or whatever other critter to stay out....See More
User
3 years agohobby_libby
3 years agoUser
3 years ago
popmama (Colorado, USDA z5)
3 years agoUser
3 years agohobby_libby
3 years agohobby_libby
3 years ago
tapla (mid-Michigan, USDA z5b-6a)
3 years agolast modified: 3 years agoUser
3 years agohobby_libby
3 years ago
tropicofcancer (6b SW-PA)
3 years agoUser
3 years agotropicofcancer (6b SW-PA)
3 years agolast modified: 3 years agoUser
3 years agohobby_libby
3 years agoUser
3 years agotropicofcancer (6b SW-PA)
3 years agolast modified: 3 years agohobby_libby
3 years agotropicofcancer (6b SW-PA)
3 years agolast modified: 3 years agohobby_libby
last yeartropicofcancer (6b SW-PA)
last year
Tiffany, purpleinopp Z8b Opp, AL
last year
Related Stories
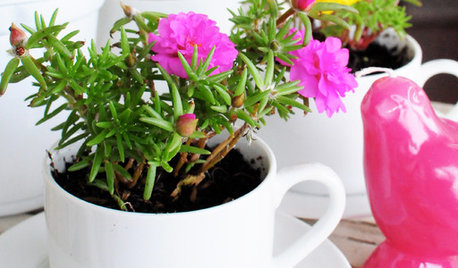
CONTAINER GARDENSDIY Project: Teacup Planter Pots
Add a riot of color to a windowsill, table or balcony by repurposing old cups and saucers as little planter pots
Full Story
SUMMER GARDENINGHow to Water and Refresh Your Potted Plants Over the Summer
Keep container gardens looking lush by cooling them down when temperatures rise and by giving them a seasonal spruce-up
Full Story
HOUSEPLANTSOne Pot, One Big Shot of the Tropics
Give your rooms exotic flair in a single stroke. Tall Kentia palm fits the tropical bill beautifully
Full Story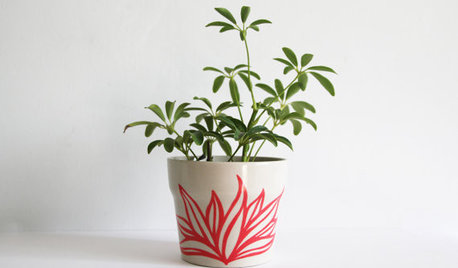
PRODUCT PICKSGuest Picks: Playful Planters and Pots
Get planting this season using pretty pots that move from indoors to outside with ease
Full Story
GARDENING 101Your Healthy Houseplant Checklist
Choose the best plants for your rooms, and then get growing with the right pots, tools and ingredients
Full Story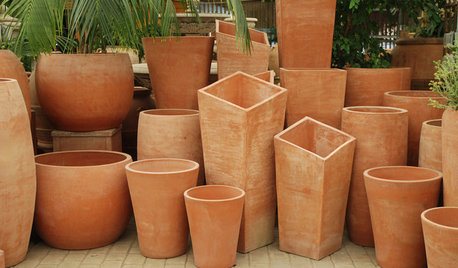
CONTAINER GARDENSBeat the Frost With Natural Terra-Cotta Containers
Here's how to protect your pots during the cold winter months
Full Story
HOUSEKEEPINGShine On: How to Clean Copper
Restore the luster to your copper pots and pans with these tips for using both natural and store-bought cleaners
Full Story
CHRISTMAS TREESWhy You Should Consider a Living Christmas Tree
Potted conifers last for years and can enrich the landscape. Here’s how to select and care for your tree
Full Story
CONTAINER GARDENS10 Ways to Take Containers Beyond the Patio
Enliven your landscape with pots and containers
Full Story
GARDENING GUIDES10 Dazzling Winter Container Designs
Get inspired by these ideas for festive arrangements in outdoor pots and planters
Full Story
tapla (mid-Michigan, USDA z5b-6a)