


Understanding NPK fertilizers
figuringitout
3 years ago
Featured Answer
Sort by:Oldest
Comments (8)

deanna in ME Barely zone 6a, more like 5b
3 years agoRelated Discussions
NPK Fertilizer mixing
Comments (17)That is the point several people have made. We don't know your position and neither do you. You are just making guesses. The only place to start is with a soil test so then you will know exactly what to use and how much. Most soil tests will show that nothing, or very little of 1 or 2 things are required. Keep the products you bought and once you have the soil test it will tell you what and how much to use. If you refuse to get a professional soil test done then the only safe option left is to stick with lots of organic supplements like compost and composted manures, not fertilizers. .Supplements like the Black Cow Composted manure you linked above will provide any needed nutrients without the fears of over-application. But composted manure doesn't need to be that expensive either.Walmart, HD, Lowes and many other stores all offer several different brands of compost and composted manures. Link below is just one example of non-manured compost. Also see: http://www.walmart.com/search/search-ng.do?search_query=manure&ic=16_0amp;Find=Find&search_constraint=0 Also will I have to add this types of organic food every year ? Or one time is good for few years ? Yes you will need to add them every year at least 2x a year. There is nothing you can add one time and be good for years. So I water my garden every alternative day from normal tape water. But I have observed that, if there is a heavy rain, all plants grow really fast. No one should ever water their garden every alternative day. Any experienced gardener will tell you that. Doing so only creates water-dependent shallow rooted plants with poor production. Vegetables require deep much less frequent waterings and only when they need it, not when it is convenient for the gardener or on some sort of fixed schedule. But not all vegetables require the same amount of water nor do they all require watering at the same times and the needs vary greatly depending on the weather and the size of the plant and the stage of growth it is in. You need to learn how much water each of your vegetables require on a weekly basis at each stage of growth. Plants appear to perk up from rain due to all the extra nitrogen in the rainy air. Your tap water is no different from most anyone else but the pH of the water makes little difference. Hope this helps. Dave Here is a link that might be useful: HD - Mushroom Compost...See MoreFertilizing Seedlings and a Simple Explanation of N-P-K
Comments (0)"When should I fertilize my seedlings?" I begin to fertilize my seedlings a few days after I transplant them. I intially give them a very weak solution of fertilizer.....that's no more than 25% percent strength solution. "Why is the fertilizer applied at a weaker rate?" Plant seedlings are baby plants. We don't feed our own newborn babies steak and potatoes, they get milk which is easier for them to digest. A weak fertilizer solution is easy for the seedlings to utilize, it won't burn their delicate roots. "How do I make the solution 25% strength?" That's easy to do. Prepare your favorite liquid plant food at full strength. If it makes a gallon of liquid food pour off a quart (or four measuring cups) of it into a separate and empty gallon container....this is a great way to recycle a cleaned and washed out plastic gallon-sized milk jug. Add another three quarts of water to it and that will make a gallon of 25% strength liquid plant food. Here's the forumula: 1 quart of full strength liquid plant food 3 quarts of water Mix the plant food and water in a clean container. ===================================================== If you prepare a quart of full strength plant food this is the formula: 1 cup of full strength liquid plant food 3 cups of water Mix the plant food and water in a clean container. ==================================================== "How do I apply the fertilizer?" Give your seedlings a drink with the hose or sprinkler, let them get a good soaking. Don't water your seedlings with a gush of water straight from the end of the hose, you might splash them out of the ground, use an attachment that will give an easy flow of water...like a sprinkler or a shower nozzle. After giving them a drink of plain water give each seedling about a tablespoon of the 25% solution. It's okay if you give them more than that because you've splashed with the jug, it's still just a 25% strength solution. "When can I increase the percentage of food I give the seedlings? About every two weeks give them a higher percentage of food...go to a 33% strength the next feeding, 50% strength after that, and then 75% strength, and then they can get full strength from then on. Here are the other formulas. For 33% strength plant food: 1 part full strength plant food 2 parts water ================================ For 50% strength plant food: 1 part full strength plant food 1 part water ================================ For 75% strength plant food: 3 parts full strength plant food 1 part water =============================== "What is N-P-K?" N-P-K is the set of three numbers that you see on containers of plant food. =============================== "What do they mean?" Those numbers reflect the percentage of the particular nutrient weight per pound of plant food. =============================== "What do they stand for and what do they do?" "N" stands for Nitrogen. Nitrogen is the first number. Nitrogen promotes plant growth above the ground. With plenty of nitrogen a plant will grow quickly and have rich green foliage. "P" stands for Phosphorus. Phosphorus is the second number. Phosphorus is beneficial for healthy growth. It helps a plant grow strong roots, it helps with flower production, and it helps make plants stronger to resist diseases. "K" stands for Potassium. Potassium is the third number. Potassium is neccesary for growing strong plants. It helps makes them stronger to resist disease, it helps to make them less susceptible to damage from the cold, and it helps protect them from excessive moisture loss during dry spells....See MoreGrowing healthy Tomatoes Liquid fertilizer NPK
Comments (1)The biggest limit on good prouction in containers is containers that are too small. It leads to inconsistent soil moisture levels, nutrient deficiencies, BER and blossom drop. Additionally trying to use only organic nutrient supplements in containers is a challenge since there is no soil food web in the container to pre-digest them to a form usable by the plants. The way to get around that problem is to use organic liquid supplements and use them frequently and regularly. Nutrients wash out of the container every time you water so they have to be replaced. There are any number of good liquid organics available but to cover all the primary and secondary micro nutrients you usually have to use 2-3 separate products. For example many will use fish emulsion for the nitrogen and phosphorous needs and add one of the seaweed emulsions to cover the potassium and micronutrients. Check out the many products offered by Planet Natural and EarthJuice to see many of the products available. But you are growing big indeterminate plants so unless you are using 15-20+ gallon containers for them getting good production will be a challange. Dave...See MoreHow to properly feed vegetables in big containers with NPK fertilizer?
Comments (14)It is hard to keep veggies happy in containers when growing organically. In order to create the microherd of bacteria needed to break down organic fertilizers into usable components, what has worked best for me is to carry large chunks of half-rotted wood, along with lots of leaf mold, twigs, sticks, and compost, from our woodland (only after we are very, very cold and the snakes are 'down' for the season, which hardly happened at all last year because the winter stayed so warm). I add tons of half-rotted wood, leaf mold, twigs, sticks and compost to the bottom halves of the containers and then fill them up the rest of the way with a soil-less mix made for containers. Think of it as a hugelkultur in a container, and the need for space for all the half-rotted wood is one of the reasons I use the largest containers I can find. I don't have to add new wood every year as it breaks down at different rates depending on how rotted it was when I gathered it, but I do enrich the soil in the containers from the top down by continually adding new layers of mulch from the top. Adding wood is generally frowned upon by most gardening folks as it ties up nitrogen as it breaks down, but in our incredibly hot and often humid climate, I don't have much trouble with that. Maybe I am adding enough nitrogen to compensate, or maybe it is because the wood is already partially rotted, but my results from the organic containers speak for themselves. I get tons of veggies, herbs, flowers, and some fruit (strawberries) from the containers, and get higher yields now than I did before I started adding woodland 'trash' to my containers. Nothing has improved the performance of plants in large containers more than putting those hugelkultur ingredients at the bottoms of the pots. I've done it for about a decade. I mostly use grass-clippings from our lawn mixed with chopped/shredded autumn leaves as mulch, and sometimes I add layers of compost right in with the mulch. If I have rotted bales of hay, I break them open and 'steal' the black compost from the center of them to use too. All the mulch ingredients break down pretty quickly here in our extreme summer heat, so sometimes I am adding new layers every week or every other week. My mulch isn't a semi-permanent mulch like bark chips, it is a living mulch that is decomposing literally every day (and very quickly) to feed the soil so the soil can feed the plants. The soil in my containers usually has more earthworms and other soil-dwelling critters than the soil in my raised garden beds that have been amended every year since 1999, and the soil in my raised beds has plenty of earthworms and other soil-dwelling creatures. How long any ingredients last in the containers is highly variable depending on the weather. You get different results (in terms of longevity of the woodland trash/hugelkultur material) in a mild, wet summer in a year with 40-50" of rain than you get in a hot summer in a year with 20-25" of rain. Everything breaks down a lot more quickly in wet summers, keeping in mind that what I call a mild summer (for us here in southcentral OK) still has highs in the upper 90s and lower 100s, but a hot summer will have highs in the 100s thru 115s. There are more and more organic fertilizers available in local stores (for me, local extends as far south as Mike's Garden Center in Southlake, TX, because Mike's carries tons of organic products) every year. Even Wal-Mart had a great selection of multiple brands of organic fertilizers this past year. I use a wide variety, but Espoma is and has been one of my favorites for about a decade. When I started using it, I could only get it by ordering it online and having it shipped, so I'd order a year's worth at one time. Then, Mike's started carrying it, and then TSC and Home Depot, and now even Wal-Mart has the Espoma Line. Espoma also has introduced liquid fertilizers that are organic, so that's one more tool in our arsenal. You also can mix together ingredients to make your own organic fertilizer. There's a simple recipe for doing this in the article linked below. Organic Gardening in Containers (Article from Mother Earth News) I also have used a ton of liquid organic fertilizers over the years, including liquid fish emulsion, liquid seaweed, combination products that combine liquid fish emulsion and liquid fish, compost tea, alfalfa tea, molasses tea (and dry molasses as a biostimulant) and even Garrett Juice (which is an enhanced compost tea product). I don't use manure or manure tea at all any more. The constant watering needed for containers daily when the temperatures are in the upper 90s to 100s for three months on end (only three months if we're lucky!) leaches out nutrients quickly, so you have to fertilize often to make up for that leaching of nutrients. It took me about a decade of trial-and-error after moving here to find the right mix of woodland trash and soil-less mix that would hold moisture, break down fast enough to feed the plants, but not break down so quickly that the wood was gone before the end of the summer. I started out with little pieces of rotted wood in the early years, but quickly learned I needed huge pieces (like pieces of wood the size of a human head, or a half-rotted log so big it would barely fit into the molasses feed tub) that would last through the season. There's an old saying that 'heat eats compost' because of how rapidly the high heat/humidity here break down organic materials, and I found that to be very true. I have found it easier to keep the very large containers happy if I put them on drip irrigation driplines. You can set them on a timer, but I don't, since I'm home all day. When the temperature is going well over 100 degrees daily, I water them early in the day if needed, and then late in the day. If the temperatures are 108-110+, I sometimes have to water them in the middle of the day, particularly with indeterminate tomato plants. Thankfully, this has been a relatively easy year for container gardening since the highest temperature we had this summer was only around 106 or 107, and compared to most summers, it was only for a relatively few number of days. Because of our extreme summer heat, which in the worst summers can run from May until October or November, I have set up all my containers in an area where they get morning sun and then afternoon shade. Everything produces better that way than when I had the containers in full sun. In our climate, in the hottest parts of the summer, full sun is too much. I keep shade cloth handy to shade tomato and pepper plants growing in raised beds in the fenced garden from full-sun all day once the worst of the summer heat sets in. By placing the containers at the shady end of the garden, I don't have to shade the containers. I let the shade from the pecan tree that sits west of my garden do that shading for me....See More
nekobus
3 years agofiguringitout
3 years ago
NHBabs z4b-5a NH
3 years agolast modified: 3 years agoNHBabs z4b-5a NH
3 years agofiguringitout
3 years agoexmar zone 7, SE Ohio
3 years ago
Related Stories
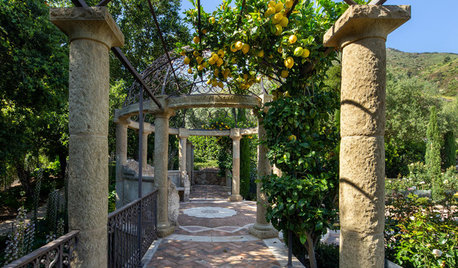
GARDENING GUIDESHow to Keep Your Citrus Trees Well Fed and Healthy
Ripe for some citrus fertilizer know-how? This mini guide will help your lemon, orange and grapefruit trees flourish
Full Story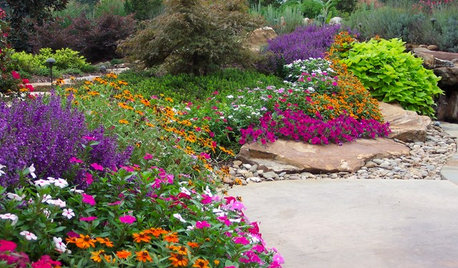
GARDENING GUIDESHow to Feed Your Plants for a Healthier Garden
Here’s what you need to know to choose a fertilizer that best fits your plants’ needs
Full Story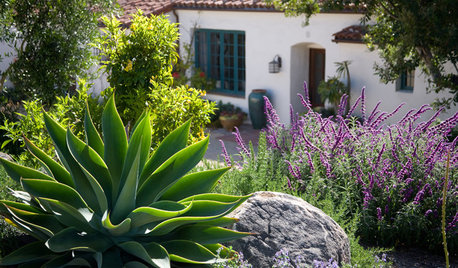
GARDENING GUIDESCommon Myths That May Be Hurting Your Garden
Discover the truth about fertilizer, soil, staking and more to keep your plants healthy and happy
Full Story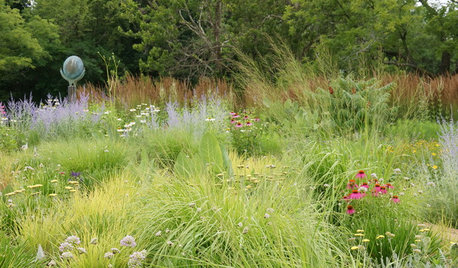
GARDENING GUIDESGet the Dirt on Your Garden’s Soil
Understand how your soil supports your plants so you can ensure your garden’s success
Full Story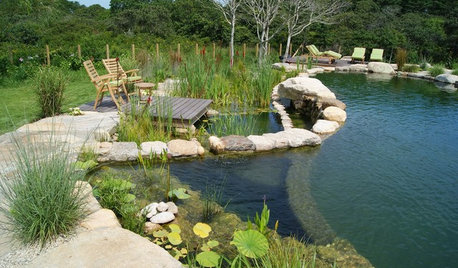
LANDSCAPE DESIGNSecrets of a Successful Water Garden
Relax. Having a water garden is much easier once you understand the basics
Full Story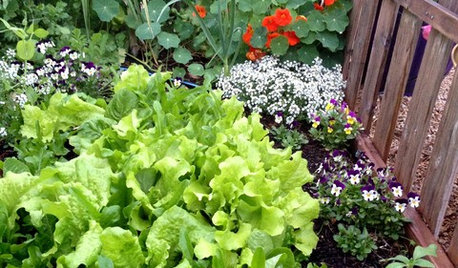
GARDENING GUIDESThe Poop Scoop: Enrich Your Soil With Good Old Manure
Get over the ick factor already — this natural super-ingredient for soil has so many benefits, you'll wonder why you ever went chemical
Full Story
LANDSCAPE DESIGNThe Unparalleled Power of Trees
Discover the beauty and magic of trees, and why a landscape without them just isn't the same
Full Story
EARTH DAYThe Case for Losing the Traditional Lawn
Work less, help the environment and foster connections by just saying no to typical turf
Full Story
EDIBLE GARDENSHow to Add an Apple Tree to Your Edible Garden
Readily available, beautiful and fragrant, apple trees offer four-season interest along with crisp, juicy fruit
Full Story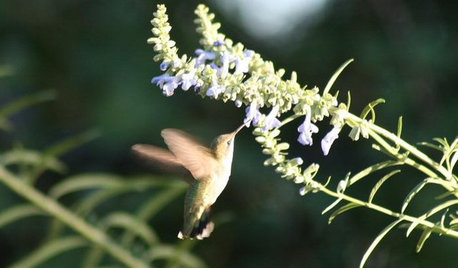
GARDENING GUIDESHow to Find the Right Native Plants for Your Yard
Find plant maps, sale sites and guides that make going native in the garden easier than ever
Full StorySponsored
deanna in ME Barely zone 6a, more like 5b