

Using refrigerated sourdough starter?
6 years ago
last modified: 6 years ago
Featured Answer
Sort by:Oldest
Comments (20)
Related Discussions
Confused with sourdough starter
Comments (7)Ginny, I am very familiar with Carl Griffith's 1847 Oregon Trail Sourdough culture. Mine has been going strong for 3-4 years now. Usually the starter is fed with equal measures of flour and filtered or bottled water. If you continue to feed it every 12 hours, you will end up with way more starter than you need. Following is from the information sheet that I provide when I share either of my starters: The starter will need feeding about every couple of weeks; just add 1 cup warm water and 1 cup flour. When you want to bake bread, take the starter out of the fridge and bring it up to room temperature (this will take 1-2 hours). Then, feed the starter with 1 cup flour and 1 cup warm water and let it sit in a warm place overnight to ferment. The next morning, remove the amount you need for baking. Pour the remaining starter into a clean jar and refrigerate. Wash the previous jar very well. I have only fed my starter with water and flour, no milk, no potato flakes or potato water and only used sugar and the potato flakes at the very first to activate the dried starter. Beat some air into the starter with the spoon or fork as you feed it. If you find yourself with only a small amount of starter left, you will need to build the starter  i.e. donÂt dump a whole cup of flour and water into 2 TB of starter! To build your starter amount: add 1-2 TB of flour and water into a small amount of remaining starter, let sit to work; then add about 1/4cup flour and water, stir well, let sit to work; next feed, add another 1/4cup flour and water, stir well, let sit to work. Let the starter work for a minimum of 2 hours each time after you feed it. Now you have built up additional starter so you can feed with 1 cup each flour and water, let sit to work, use to make bread, or store in fridge. Store the starter in glass or crockery. I mix the bread in my Kitchen Aid stainless mixer and let it rise in the stainless bowl or in a crockery bowl. There is a lot of speculation about the sourness of bread. One idea is every once in awhile use dark rye flour to feed the starter or some in the bread dough. Another is to let it rise at a lower temperature (60?) so it rises longer and gives the bacteria a longer time to do their work. Some feel that making the starter more firm (adding more flour than water when feeding it) results in a more sour taste. DonÂt expect your starter to ever taste as sour as commercial sourdough bread  they add things to it to get that really sour taste. The starter will develop "hooch"  a mixture of alcohol and water  while being stored in the refrigerator. If there is more than one-inch of hooch, I pour most of that off, let the starter come to room temp, feed it, let it expand 4 hours, then use it to make bread or put back in the refrigerator. Any sourdough recipe you may try assumes that the starter has been fed and left to rise, then you begin the recipe. Hope this helps, Teresa...See MoreSourdough Starter
Comments (16)No forgiveness needed Cecilia! Here are the original instructions. I find them to be rather convoluted but I'm giving it a go! As posted by Ann T......... Home Cookin Chapter: Recipes From Thibeault's Table Sourdough starter - Amy's bread =============================== copied from: http://countrylife.net/pages/recipes/672.html Amy Scherber's Sourdough Starter RYE STARTER From AMY'S BREAD, copyrighted. Amy's bread This starter is begun with rye flour because rye just LOVES to ferment and is an easier starter to get going than a wheat starter. When I first made it, it had a bubble or two within a couple hours. The procedure is to start it with rye flour, then transform it by changing what you feed it. The original rye will dilute to nothing over time and you'll end up with a white flour (or whatever other grain you choose, it could be whole wheat or pumpermickel, or you could leave it as a rye starter) and water based starter, but it had the advantage of beginning it's life from highly fermentable rye flour. Start it with organic rye flour and spring water. Once you have it going well you can switch to all-purpose white (or other) flour as you choose. The use of spring water is recommended for maintenance, however, as tap water may contain elements (such as chlorine) which may be detrimental to the health of your starter. I also recommend that you use a container that you can mark the volume levels of starter each time, so that you will know when it has doubled. Use a marking pen or tape or any other means to indicate on the container the starter levels each time you feed. Phase 1 - Combine 2 oz organic rye flour (room temp) with 4 oz spring water in a clear container. The batter should be about the consistency of very thick pancake batter, add more water or flour if necessary. Cover & let it sit for 36 - 48 hours at 75 - 77 degrees (a little cooler is okay but over 80 you will incubate the wrong kind of bacteria and your culture will have an unpleasant bitter taste). You should start to see tiny bubbles forming after about 24 hours. By the time it has doubled, there will be a noticeable network of small bubbles throughout the batter & it will be foaming & bubbling on top. (If the batter has not doubled within 48 hours, feed with 2 oz water & 2 oz flour (add more of either if necessary for the consistency) and let it sit another 24 hours or until you see some definite activity.) Phase 2 - Stir the culture down, notice how soupy it's become. The batter should have a noticeable sour smell & a mildly tangy taste at this point. Add 2 oz water & 2 oz flour and stir vigorously until well-combined. Let it sit for 12 hours. It should be showing a fair amount of activity at this point. You should see lots of foaming & bubbling through the sides as well as on the top. Don't be concerned if the culture deflates & loses volume. This means the yeast has exhausted its food supply, but it will continue to increase in acidity. Don't worry if your culture isn't dramatically active yet. As long as there is some noticeable activity going on and the mixture smells & tastes sour, you're on the right track. Phase 3 - The culture should now have a pronounced, sour, fruity taste and smell, it should not taste musty or bitter (if it does, discard and start again, paying close attention to the temp of the culture at all times). Now you can start "transforming" it into a white (or other) flour based starter. Use 6 oz of the starter, add 3 oz water & 3 oz flour, stir vigorously. Let it sit for 12 hrs at 75 - 77 degrees F. Refresh it again, setting up a maintenance level of 12 oz of starter. This will be your "mother" starter that you use to build the sourdough starters/sponges needed in individual recipes. Each time you take part of the mother out to build a starter, you must refresh it with equal weights of flour and water to bring it back up to its maintenance level. To maintain - Use 6 oz of the mother culture (discard the rest), add 3 oz water & 3 oz flour, stir vigorously, let it sit at room temp until doubled in volume. A strong mother will double in 8-12 hours. If yours doesn't do that, let it continue to sit out until it has a nice tangy taste and smell; discard all but 6 oz and repeat this procedure. Repeat this procedure as many times as necessary until the mother doubles within 8-12 hrs. It may take several days. Don't get discouraged, it's worth the effort. To use for recipes - Combine 1/2 c (5 oz) Mother from the refrigerator, add 3 oz flour and 2.5 oz warm water (85 - 90 degrees). The mixture will be stiffer than the mother. Let it sit, covered, until doubled in volume (if it doesn't do so go back to maintenance procedure). When the starter has doubled, it is ready to use in a recipe. Measure the amount needed and discard any that remains....See MoreI want to make bread with my sourdough starter tomorrow
Comments (1)Ginny, you will find all kinds of different advice. Here is how I use my starter. When I take it out of the fridge to feed it, I take 2 ounces of the discarded starter (60g) and mix it with 225g of flour and 225g of water. Stir well cover and leave to double. Once it is doubled, I add it to 1000g of flour , 680 to 750g of water, and 26/27g of salt. So based on when you want to make your bread. I would make the preferment now. It should have doubled in about eight hours. Then you can make your dough and put it in the fridge for an overnight longer fermentation. Bake tomorrow. Take the dough out of the fridge about 3 hours prior to shaping. It needs to come to room temperature and start to rise again. Then you can shape and proof and bake. If this is the first time you are using your starter, you might want to add a pinch of yeast just for insurance. Or just take your chances. ~Ann Here is a link that might be useful: Sourdough Bread This post was edited by ann_t on Fri, Nov 14, 14 at 16:51...See MoreIs this old sourdough starter is still good to use?
Comments (16)Here’s an update: a bubble or two appeared after about 12 hours, and now after about 40 hours (one feeding, no discard, just sitting on covered with light towel counter) there are several (see pics). So I guess it’s alive! Overnight the little layer of dark separation that you see formed. I’m thinking I’ll try to pour that off and feed, without discard, as per @pilllog’s suggestion. Also, it still smells quite strong. Volume didn’t increase in the 40 hours. @artemis_ma: i don’t suggest waiting 1-1/2 yrs between loaves!!...See More- 6 years ago
- 6 years ago
- 6 years ago
- 6 years ago
- 6 years ago
- 6 years ago
 6 years ago
 6 years ago
- 6 years ago


Related Stories

HOUZZ TVRetired Houston Couple Replaces Starter Home With Forever Home
See how the Elders built their dream home while preserving the memory of the home they lived in for nearly 4 decades
Full Story
FEEL-GOOD HOME12 Very Useful Things I've Learned From Designers
These simple ideas can make life at home more efficient and enjoyable
Full Story
KITCHEN STORAGEShould You Use Open Shelves in the Kitchen?
Two designers make their cases for and against using floating kitchen shelves
Full Story
GREEN BUILDINGHouzz Call: What Have You Salvaged for Home Use?
If your floors, furniture, exterior materials or other home elements have a past life, we'd like to hear the story
Full Story
KITCHEN DESIGNKitchen of the Week: Updated French Country Style Centered on a Stove
What to do when you've got a beautiful Lacanche range? Make it the star of your kitchen renovation, for starters
Full Story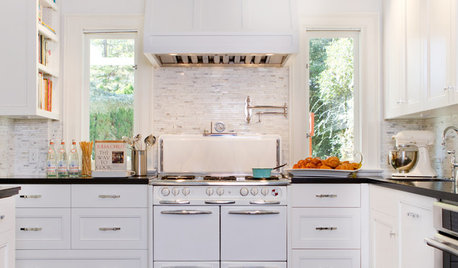
VINTAGE STYLERevel in Retro With Vintage and New Kitchen Appliances
Give your kitchen old-fashioned charm with refrigerators and stoves that recall yesteryear — even if they were made just yesterday
Full Story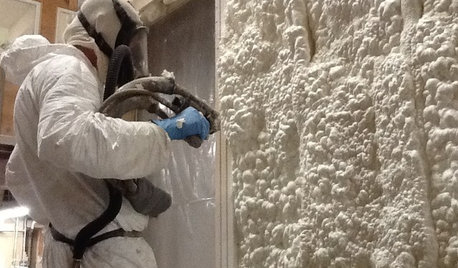
MATERIALSInsulation Basics: What to Know About Spray Foam
Learn what exactly spray foam is, the pros and cons of using it and why you shouldn’t mess around with installation
Full Story
KITCHEN DESIGNKitchen of the Week: Tiny, Fruitful New York Kitchen
Desserts and preserves emerge from just a sliver of counterspace and a stove in this New York food blogger's creatively used kitchen
Full Story
MOST POPULARHow to Remodel the Laundry Room
Use this step-by-step guide to figure out what you want and how to make it happen
Full Story
SMALL KITCHENSNew This Week: 3 Ways to Make Your Kitchen Feel Bigger
Using lighter colors, bringing in more sunshine and a few other tricks can help you visually enlarge your kitchen
Full Story
patriciae_gw