


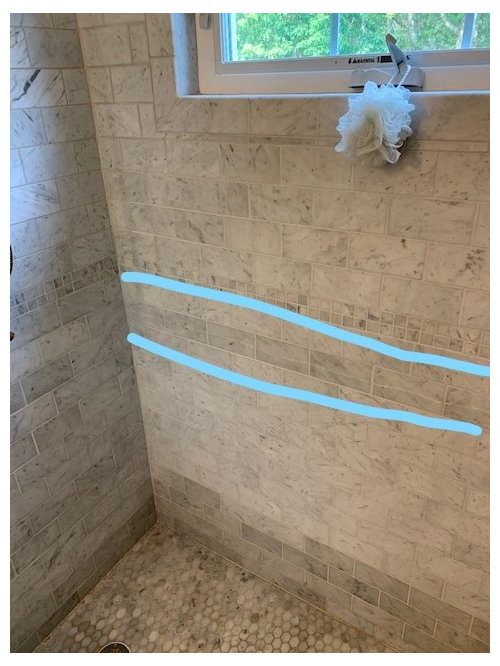
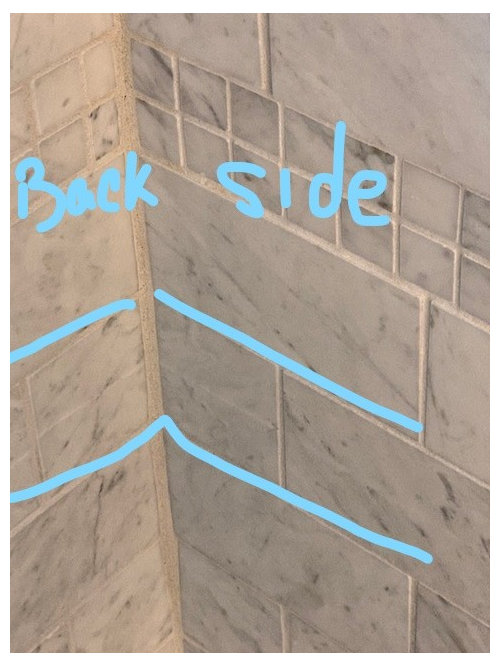
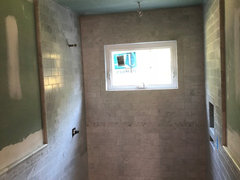
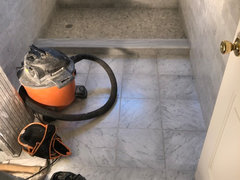
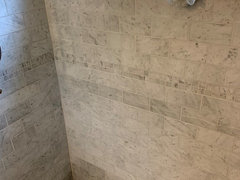
Hairline Crack in 3x6 Marble Subway Tile
Sal Thanks
4 years ago

Featured Answer
Sort by:Oldest
Comments (29)

Sammy
4 years agolast modified: 4 years agoRelated Discussions
Help With Retiling 2 Walls in BR with Original 3x6 subway tile
Comments (1)It all depends on why that tile is cracked. if it's because of the mud bed behind it being cracked, thn that will have to be removed, as well, which means the whole thing comes down. Additionally, if you're trying to leave part of it up, and only replace some of the tile, you're going to have a tough, if not impossible, time matching up tile. White is one of the toughest colors to match. There are just too many variables that can influence the shade of white. Also, you can bet that the tile was, at one point, adhered to the mud bed. It was not stacked free-floating, away from the mud. My suggestion would be to take all the tile down, make sure the mud bed is still in good shape, and then install the whole wall. As for the mud cap at the top, I know for sure that both Daltile and American Olean carry mud cap pieces for their subway tile lines....See MoreI can't find white glossy subway 3X6 tiles in Greece!!
Comments (3)I googled 152 mm x 75 mm wall tile uk and came up with many results, including the following. There's all kinds of stuff, including the very beautiful and expensive Craven Dunhill. But you can work your way up to that on your own! Try to find a big company that has local dealers near you. You might even find that a big tile manufacturer makes many lines and many names, and is nearer than it appears, and you could drive there and load up. Wouldn't that be nice? It's worth poking around a little bit. (I know I have seen this kind of tile in the UK. You could substitute IT, SP for whatever country you like to see their results.) They may ship to you, or consider a little minibreak on one of those cheap euro airlines. Even charging for luggage, meals, bathrooms and air, you might come out ahead. Or maybe someone wants to visit you by train? Another thing someone on this board suggested to me once was having a very white, shiny, featureless marble cut into the right size pieces. Or are you all marbled-out in Greece! Good luck! Here is a link that might be useful: Just a sample of the stuff out there....See More3 x 6 Subway Tiles with Inserts ???
Comments (12)I was typing my response when the web-page crashed. I hate that ! Anyway - just wanted to say thanks to Roamer14 for those additional pictures. The tiles look great. Is that typhoon bordeaux granite by any chance ? It looks similar. I went to a tile store on saturday and they told me inserts could not be used with 3 x 6 arranged in a subway pattern. Obviously they were WRONG. I'm so glad I decided to post and ask this forum for advice and pictures. I'm FINALLY ready to order my backsplash tiles this week ! Hurrah ! Thanks for everyone's help....See MoreCarrera marble shower is turning grey.
Comments (10)Do not sign anything releasing them from liability. And if they are in charge of saying whether or not they are at fault, of course they have a strong incentive to convince you that they are not to blame. If you can, find a pro who knows the TCNA handbook and have them there with you during demo. Pay the pro for the day and have them document the problems and cross-reference them to the industry guideline that has been violated, and write up a report for you on their business letterhead. Also, take lots of pictures during the demo, at lunch when they leave, as they are working, and at the end of the day when they leave. Don't interfere or get in their way, but get in there and take pictures. I am telling you this because we just won back twice the amount we paid a contractor who trashed our bathroom and quit the job. One of the huge things that help us was having the independent tile pro documenting things during the re-demo, and cross refefencing the voilations to the TCNA, other industry guidelines, and manufacturer's instructions. We just won a district court case, pro se, last month, and we had no experience with anything like this before. Document, document, document. Hopefully Home Depot will see the writing on the wall and re-do or refund. They will see that you are documenting like crazy and will know that they need to make good now. Probably a Home Depot rep should be there too, not just the tile hack they hired. Have a friend, spouse, or neighbor there for moral support and to ensure the tile hack doesn't harass you. If they start yelling at you or anything like that, have your advocate film them on their cell phone....See More
Sal Thanks
4 years agoSal Thanks
4 years ago
millworkman
4 years agoSal Thanks
4 years agoSal Thanks
4 years agoSal Thanks
4 years agoSal Thanks
4 years agoAJCN
4 years agoSal Thanks
4 years agomillworkman
4 years agoAJCN
4 years agolast modified: 4 years agoAJCN
4 years agolast modified: 4 years agoAJCN
4 years agolast modified: 4 years agoAJCN
4 years agolast modified: 4 years agoAJCN
4 years agolast modified: 4 years ago
kathyg_in_mi
4 years agoSal Thanks
4 years ago
NYCish
4 years agomainenell
4 years ago PRO
PROJeffrey R. Grenz, General Contractor
4 years agolast modified: 4 years agoAJCN
4 years ago

Related Stories
KITCHEN DESIGNSubway Tile Picks Up Gray Grout
Heading into darker territory, subway tile offers a graphic new look for kitchens, bathrooms and more
Full Story
TILE3 Top Tile Trends for 2020
See the latest colors, shapes and patterns in tiles being introduced this year
Full Story
BATHROOM TILE6 Creative Bathroom Tile Ideas
Consider these tile colors, patterns and installation methods to make your bathroom more interesting
Full Story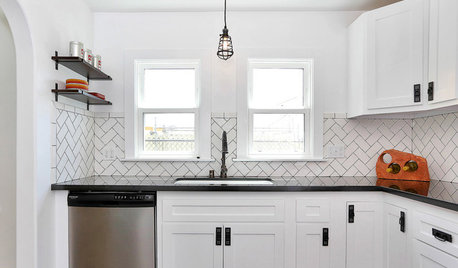
BATHROOM TILE6 Budget Tile Tricks That Deliver a High-End Look
You can get an upscale vibe without spending a fortune
Full Story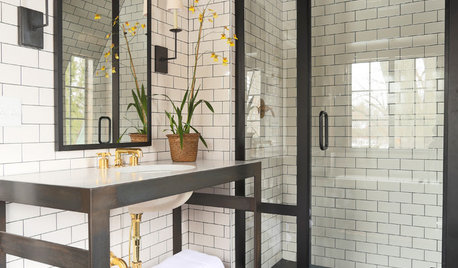
TILEIs It Over for Subway Tile?
Should we ditch the ubiquitous rows of rectangles for a rival, or is subway tile a classic that’s here to stay?
Full Story
BATHROOM DESIGNSubway Tile Wainscoting Puts Bathrooms on the Right Track
It repels water. It looks clean. It works with many architectural styles. Looks like bathrooms have a ticket to a no-brainer
Full Story
HOUSEKEEPINGHow to Clean Marble Countertops and Tile
Acidic solutions can damage your marble surfaces. Here’s how to keep marble looking clean and amazing
Full Story
REMODELING GUIDESClassic Subway Tiles Go Uptown
Get a polished, high-end look from subway tiles old and new
Full Story
KITCHEN DESIGN10 Gorgeous Backsplash Alternatives to Subway Tile
Artistic installations, back-painted glass and pivoting windows prove there are backsplash possibilities beyond the platform
Full Story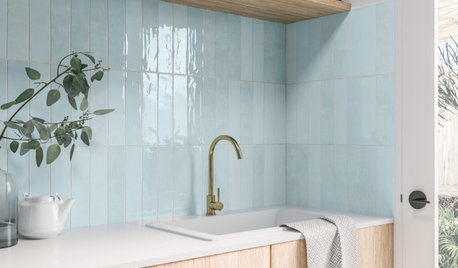
MATERIALS3 Tile Trends Emerging in 2021
See the latest tile colors, shapes and patterns that stood out at the virtual International Surface Event trade show
Full Story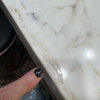


User