

Cooking Recipe For Soft Creamy Gelato
7 years ago
last modified: 7 years ago
Featured Answer
Sort by:Oldest
Comments (6)
 7 years agolast modified: 7 years ago
Related Discussions
Your Greatest Hit Recipes for Leesa - The Condensed Version...
Comments (37)Newer version of Annie's Salsa - BWB only Annie's Salsa 8 cups tomatoes, peeled, chopped and drained 2 1/2 cups chopped onion 1 1/2 cups chopped green pepper 3 to 5 chopped jalapenos (for milder leave out seeds and ribs) 6 cloves minced garlic 2 tsp cumin (optional) 2 tsp pepper 1/8 cup canning salt 1/4 c fresh cilantro (optional) 1/3 c sugar (optional) 1 cup cider vinegar (see note on subbing lemon or lime juice option) 16 oz canned tomato sauce (to adjust density) 8-16 oz canned tomato paste (to adjust density) Mix all ingredients, bring to a boil, boil 10 minutes. Pour into hot jars, process pints for 15 minutes in BWB. Makes 6 pints. _________ A lot of changes have been made to this recipe over the years. Some people like lemon or lime juice in place of some or all of the vinegar, that's fine. (Note from Sheila - I like half lemon half lime.) Some people leave out the cilantro, that's fine too. Do not increase! Some people add more hot peppers or fewer onions, fine as long as you keep the same total measurements. (Note this is what NCHFP does in their new Choice Salsa recipe.) Some people leave out the sugar, that's fine. You can scoop out the goo in the middle of the tomatoes with your thumbs when I'm peeling and chopping for a less seedy version, so it's 8 cups of chopped tomatoes without the seeds and goo. Most who make it regularly as well as Annie recommend using a variety of different slicing tomatoes, not paste types, for best flavor and consistency. (Note: use the tomato sauce and paste to adjust the consistency of the final product to a "sloshy" consistency.) According to Annie "My salsa is not as thick as Heinz catsup but it's thicker than taco sauce. If you don't like it quite as thick or sweet, cut down the amount of paste. I would add some, then taste. Reducing that ingredient shouldn't affect the safety of the recipe. I use equal amounts of sauce and paste. You can pull it off the heat at any point and adjust for flavor. Before I cook it I check for salt, sugar, check the consistency. Add more pepper or cumin if I want. When I first started making this salsa, tomato sauce and paste came in 8 and 16 ounce cans. Like everything else, they've now been downsized, so now I have to use partial cans." Does anybody have good versions of the other recipes that have weird symbols in them for measurements?...See MoreIce Cream or Gelato?
Comments (17)I am a Marzipan addict and I LOVE the following recipe for Almond Gelato: Almond Gelato Makes about 1 quart (can be doubled for half-gallon machines) 2 3/4 cups whole milk 1/4 cup heavy cream One 7 ounce tube almond paste (found in the baking aisle--should be soft and moist) 2/3 cup sugar 5 large egg yolks, at room temperature 1/2 teaspoon almond extract (real extract, not imitation) 1/4 teaspoon salt 1. Heat the milk and cream in a medium saucepan set over medium heat until tiny bubbles fizz around the pan's inner rim. Adjust the heat so the mixture stays this hot but does not come to a boil. 2. Place the almond paste and sugar in a large food processor fitted with the chopping blade; process until the texture of find sand, about 1 minute. Stop the machine, add the yolks all at once, and process until light and thick, about 2 minutes. (note: if you don't process enough, the end result will taste grainy from the almond paste--still delicious, but a weird texture.) 3. With the machine running, dribble in about half of the hot milk mixture through the feed tube; process until smooth. Then whisk this mixture back into the pan with the remaining hot milk mixture. Instantly reduce the heat to very low--if you have electric burners, place the pan on a second burner just now set on low. Cook slowly, stirring all the while, until the mixture thickens to the consistency of wet but smooth pancake batter and can coat the back of a wooden spoon, a little less than 2 minutes. Strain through a fine mesh strainer into a clean bowl to get rid of any extraneous bits of scrambled egg (and almond paste debris that makes the finished product a bit gritty); stir in the almond extract and salt. Refrigerate until cold, for at least 4 hours, or overnight. 4. Just before making the gelato, place the almond custard in the freezer for about 10 minutes. (we're trying this on our second batch which is being made tonight and tomorrow--it took a long time for this gelato to set up the first time.) 5. Freeze the custard in your ice cream machine according to the manufacturer's directions. Serve at once--or transfer to a large container or several smaller containers, seal tightly and store in the freezer for up to one 1 month. (if this gelato lasts a month at your house, you're a better person than I. ) Soften at room temperature for up to 10 minutes before serving....See MoreCreamy Chicken Tortilla Soup - Thank You Danain
Comments (16)Well, this thread made me hungry, so I madee this soup last night. All I can say is YUMMO! I didn't see your update, either, Marilyn. I used tortillas. I like that they are cooked and pureed in the soup rather than toasted and used as a garnish. Beachlily, here is a non creamy tortilla soup that I made for our annual soup party last fall. It's really good! Tortilla Soup with Chipotle Crema courtesy Emeril LaGasse 2 tablespoons olive oil 1 cup chopped onions 2 teaspoons chopped garlic 1 poblano pepper, and 1 jalapeno pepper, seeded and chopped 1 1/2 teaspoons salt 1 1/2 teaspoons ground cumin 1/2 teaspoon ground coriander 1 tablespoon tomato paste 6 cups chicken stock 1 pound boneless, skinless chicken breasts, trimmed and cut into 1/2-inch cubes 1/4 cup chopped fresh cilantro leaves 2 teaspoons fresh lime juice 2 cups vegetable oil, for frying 6 stale corn tortillas, cut into 1/4-inch-thick strips 1 teaspoon Essence (recipe follows) 1 avocado, peeled, seeded, and chopped, for garnish Chipotle Crema, accompaniment, recipe follows In a Dutch oven or large heavy pot, heat the oil on medium-high heat. Add the onions, garlic, peppers, salt, cumin, and coriander for 5 minutes. Add the tomato paste and cook, stirring, for 1 minute. Add the chicken stock and bring to a simmer. Simmer for 20 minutes. Add the chicken and simmer for 5 minutes. Add the cilantro and lime juice, and stir well. Remove from the heat and cover to keep warm. Heat the oil in a heavy pot or electric fryer to 350 degrees F. Add the tortilla strips in batches and fry until golden and crisp, 1 1/2 to 2 minutes. Remove with a slotted spoon and drain on paper towels. Season with the Essence. Ladle the soup into 4 or 6 serving bowls. Garnish each serving with the diced avocado, the fried tortilla strips, and Chipotle Crema. Chipotle Crema 1/2 cup sour cream 1 teaspoon chopped chipotle peppers in adobo sauce 1/8 teaspoon salt In the bowl of a food processor or blender, combine all the ingredients. Process on high speed until smooth. Serve with the soup. Emeril's ESSENCE Creole Seasoning 2 1/2 tablespoons paprika 2 tablespoons salt 2 tablespoons garlic powder 1 tablespoon black pepper 1 tablespoon onion powder 1 tablespoon cayenne pepper 1 tablespoon dried oregano 1 tablespoon dried thyme Combine all ingredients thoroughly. I bought a jar of the Essence, already prepared, at the grocery store Linda...See MoreRECIPE: Looking for good old fashioned homemade bread recipe.
Comments (9)Here's one I haven't long time!! Almost forgot about it! But it's wonderful and makes the most awesome toast! Dartmouth oatmeal bread.... Proof 1 packet of dry yeast with 2 Tsp sugar in 1/2 cup of warm water. Stir 1 cup of rolled oats ( not instant!) into 2 cups of boiling water Add 2 Tablespoons shortening ( I use crisco.....but bet originally they used lard) 1/2 cup dark molasses Mix and cool Add the yeast mix to the oatmeal mix. Add 5 or so cups of bread flour and knead until smooth. Place in a greased bowl, cover loosley let rise until double....punch down....let rise again....shape into 2 loaves, let rise until double and bake at 350 50 or 60 minutes! And...another Here's a Rye bread Makes 6 loaves. Cook 4 medium potatoes (peeled), drain saving the water and put through a sieve (or mash) proof 2 pkts of yeast (or 3 1/2 teaspoons) in 1/2 cup warm water with a t. of sugar. Mix 4 c. of buttermilk, 3/4 c. dark molasses, 1/4 cup of shortening (she used Crisco, I use butter) and 1 t. baking soda and 1T.salt. Add 3/4 c. brown sugar and 3/4 c, of the potato water. Add enough rye flour to make a dough ( still able to be stirred, but getting pretty stiff).Add the yeast mixture and mix well Add enough white bread flour to (as Mrs. Faust said)work it up, That is until it is stiff enough to knead. knead about 6 to 8 minutes, let rise till double, punch it down and shape into loaves. this works best in bread pans due to the long cooking time--if you don't have 6 bread pans, just "free form" the rest and maybe take it out of the oven a little sooner. Butter top of loaves and raise until it almost cracks on top (this is a very heavy bread!) Bake 350 for 1 1/4 hours. mrs Faust used to divide the dough in half and add about a t. of anise seed to -one half of the dough--I like it--almost like a tea bread.. Good Luck--I'm getting hungry just reading the recipe--it's really a fabulous bread! And this....known to Swedes as Limpa....and Ann's bread is wonderful! From the Kitchen of Ann Straight Swedish Rye Bread (5 loaves) 2pkg dry yeast 1 cup warm H2O dissolve these three ingredients 1tsp. sugar (meanwhile) 1 cup brown sugar 1 cup whiter sugar 1tsp. salt (scant) 1/4 tsp. fennel seed 1 cup shortening (I use oleo) 1/2 (scant) molasses 4 cups warm H2O (combine this), add yeast mixture Stir in 4 cups Rye Flour Work in 8 or more cups of white flour (I use 10 cups) The dough should be soft, but of course it should be workable Knead for 5 minutes Mix well--cover and let rise in warm place until double--- stir or punch down Dump out on lightly floured counter Divide into 5 sections---shape Place in greased pans--let rise Bake at 275 -300 degrees until done...See More 7 years ago
 7 years agolast modified: 7 years ago
 7 years ago

Related Stories
KITCHEN DESIGNA Cook’s 6 Tips for Buying Kitchen Appliances
An avid home chef answers tricky questions about choosing the right oven, stovetop, vent hood and more
Full Story
LIFEInviting Kids Into the Kitchen: Suggestions for Nurturing Cooks
Imagine a day when your child whips up dinner instead of complaining about it. You can make it happen with this wisdom
Full Story
MOST POPULARTrending: 13 Warm, Inviting Kitchens You’d Want to Wake Up To
Some of the most popular kitchen photos uploaded to Houzz in summer 2018 offer a recipe for creating a welcoming design
Full Story
SUMMER GARDENINGHow to Grow Basil
Bright color, quick growth and endless uses for cooking make this summer annual a winner in the garden or a pot
Full Story
APARTMENT LIFEWarm Up Fall With an Apple Pie Party at Home
A pie enthusiast shares a recipe, ideas for pretty crusts, and tips on how she makes the most of her rental kitchen
Full Story
PRODUCT PICKSGuest Picks: The Well-Stocked Starter Kitchen
We’ve got all the kitchen basics and tableware you need (or that recent grad needs) to make cooking a joy
Full Story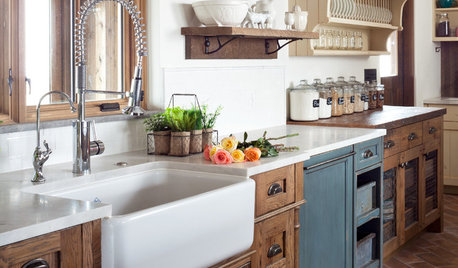
KITCHEN DESIGNThe 10 Most Popular Kitchen Photos of 2016
Fall in love with classic styles and materials all over again — and see what’s cooking for the new year
Full Story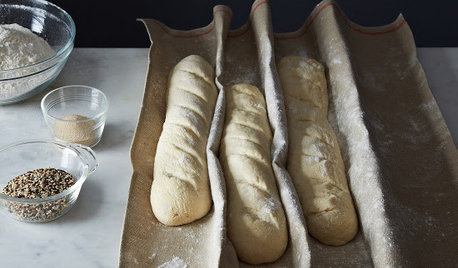
PRODUCT PICKSGuest Picks: Be Your Own Artisanal Chef
You may never settle for prepared foods again with these cooking tools, gadgets and storage pieces
Full Story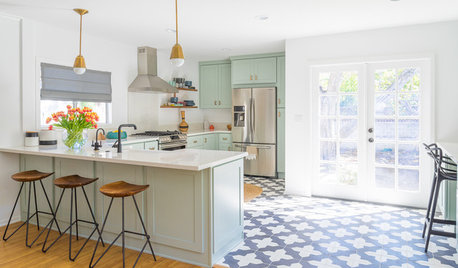
KITCHEN DESIGNTrending Now: 25 Kitchen Photos Houzzers Can’t Get Enough Of
Use the kitchens that have been added to the most ideabooks in the last few months to inspire your dream project
Full Story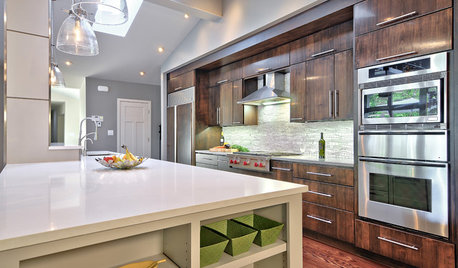
KITCHEN COUNTERTOPS7 Low-Maintenance Countertops for Your Dream Kitchen
Fingerprints, stains, resealing requirements ... who needs ’em? These countertop materials look great with little effort
Full Story
plllog