


Cracks and Gaps Around Crown Molding
oldjohnboy
5 years ago
Featured Answer
Sort by:Oldest
Comments (7)

oldjohnboy
5 years agoRelated Discussions
Now what? Crown moldings are 1/4' to 1/2' from ceiling.
Comments (19)Just because it's a "Style" does not make it right. I hate the look frankly, and yet no one even notices it in DS's room. It was a very expensive mistake for the contractor (May he rest in terminal heckfire) (he's not dead, just fired). I should have had it taken down the day I saw it frankly, and I'd advise you to do the same. It's worth the wait to do things right, it is, and this from a chick who's working on a three year (NOT DIY) remodel. Mine looks like it was done on purpose, so it's ok. I live in a house on pilings so I can understand the idea of floating the molding, I just don't care for it. In other rooms, where the ceilings aren't remotely flat, there are some gaps in the crown to ceiling but they're hidden in the shadow line (it helps that my trim is tint de'negre which is brown so dark it appears black). So in these rooms, you don't see at all where there is a gap unless you're on a ladder with the crown in your face. Since firing the contractor I've found some areas where his wife caulked on our baseboard. She didn't worry about the fact that he obviously didn't nail it into studs so there are big gaps between wall and trim, instead she just filled the gaps with caulk. They look like crap, really really bad. I'm going to redo all of these rooms myself to correct the problem, which involves cutting through the caulk, then pulling the molding off the wall, hopefully not damaging the wall to badly, then new molding, paint blah blah...I'm not a little peeved about this issue. If you do decide to keep it, I really do suggest repainting the ceiling which helps immensely. I had a white ceiling in my son's bathroom and changed it to a color called parchment by ralph lauren. It flows well with the wood and somewhat hides the issue to the naked eye. It's so much better than when it was white with a huge contrast. The difference being mine was purposely hung to float...so It's somewhat "ok" since it's just a style issue...it sounds like yours might just be more error than anything...in that case, I just wouldn't live with it. here are pics of my bath to show it sort of disapears with the ceiling painted... and in this pic there are areas where the crown does not touch the ceiling due to slope issues (particularly the inside corner you see here...and yet it's rather invisable): In this room the ceilings really have slope...we just tented it :oP Another option heh heh...See MoreSeams & crown molding cracking after 2 months
Comments (4)Wood expands when it's humid because it absorbs moisture. It contracts when it's dry, because it loses that moisture. Movement from wood is 100% normal and to be expected seasonally. It perhaps may be magnfified in your case because the AC wasn't running when the work was done so there was more humidity around for the wood to absorb. Contact the contractor for a call back, but you have to be careful about making things too tight during the dry season. If you do that, you can get buckling and cupping when the humidity naturally rises come late spring into summer. You can also talk with a HVAC pro about installing a whole house humidifier. Most wood floor manufacturers and cabinet manufacturers require the home's humidity to be between 25-55% year round for their warranty to remain in force. That means using the AC in the summer as well, and being sure that it's not too oversized to handle the humidity....See MoreGrout around tub from years ago; has mold, crack, & needs repair.
Comments (5)If the grout joint has a consistent height around the tub of 3/4", and alternative to a huge caulk joint could be to use something like a tile trim or liner piece to fill most of the gap. There are certainly restrictions going that route, ie, there might not be a proper material in the back of the gap to bond the liner to. If you do go the "all caulk route", look at backer rod as millworkman suggested. Backer rod is a foam rope that comes in different diameters. Backer rod gets stuffed into the gap to act as a filler for the deepest part of the gap. It greatly improves the performance of caulks when they are used in large- or deep-gap situations, as a large slug of caulk. If you filled a large gap with a single large slug of caulk, as the caulk cures and shrinks, internal shrinkage can cause the caulk to pull away from the edges, or even crack in the middle of the joint. Backer rod allows a Thicker depth of caulk at the edges where you need adhesion, and a thinner depth of caulk in the middle of the joint where you need flexibility....See MorePlease help with joining crown molding with kitchen cabinet crown
Comments (5)You've got several problems. If you buy more of the same crown from your cabinet company, you'll still have to deal with the gap above the corner cabinet. If you raise the existing crown to the ceiling, it's very unlikely you'd find unpainted crown that matches it's size and profile, plus you'd then have to deal with a gap between the cabinets and the bottom of the crown. Here's what I would do. Choose the new crown mold you want for the rest of the room and measure it's height (how far down from the ceiling it comes). Make a mark on the wall at that height, then use a level to transfer that height to the stained crown and mark it. Then, trace the old, existing crown's profile onto the wall with a pencil. Now you have a mark where the bottom of the new crown will intersect the old crown, and another mark where the old crown will have to be narrowed to fit underneath the new. Carefully remove the stained crown from the corner cabinet. Next, build a frame above the corner cabinet that's the same height as the new crown, and that extends beyond the cabinet to the point at which the new crown will intersect the old. Now, install the new, painted crown around the kitchen and across the new soffit. Last, run the old crown through a table saw and cut it down so that it fits underneath the new crown. With me? This is a tough one to visualize....See Moreoldjohnboy
5 years agorobin0919
5 years ago PRO
PROCharles Ross Homes
5 years ago
annied75
5 years ago
Related Stories
KITCHEN DESIGN9 Molding Types to Raise the Bar on Your Kitchen Cabinetry
Customize your kitchen cabinets the affordable way with crown, edge or other kinds of molding
Full Story
MOST POPULARHow to Get Rid of Household Mold
Find out how to work with a pro to stop mold from damaging your house and health — and how to prevent it from forming
Full Story

CONCRETEWhy Concrete Wants to Crack
We look at the reasons concrete has a tendency to crack — and what you can do to help control it
Full Story
REMODELING GUIDESHow to Size Interior Trim for a Finished Look
There's an art to striking an appealing balance of sizes for baseboards, crown moldings and other millwork. An architect shares his secrets
Full Story
GREAT HOME PROJECTSHow to Bring Out Your Home’s Character With Trim
New project for a new year: Add moldings and baseboards to enhance architectural style and create visual interest
Full Story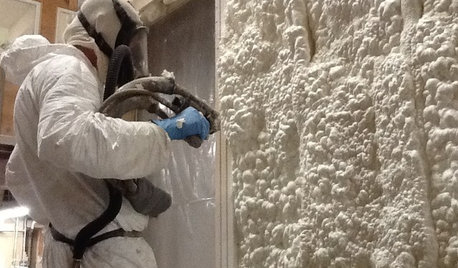
MATERIALSInsulation Basics: What to Know About Spray Foam
Learn what exactly spray foam is, the pros and cons of using it and why you shouldn’t mess around with installation
Full Story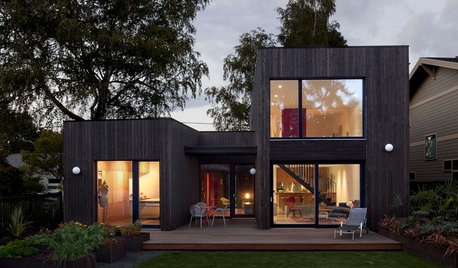
BASEMENTSDesign Workshop: Is It Time to Let Basements Become Extinct?
Costly and often unnecessary, basements may become obsolete — if they aren’t already. Here are responses to every reason to keep them around
Full Story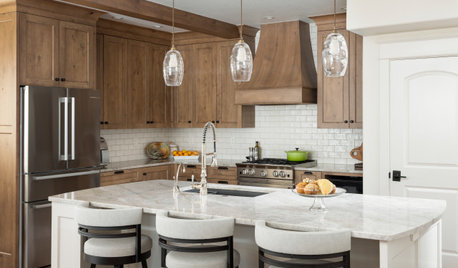
KITCHEN BACKSPLASHESWhere to Start and Stop Your Backsplash
Consider these designer tricks to work around cabinets, windows and other features for a finished look in your kitchen
Full Story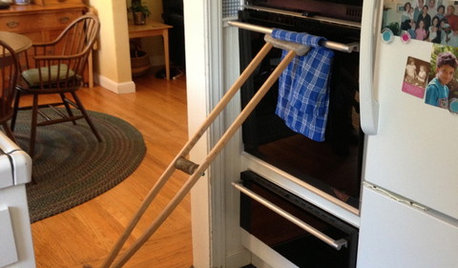
LIFEYou Showed Us: 20 Nutty Home Fixes
We made the call for your Band-Aid solutions around the house, and you delivered. Here's how you are making what's broken work again
Full Story

ShadyWillowFarm