


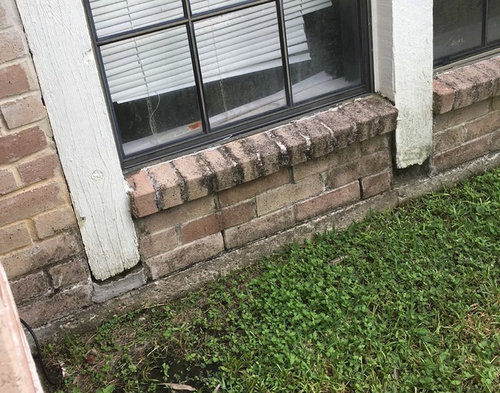
How to diy repair rotting wood exterior trim?
Dre Crego
5 years ago
Featured Answer
Sort by:Oldest
Comments (9)

Dre Crego
5 years agoRelated Discussions
repair exterior wood siding dry rot
Comments (6)'Dry rot' normally requires repeated long term water. Siding can usually dry out fast enough it is not a problem unless the moisture is coming from the inside of the wall. Plants against siding can trap enough water to cause problems. You need to figure out how the rot occured and make sure it is just the siding and not the studs or bottom plate inside the wall. A carpenter has the best chance of finding the cause and making a long term repair....See MoreExterior Repair and Painting of Damaged Wood Siding
Comments (33)The cheap hand held sprayers do not spray heavy bodied paints or primers. If you thin the product enough so that it will spray, its integrity has been compromised. The hand held Graco sprayers will spray heavy bodied latex or oil paints, but the price range is about $180 to $270. Simple air compressor powered siphon guns will also not spray heavy bodied paints or primers. Even if they did, they require large compressors capable of delivering large volumes of air. If you only have a few shutters, you might consider the spray cans of CoverStain, primer which is rated for exteriors. This is a quick dry oil primer. One trick I always use by spray cans is to heat the cans by putting it in hot water as hot as it comes out the faucet ( about 125 degrees). This increases the pressure in the can so that it sprays better. Being an oil product, the viscosity of the primer is also lowered, so that the l.ighter liquid simply sprays better....See MoreHow concerning is wood rot?
Comments (12)I would be extremely hesitant to go through with this purchase. There is so much damage all over the house from water -- I've cut out rot, filled and repainted from outside door trim and the back door to the garage, and that wasn't hard, but you seem to have so much of it! How old is this house? And trying to pass off the water heater as only 5 years old really concerns me. All of the houses in my neighborhood have the washers draining into a floor drain (into the utility tub then down a pipe to the floor drain opening) -- all built in the 1940s -- not a problem in any way . The mildew smell, if it is not from the shower curtain, is a big red flag also. Could be that they fixed the leak then closed up the wet area without letting it dry out. I think a major price reduction is in order here. I wouldn't let them make any repairs, but would insist on price savings to cover the cost or have them deposit the necessary funds in an escrow account for that purpose. Now that they have that inspection report, I think they have to disclose it to the other potential buyer also, so it isn't as if they have a sure thing in their pocket. Do you really love the location, lot and layout enough to take on these repairs?...See MoreNeed tips on supporting exterior walls for wood repair
Comments (13)Thank you! I have most of the tools (not the cat’s claw or cleat - will have to google those). I do a lot of finish work. The foundation is piers. Under the house in the crawl space are several concrete cinderblock stacks that support the first floor. That is all inside the brick skirt, which I believe is about 3” thick (clay bricks with holes). The floor of the crawl space is dirt, but it has been covered with a thick ”plastic-ish” vapor barrier and the crawl space sealed/encapsulated with dehumidifier. In other words, the crawl space is now clean and climate controlled, but the base is soft (dirt). The 2x10s appear to sit on top of the brick skirt. So I assume the brick skirt provides support for the frame. When I take pics of the crawl space, that may become more clear. I probably have to remove more subfloor to see everything that’s going on. The roof shingles were recently replaced (full roof replacement) and they did not charge me extra for decking, so I assume the roof structure underneath was in good shape. It is a steep roof (guessing 57 degrees) so it was not subjected to a lot of wear. With regard to the subfloor, I think the crawl space installer was mistaken about what was damaged. I have to spend some time in the crawl space to test all the subfloor. I think most of the damage is along the back edge of the house behind the deck. If there is other damage, it would probably be related to plumbing leaks. I do know that the bathtub drain leaked and that probably damaged the subfloor underneath. The good news about the subfloor is that it is 2 layers: 5/8” plywood over 1/2” plywood, with a black vapor barrier in between. I plan to patch it with 3/4” advantix and 3/8” plywood underlayment inside the house, with any necessary blocking between joists to stabilize. At most, the damaged subfloor to be removed is within 20” of the exterior wall. I’ll be adding a 1/4” hardiebacker layer and porcelain tile planks. With the piers cinderblocks supporting the double subfloor, I feel pretty good about the stiffness of the floor. It feels solid. (I removed the carpet months ago and covered it with plastic sheeting until I can get it tiled, so I have been walking on it.) The upper window is an issue, but again, I think that was flashing-related - there is a flashed metal platform under that window and the backsplash from that probably eroded the siding and trim around the window. I plan to replace that damaged wood with water-resistant trim. The window is directly above the middle of the kitchen ceiling, and that ceiling appears to be fine. I’ll go over these suggestions and do more research this week. Thank you so much for the leads!...See More
ci_lantro
5 years ago PRO
PROJoseph Corlett, LLC
5 years ago PRO
PROGN Builders L.L.C
5 years agoDre Crego
5 years ago
raee_gw zone 5b-6a Ohio
5 years agoci_lantro
5 years ago- PRO
Joseph Corlett, LLC
5 years ago
Related Stories
CURB APPEALWhat to Know About Getting Your Home’s Exterior Trim Painted
Learn when it makes sense to change the color of your exterior trim and how much this project might cost
Full Story
MATERIALSDesign Workshop: Natural Wood Siding Minus the Maintenance
No need to worry about upkeep when you choose wood that embraces weathering
Full Story
WOODTry DIY Plywood Flooring for High Gloss, Low Cost
Yup, you heard right. Laid down and shined up, plywood can run with the big flooring boys at an affordable price
Full Story
REMODELING GUIDESPro Finishing Secret: Aniline Dye for Wood
Deeper and richer than any stain, aniline dye gives wood stunningly deep color and a long-lasting finish
Full Story
TILETop Tile Trends From the Coverings 2013 Show — the Wood Look
Get the beauty of wood while waving off potential splinters, rotting and long searches, thanks to eye-fooling ceramic and porcelain tiles
Full Story
HOUZZ TOURSMy Houzz: Major DIY Love Transforms a Neglected Pittsburgh Home
Labor-intensive handiwork by a devoted couple takes a 3-story house from water damaged to wonderful
Full Story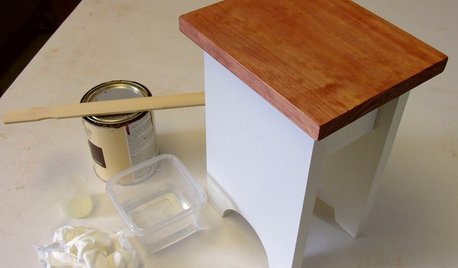
DIY PROJECTSCool Tip: Mimic Stain With a DIY Color Wash
Get the look of an oil-based stain without all the bother, using this easy wash made with paint
Full Story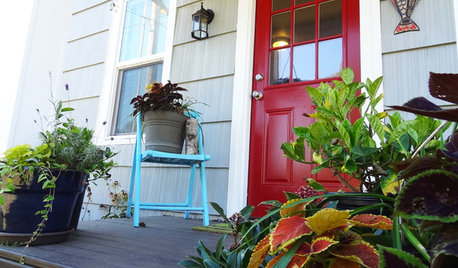
CURB APPEALDIY Painting Project: A Colorful Front Door
Give your entrance a notice-me new hue to make it inviting and energizing for fall
Full Story
FENCES AND GATESHow to Install a Wood Fence
Gain privacy and separate areas with one of the most economical fencing choices: stained, painted or untreated wood
Full Story
COLORFUL HOMESMy Houzz: Colorful and Clever DIY Touches Fill an Alabama Farmhouse
Antiques, repurposed items and a whole lotta hard work give a family home cheery, personable style
Full Story

GN Builders L.L.C