SHOP PRODUCTS
Houzz Logo Print
webuser_604329151

Experience sifting Turface and grit for gritty mix

I am making some gritty mix for my small trees, cactus and maybe house plants. I bought Reptibark, Turface All Sport and Manna Pro Poultry Grit.

Because those need to be sifted I got materials to build sieves.

I will settle the Reptibark challenge later once I make a decision on whether or not I want to grind it through a leaf blower/mulcher that I would buy for the sole purpose of making gritty mix.

I got the grit and Turface covered though and here is the build.


My goal was to make a 1/16in aluminum insect screen sieve and a 1/4in metal hardware cloth sieve.

First I built two of these frames(width 12in length 18in):


Then I stapled the screen and the hardware cloth to the bottom four sides of the frames. I started with thin staple nails and that gave very poor results so I put on another coat of actual staples this time, which held the screen and cloth tightly and properly to the frames:


I probably won't post the other one but ask if you want to see it. Then again I might show it if I post a follow-up about sifting the Reptibark, because that one requires the larger sieve for sure.


Then I sifted the chicken grit through the larger sieve and nearly all pebbles went through it, which was great. It was very hard to find particles that would have needed sifting from the insect screen so the bag of grit will not be sifted, which is less work and is great. It was also $9 after tax for 25 pounds of it.


Then I started on the Turface (Turface All Sport). It was obvious that sifting through the larger screen would be useless due to the smaller size of the particles with Turface. I sifted it through the insect screen and got this from a small tryout sample:


There wasn't a lot of dust flying in the air, I had the bathroom vacuum fan on just in case. I had a respirator handy but at that time I was only doing the bottom of a cup to try out my newly-crafted sieve. I will wear the respirator when I start actually sifting the entire bag.

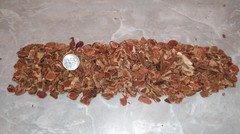
The photo above shows to the right what stayed in the sieve and to the left what went through it. I was somewhat surprised at the amount that fell through but not shocked either. I picked up a tablespoon measure and measured the volume of each pile to come up with roughly 2 tablespoons of thinner than 1/16in and 6 and a half tablespoons of on-target, larger than 1/16in material. The math for the sifting loss is the following: (bad material) * 100 / (bad material + good material) = 2 * 100 / (2+6.5) = 23.5%.

For me 23.5% loss is definitely worth it.

The question remains now since I will be left with 12.5 pounds of unusable Turface, what to do with it?


Also I'll welcome any input for making Reptibark to size. Now it gravitates from say 3/16in to 3/4in so the larger pieces will need to be cut down to target size. The possibilities so far are, in the order that seems to me the least efficient to most efficient:


-driving over it multiple times (really? come on....)

-smashing with hammer

-put it in a kitchen blender

-drive over it with a lawnmower

-mulch it with a leaf blower/mulcher


Thoughts?


Comments (70)

  • val rie (7a - NJ)
    Original Author
    5 years ago

    newhostlady , well that fan looks pretty good. The edges seem sharp. I'm trying mine on bark in 5 minutes and will tell you how it goes. You may want to go slowly on smaller piles, who knows. I have a feeling it will work very well, just want to make sure I don't overheat it or anything. Wish me luck and now I'm off for some fun... will post results later today if work doesn't get too crazy.

  • val rie (7a - NJ)
    Original Author
    5 years ago
    last modified: 5 years ago

    So this morning I experimented on mulching Reptibark through a leaf blower/mulcher in order to reduce the size of the bark chips so that they could be less than 1/4in (and as close as possible to the size of the Turface and grit particles). Here are the results.
    The mulcher I used is a BLACK+DECKER BV6000. I used the bark that I had previously sifted with 1/4in at the beginning of this thread, the "57%" of the bag that was too large to be used right off of a 24 quart bag. I made a point to carry out this study because I find great value in the fact that this product can be had easily and for around $15 for 24 quarts, and is Fir, which I prefir. Pun intended...

    Conclusions:

    The most effective way to downsize most of your oversized bark (as provided by a sifted bag of Reptibark) is to mulch it twice through a leaf blower/mulcher with preferably a metal fan inside so it will not explode. Setting the mulcher to speed 2 is also better but not considerably better. I sifted the bark to 1/4in between each mulching and I don't believe that not sifting it between mulchings would help, but I might be wrong, I may test the difference in powder loss and percent yield by not sifting between each mulching, but not this year ^_^ .

    Experiment:

    This is how the bark looked when I started the first test.


    First I set the speed to speed 1 and started mulching a small pile, not too fast so the bark wouldn't clog. Results:

    Here to the left the pile of too large to the left and the pile of on target to the right:

    Then I grabed some oversized bark from the bag again and this time mulched it at speed 2 (sounded a lot louder but not all that impressive otherwise):
    Once again, at speed 2, the results:
    As a recap picture, this pile is the bark that is too large after being mulched one time, but some of it at speed 1, some of it at speed 2:
    And the way it looks when mulched for the second time (at speed 2 because it is faster):
    At that point I put all of the on target from all tests into the pot (1 quart? not sure) at the left and the remaining material too big that fits into about an inch of the bottom of a 14 oz coffee cup from the service station:
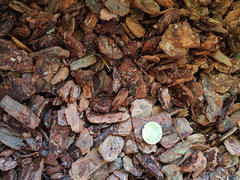
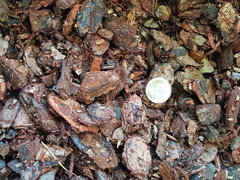
    These here are all the pieces left at the end, the ones that didn't make it. I placed around the dime all of the largest pieces from the batch. A dime is slightly less than three quarters of an inch for scale, so one third of the dime would be the ideal particule size. I think this remaining pile would still be okay in the gritty mix (because there is so few of it compared with the ones that are at target size) but in the intent of going all the way, I will not included these into my mix. Maybe later down the line when I become good at gardening I will try things.
    Here I could not resist to mulch again (now the bark has been through the mulcher 3 times) and got this, these are naturally selected to be the toughest and baddest little pieces of bark from that entire batch. I just sifted the stuff and put the rest back in the original pile of "too large" from the sifted bag.
    To roughly measure my results I would put the stuff that was too big into the coffee cup and make a mark where the level was, then removed it and filled the cup with the stuff that was right on target. T1, T2... means "test number". Speed 1 and Speed 2 mean how fast the setting on the blower, it only has 2 speeds. In each test the level of too big bark was under the level of on target bark. There were 4 tests overall. First test at speed 1, second at speed 2, third at speed 2 and mulching the remaining bark that was too big over again, so that means it was mulched twice, and 4 fourth doing that again, but the third mulching, as you can see yielded an amount of good size equal to an amount of too big and that is when I decided it would become tedious to continue; that was after mulching the bark 3 times. I think I will only mulch 2 times as that is when I saw the biggest yields. Here are the pics of the results of each test, the last test is not labeled but you can see that the 2 levels that I recorded were almost at the same level, and at that point there was barely any bark left in the cup:

    (ah oops this is when there is a picture limit, I will post the rest in my next comment)

  • Related Discussions
    Question about Turface for Gritty Mix

    Q

    Comments (7)
    Since I had to order my turface on the internet. I had not very much of it. The bark was 1/4 size from a good orchid place, the turface was 1/4 and so was the granite. I can't see any point in losing some of the turface because it gets ground into powder from the screening. It worked out great for me anyway. I was a bit heavier on the bark, due to a lack of the turface and granite, but the plants still look good and they are not sitting there wet. I checked and they are draining out. So, I don't think one needs to screen it. If the plant is a super fussy plant and ultra expensive maybe, but these were just test plants. They need good, but not excellent drainage.
    ...See More

    Gritty mix: substitute granite grit with Marble gravel OK

    Q

    Comments (10)
    Tapla thanks for the reply. Would the pea gravel be OK? As I said I found fine bark at the Gowanus Nursery as suggested on the thread where to find the materials for the gritty mix. It does not look like wood chips. Could I mix just Napa Floor-Dry XXX 8822, some bark and some Miracle Grow orchid mix (it is a mix of some peat moss and fine bark, not a real orchid mix but way chunkier than potting soil) and / or perlite? I want to repot my plants on a grittier mix but I can't get huge bags or travel hours. I live in Brooklyn NY. Not much variety in gardening supplies and I live in an apt. I put some plants on the roof and fire escape in the spring / summer/ part fall. If I can't get the perfect gritty mix I'd like at least have a better mix of what comes prepackaged. I grow hot peppers (habaneros), ficus, mangos, lychee from seed. Have coffee plants, some tropical aroids. S
    ...See More

    Deciding where to use Turface Gritty Mix

    Q

    Comments (24)
    Jamie, there are plenty of aquatic plants, but we seldom grow them as container plants in soil. I would not consider a willow tree to be aquatic. All the willows on our property grow in areas where the ground dries out occasionally during the growing seasons. They are never in a constant state of being waterlogged. I think maybe you're thinking of a mangrove environment, as opposed to a rain forest. In mangrove swamps, plants and trees have adapted to being in water. In a rain forest, the trees have adapted to seasons of high humidity and lots of rains. Orchids, for example, enjoy the humidity and rains, but couldn't be grown in a constant state of wetness. I'm not really knowledgeable enough to explain the chemical breakdowns and the science of it all, but I can tell you that in nature, there's a certain balance kept by all the living and non-living organisms and the constant decomposition going on. It's a cycle that works very well in a garden environment... but it doesn't work in a pot. Within the confines of a pot, it's next to impossible to keep everything in a state of balance because the same living organisms are not present cycling the decomp... and an organic environment in a pot can quickly become unbalanced and toxic. That's why it works best to keep a more inorganic medium in containers. Perhaps Al or someone can explain mycorrhizal fungi, which have a symbiotic relationship with plants, and how they fit into container growing. There's a huge difference between water in vapor form, or being slightly moist... and being in a constant state of wetness. Most container grown plants dislike being consistently wet. The roots can't survive being waterlogged all the time. They need oxygen and a chance to "dry out" for periods of time, and a fine, compacted soil that holds too much moisture for long periods of time does not allow for the necessary exchange of oxygen and gases. I'm probably doing a poor job of explaining it... we can't really talk about growing in the ground and growing in a confined container in the same breath... the two environments are at opposite ends of the growing spectrum. Instead of comparing the two environments, I think of them as two completely separate subjects. Each has a different set of needs. In a garden, nature controls most things... in a pot, we are in control... we are playing the part of Mother Nature.
    ...See More

    Al's Gritty Mix Turface Size, Screen size (and Citrus tree)

    Q

    Comments (3)
    Thanks so much mblan13. I have a 1/2", a 1/4" screen and I *think* I actually have one of those tops for a reptile tank kicking around. My friend gave me an old style tank w/ the metal corners with a top like that. I wanted the tank for fish, but I think I still have the screen top. If not, I can make one easily enough knowing the measurement. I have regular screen door material too, so can make a screen with that for the finest stuff. I figured that rinsing would be a good way to remove the smallet stuff/dust, so I am glad you brought that up and will do that w/ the Gran-I-Grit. I did get one of my Gran-i-grit bags at Agway. Had one from the local garden center but Agway was cheaper. Was gonna get two there but they only had one in stock. I didn't know they carried Turface, though. The closest Agway is in NJ, though. Dollar for dollar, I am better off using my garden supply and the landscaping place for the Grit and Turface. I hadn't considered Opti-sorb. It may be worth looking at. I was going with Turface because I was under the impression it held up the longest without breaking down. I do have raging ant issues. Seem to get in every pot I have outside, so it may be the way to go. I'll look into it. If I can find it close by, maybe it would be the way to go. The price I was quoted for the Turface MVP was less than I expected, so I was going to go with that and stick to the Gritty Mix as close as possible. And good to know someone else is using the Frey Brothers stuff! Thanks so much for all the info, mblan13. I do appreciate it! merlcat
    ...See More
  • val rie (7a - NJ)
    Original Author
    5 years ago

    Test volume yield results:

    Final notes:
    I did post a million pictures but when I read a thread I love to look at pictures and when there are coins in there and everything, so I tried to do the same hoping you would find it informative and entertaining.
    Next:

    I'll finish this bag in the next few weeks so I can repot as many plants as I can with gritty mix while they are still rooting and growing, although will leave 2 of my new japanese maples in their original soil because the soil they came in seems to be draining fast and has bark in it, it seems like some sort of soil that would behave like 511 maybe... also they are just starting to put out some new growth of after summer, after we had such brutal heat waves and I do not want to bother them with repotting while they are putting out this new growth (still weak growth though but it just started sprouting from random places around the trunk). Those two I will repot (and a very light root prune) in Spring, with gritty mix, but I have them in stable condition right now and I am not taking risks. The rest are experiments, cuttings, seedlings I picked up, 2 root suckers I cut off of the first japanese maple, one of them is doing very well and could probably benefit from an immediate repot at the rate it is growing.

    Next time I need bark I will get the blue mulch from Agway (in the U.S) and see how that compares with Reptibark with the amount of sifting involved (mulching by itself is quite fast) or maybe an entrepreneurial member here can try it and let us know...

  • newhostalady Z6 ON, Canada
    5 years ago

    You did a fantastic job of mulching and documenting your results! Thank you so much for sharing the information with us! Looks like your B&D mulcher has provided good results.

    I have a bag of Rept-bark which I haven't attempted to mulch yet. I have been using our mulcher with pine bark pieces. I am not sure whether I achieved as good results as you did. I hope to use the mulcher again this season and will report my results here too. (I just won't be as good at it as you have been!)

    I imagine that the Repti-bark (being a fir bark) is a harder product than the pine bark is. I wonder how your results would differ. Thanks again!


    val rie (7a - NJ) thanked newhostalady Z6 ON, Canada
  • Matt Barnett
    5 years ago

    Well, mulch what you have, then hit the phones to find a less complex and less expensive (money and time) source for fines. They are out there, and chances are they are within 10 miles of your house. Call each landscape supply store, and if they don"t have them, ask them who does. You will find a source quicker than you think.

  • val rie (7a - NJ)
    Original Author
    5 years ago

    I made 2 gallons of mix this morning with a bit of bark i sifted from the bag and the stuff I mulched. It looks good in my opinion. I'll let you be the judge:

    newhostalady Z6 ON, Canada

    "Looks like your
    B&D mulcher has provided good results."

    Yes it was pretty good at the task at hand. It mulched correctly half of every pile I threw at it. Will do the rest of the bag soon.

    "I have a bag of Rept-bark which I haven't attempted to mulch yet."

    43% of it should be good to use, after you sift it with 1/4in, by the way how are you doing on that project?

    "I imagine that the Repti-bark (being a fir bark) is a harder product
    than the pine bark is. I wonder how your results would differ. Thanks
    again!"

    Hehe yes I want to grind a bag of pine bark now it is tempting! Maybe will do...


  • newhostalady Z6 ON, Canada
    5 years ago

    Don't let me be the judge! I haven't even made any gritty mix yet. But looks great to me! I am very happy for you!

    I am not sure that when I used my mulcher, that I was able to have it mulch half of the bark correct to size. But then, I was starting with larger pieces (about 1 inch size).

    The Repti-bark mulching is going to have to wait. I've got too much on the to-do-before-winter list to even think about it right now. In fact, if I do get some gritty mix prepared soon, I will probably use the smaller pieces of pine bark that I mulched through the mulcher. But I would prefer to use fir bark in my gritty.

    I would love to know about your results if you attempt to mulch any pine bark.

    ____________________

    Matt, I can't tell you how much time I have spent looking for pine bark fines or, at least, bark or even fir bark in the appropriate size. It has been an extremely frustrating experience, and my pots have suffered due to the fact that I have not been able to get the right product. Just recently I found a landscape supplier that says they have composted pine bark that they screen through a 1/2 inch screen. They are a half hour from my home. I did pick up some composted bark from them last year but was unaware that they had three sizes available. I had picked up the landscape mix (up to 2 inches in size) in a sample bag. I only found this out this year when I called up inquiring about pine bark in smaller sizes and where I could get it. I would have to buy a larger quanitity from them in order to purchase it.

  • val rie (7a - NJ)
    Original Author
    5 years ago

    I transplanted this tree this morning in the new mix after having bare-rooted it without root pruning. I untangled the roots and misted them with outside-temperature water in order to remove the filth. The weather was cloudy without wind and the temperature was around 65F. I took great care of packing soil around all the roots with a thin stick to try and limit air pockets around the root hairs, for less transplant shock. I'd like for this tree to not go into shock and it would be nice if the roots had filled most of the 6" pot by the time I formally repot it in Spring '19. Due to the time of the year I did this, these wishes may not come true, but I am hopeful and I chose a time when the tree had great vigor so maybe it will not lose too much energy from this and will just love its new soil and thrive in it.
    The tree is 1 foot tall. It was originally a root sucker that I cut off of a ~3ft tall green palmatum two months ago (my first tree ever). Its roots grew about 50% while in the pot I put it in after cutting it off the main tree's root system.

    So far it's been quite fun but today was hard to beat.

  • newhostalady Z6 ON, Canada
    5 years ago

    I sure do hope your plant is happy! You deserve to have success with your tree after all your work! It does sound like a wonderful day. By the time I get to make my gritty, you'll be an expert!

    I decided to bring in my small rosemary plant. Since I didn't have any gritty mix, I planted into 511. I also removed all the media. I found it interesting that the roots were in small ball under the plant and that there weren't really that many roots at all! I had it indoors last winter and my budgie acquired a taste for it. Often she would fly onto my shoulder and what do I smell? Rosemary! It seems that ever since starting eating the rosemary, she has decided to nip at my other plants to my dismay!

  • val rie (7a - NJ)
    Original Author
    5 years ago

    Well I've been trying to maintain these rosemary seedlings on the balcony. They're not dying but not growing all that fast either. I need to make more mix. That bag is still 3/4 full.

    So by the way i googled a bit about fir bark versus pine bark. It turns out that fir bark is harder than pine bark. The reason seems to be because pine bark comes in scales out of bags while fir comes in nuggets that don't separate into scales like pine bark does. So this would mean that pine bark is much faster to resize and shred down than fir bark. It makes sense since thin bark scales are easily breakable compared with bark nuggets. I'll go and pick up a bag from Agway maybe and try to sift it then much the rest.

    Let me know how to take care of herbs if you know because I want my stuff to make it. I have a couple seedlings/small plants of Rosemary, Thyme and Basil.

    Cheers.

  • newhostalady Z6 ON, Canada
    5 years ago
    last modified: 5 years ago

    As far as I understand it, basil is not a perennial. Rosemary and thyme are perennials. I don't have experience with herbs. Could the Herb Forum be of help to you? As far as the rosemary goes, I had tried twice to overwinter my rosemary outdoors with no success. When I brought it in for the winter, that's when it survived. I never removed ALL the media before. I just plunked it into what I thought was good media (soil and peat based). It is only recently that I decided to bare root. That is due to the knowledge that I have gained in the Container Forum. I do know though that it was not the "right" time. I learned that my rosemary plant didn't have a large root system. It helped me to understand what size pot would be the most suitable.

    As I understand it, rosemary and thyme like to be on the dry side in regards to watering. During the winter I kept my rosemary in a south facing window and watered only when dry. It barely grew during this time. So this year I have planted it into 511. I look forward to seeing how well it does.

    I found the following thread which might be of interest to you. Al talks about overwintering specific herbs:

    https://www.gardenweb.com/discussions/3416594/bringing-potted-herbs-inside-for-winter#n=6

    Thanks for the info on fir versus pine bark. I believe that fir bark media lasts longer than bark based media too. I understand that a gritty mix made with fir bark will last approximately three years before repotting is required---that is to give your plant a chance to reach its full potential. The 511 will last 1-2 years. The down side is that fir bark is much more expensive than pine bark. I understand also that 511 is more moisture retentive than the gritty mix. So watering requirements will differ.

    As I have read, Agway pine bark mulch is a great product that wouldn't require much in the way of mulching by machine. I am envious!

  • val rie (7a - NJ)
    Original Author
    5 years ago

    Hey! Thanks for all the advice and for the link. I started watering my basil more and rosemary and thyme less. For overwintering I'll try and wrap them with the other trees on the balcony and push everything against the sliding window. Near the window they should be getting some warmth from the inside of my apartment and freeze less. If that fais, they are $2 each...

    I went to Agway and got a bag of bark. It's huge(3 cubic feet) and the pieces seem small although I have yet to open the bag and inspect. Still working on my fir bark for now, I don't have that many plants. Something like 10 pots on the balcony and 10 pots indoors. If the stores have massive rebates over fall, winter and early spring I'll be getting more though that's for sure.


    Val

  • newhostalady Z6 ON, Canada
    5 years ago

    Just wanted to let you know that I was using my mulcher/blower to mulch my 1 inch pieces of pine bark. My son helped me out and we put it through the machine twice. I was really disappointed with the results. The majority of the pieces of bark were still too big. Perhaps my son did too many at a time. I'm not sure. I thought I had better results when I had done it previously. So now I am wondering whether the model you purchased is superior to mine and whether it would be worthwhile for me to purchase it.

    I made a bit of gritty mix, but I haven't transplanted anything into it---yet.

  • val rie (7a - NJ)
    Original Author
    5 years ago

    I transplanted my red JM the other day in it. Barerooted it completely. I hope it like its new home.


    If you have 1 inch bark it means it's big pieces and they would be quite hard. The only thing I can do is try some of my Agway pine bark through the mulcher and let you know how well it works. However the Agway pine bark is quite small to begin with. You know what its still in my trunk let me go get a sample to see the size of pieces.

  • val rie (7a - NJ)
    Original Author
    5 years ago

    Okay I'll post a pic of the bark first then give observations.


    Observation 1: it's very wet, normal because it was sitting outside in their lot. Before I put this through sieves I'm gonna have to dry it all. Maybe leave it on the balcony in front of the A/C exhaust port for a week :)

    Observation 2: yes, this stuff does come with large pieces, so I will test how well I can mulch these large pieces. Just need to make the proper sieves... I guess I could build a 1inch sieve, maybe a 1/2in one too..I really hope the hardware cloth won't be expensive :S Thoughts? But then I can always reuse the rest of the roll to build cages to protect seedlings and small trees from animals if I ever plant in my parents' backyard. I want to to be able to thicken truncks for bonsai but they aren't exactly aware of that plan yet hehe.

  • newhostalady Z6 ON, Canada
    5 years ago

    Good job on the JM transplant! I hope it will be happy too!

    Your Agway mulch looks pretty good. You may not have much to mulch after sifting. I have seen that Homedepot.com. has a 1/2 inch hardware cloth for a good price ($6.50), but don't see the 1 inch there.

    If you don't think you will use the hardware cloth that much, you could just cut a piece that you can drape over a container (instead of building a sieve). I find the ends can be rolled enough to hold the hardware cloth in place. I have seen people put duct tape on each end to protect their hands from the sharp ends.

    When I was looking through gardenweb, I found another thread where someone used the blower/mulcher with good results.

    https://www.gardenweb.com/discussions/2895790/my-solution-to-pine-bark-fines-for-als-tapla-5-1-1-mix#n=18

    What I did notice though, is that it seemed that their bark was moist. And I have to wonder whether that would make a difference as to how well the pieces are mulched. I may try to mulch my pieces once again on low speed. After that I may try moistening them for a day or so and see what happens when they are not completely dry as mine have been.

  • Saypoint zone 6 CT
    5 years ago
    last modified: 5 years ago

    Val rie, I use the set I bought on amazon, there is a 1/2 inch sieve, to sift the agway bark. There was very little waste over 1/2 inch. If you dig around, there are some 1/2 inch that don’t come in sets as well.

    Practicool

    edit: it sifted fine when damp.

    val rie (7a - NJ) thanked Saypoint zone 6 CT
  • mblan13
    5 years ago

    I would not dry it out. Sometimes it can be hard to rewet if it is too dry. You don't need a 1 inch screen as anything under 1/2 inch is not usable. I get VERY few pieces that will not go through a 1/2 inch screen, and the ones that dont are generally easy to break up with your hands.

    And yes Val rie the extra screen will come in handy if you put JMs in ground. Bunnies will eat every single bud from the ground to about 1 1/2 to 2 feet up! They almost killed my Katsura and my Tsusaka silouhette. Once the lowest branches are above the 2 foot mark, you shouldn't need the screen anymore

  • val rie (7a - NJ)
    Original Author
    5 years ago

    Saypoint, Okay, 1/2 inch, got it. Will make a sieve. It's less than $10 in materials and takes about 30 minutes to make.

    newhostalady, that thread that you just linked was actually my inspiration to make this here thread hehe, after I read every single post about grinding size there was. I thought it was bold of them to try mulching it with a leaf blower and their story was pretty interesting and I wanted to repeat the experiment and document all of it, be it failure or success. This turned out to be very successful but still incomplete because the bark I used was just SO NICE hehe. Small pieces, no rocks in the bag, not messy... All right no I swear I don't work for Reptibark (or whoever makes it). That stuff doesn't come cheap either... But the last part of this thread will be getting to try against the larger pieces and pine bark this time. On another note, about mulching wet bark, the only thought I have about it now is, more lubrication, less heat in the mulcher so less stress on it, however, more weight..???

    Yes mblan13 I read a thread here about someone's bonsai tree that got its trunk damaged badly by squirrels! They just ate huge strips of bark away, on one full side... And now you with rabbits! I am glad I'm not crazy in thinking I should cage trees growing in the yard!! After thought it might have been rabbits not squirrels, I mean they only eat seeds right? Oh and there are deer that walk through the yard there, so that warrants a full cage I think.

  • newhostalady Z6 ON, Canada
    5 years ago

    Val rie, funny that I should find the thread that was your inspiration!

    I was anxious to try mulching again. I did wet the bark and let it sit for a few hours, but it didn't make much of a difference. Here is before I mulched (with a dime):

    and a closer look:

    and then after mulching:

    and a closer look after mulching:

    Disappointing. I am really getting to think it is my machine.

    On a happier note, I made some gritty mix:

    and closer:

  • tropicofcancer (6b SW-PA)
    5 years ago

    I did not read the whole thread but sounds like you folks are having fun with the mulcher. I dropped in just to say I hope you folks are aware that bare-rooting and repotting at this time of the year is not good for the plants. Even for tropicals it is a lot of stress unless you have a proper greenhouse. For outdoor perennials just make sure they never freeze but are kept cool through the winter. And keep your fingers crossed.

  • val rie (7a - NJ)
    Original Author
    5 years ago
    last modified: 5 years ago

    Haha nice newhostalady. That's some good looking gritty! It sure does look like your mulcher did not make a dent in that larger bark. I'll give it a try once I get to sifting my bark. Looking forward to it!

    Are you putting anything in your new mix it anytime soon?

    Tropicofcancer, I tought long and hard about it trust me. My argument for doing it was that I want everything to be in good soil as soon as possible and my next repot of it all will be in 5 months, realistically speaking, which seems like an eternity. I estimate out of these 5, 3 of those months will have root activity so better it be in a great soil than not. From the experiences I've read roots can suffer in the cold, and brand new roots created as a response to pruning roots, even more so. The thing is my pots will be pushed against the balcony's sliding window, getting heat from the apartment since we will have the heater on. That plus protecting them from wind with some makeshift tarp apparatus as well as covering everything with mulch. They won't be touched by snow since the balcony is covered, sort of like an alcove into the building. I have pruned almost no roots, only a short section of a thick one that was not letting me place the tree centered in the pot.

    Now I do am thinking of making a system for warming cuttings in late winter and Spring and keeping pots at or above freezing for Winter but I don't know if I have enough time to do it before Winter. I want it to behave such that if the pots' temperature goes below freezing, gentle heat brings it back up to 0 or 1 degree celcius (but not any higher to respect the plant's need for cold). For cuttings it could act the same and would eliminate any danger from late frosts. I just haven't looked for proper heating elements to use yet. There arw heating mats but they cost $20 for one that you could maybe place two 10" pots on top of and their main problem is that they maintain a temp always between 10 and 20 degrees more than ambient temperature, which I don't think makes any sense.

    I'm also trying to understand chill requirements. I need info on that to better be able to target minimal allowable temperature for the system. I have a feeling such a system would be great as a safety mechanism, but not so sure about how much better for the plant in the long term, since in nature they do just fine.


  • newhostalady Z6 ON, Canada
    5 years ago

    Yes tropicofcancer, we are having "fun" mulching with our blower/mulcher! Glad you dropped by! (Never hesitate to drop by!) I am aware that this is not a good time to repot and bareroot. BUT, some of my houseplants are declining, so thought I would take a chance and see what happens. For outdoor perennials (that are repotted or barerooted), not sure what you mean when you say to keep them from freezing. Can you explain?

    Val rie, I made some gritty mix and want to try it on some houseplants. I have a Ming Aralia that is going downhill and I am not sure exactly why. I propagated two cuttings of it in 2016 and now those cuttings are looking terrible. So I have repotted both into gritty mix. I am looking for good results! I just barerooted my second "baby" Ming Aralia:

    Just had to do it tropicofcancer. You see, there's only two leaves left! And this plant was propagated summer of 2016. And oh, how it did look wonderful once!

    Val rie, have you had any more thoughts in regards to your system for warming cuttings in late winter and spring and keeping pots at or above freezing for winter? Sounds a bit challenging?

  • newhostalady Z6 ON, Canada
    5 years ago

    And my bird has to check out anything I do with my plants. Here she is inspecting my gritty mix!

  • tropicofcancer (6b SW-PA)
    5 years ago

    Dormancy sets in below 45F in general. This is when chemical changes occur in plants to prepare for the winter and go to a deep sleep mode. Basically, prepare for freezing temperatures. And this when they least like to be disturbed too. For in ground plants the roots have more time because the ground is warmer. Potted plants do have that luxury and and roots are more vulnerable to freeze damage. In general, potted plants will require more protection during the winter. And if it has been freshly repotted then it is more vulnerable. Maple roots particularly do not like to go too much below freezing.

  • val rie (7a - NJ)
    Original Author
    5 years ago

    Hey newhostalady. "some of my houseplants are declining", yes me too.

    First of all it's hard for me to do anything to the house plant because of my girlfriend hehe. She's not on board with the aerated soil concept yet so some of our stuff is doing poorly, being far away from windows is not helping either. For example our bromeliad lost its flower and then its green leave crown around it, I can't tell what's left but we'll see if it survives.

    That Ming Aralia looks good it's green so that's what counts. It probably was suffocated in the old soil, and it got worse overtime because it always gets worse as the soil compacts with waterings and root growth, which would explain its limited volume of foliage maybe. Also house plants' best season is during the summer I believe. Now they're kind of resting a bit, but still growing, just not in a crazy way. If you don't mind me asking how were the roots when you pulled it out of the old soil?
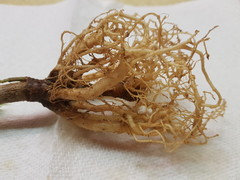
    Here is what I saw when I pulled out the tree in my last picture to put it in gritty (I was glad none of the roots were damaged or rotten, after all the soil it was in was decent but I would have wanted to see a lot denser root system considering the size of the tree):


    About the system for pot warming for the trees I'm not sure yet if I am ready to do it because I already kind of spent my plant budget on something else. I got a heating mat and a thermostat controller for the cuttings I just made because I found two large branches that had just been broken off of some nice looking Trident Maple trees in my neighborhood so I brought them home and cut them up. They've been in mini greenhouses for a few days now and waiting for that heating mat to come in tomorrow. Heating mat was 20 dollars and the thermostat too so I want to slow down the expenses because after all this is very likely to fail :) .

    If I wanted to build that system for my trees it would cost $65 (one heating wire kit of length 30 feet so I could wrap all my pots with it in a chain of sorts and one thermostat controller that turns it on once the temperature at the roots is lower than target, it has a thermometer probe that you stick deep into the pot). The other reason why I'm not jumping on that tree warming idea just yet is that I could really mess up the chill requirements with it if I set it too warm, or if it turns on suddenly because a temperature decrease and that wakes up the plant when it shouldn't have been. I just don't want to risk it before I learn more. From first study it would seem if I don't let them go lower then 3 or 4 C under freezing I should be okay, letting them freeze a little like they like. I wouldn't be warming them up under any other situations, so I'd basically set the temp to -3C and leave it there until last frost... Maybe I'll do that next month once the budget gets watered again.. That or even set it to -1C. I don't yet know how beneficial freezing temperatures are, or not at all.

    I've been kind of obsessed with cuttings and wanting to have some root, especially since my last failure that I really really thought was gonna work in late summer, so I spent money on that mat and thermostat. I believe everything else with the cuttings was done correctly so the last missing piece is bottom heat. tropicofcancer you say 45f for dormancy, but that's not enough for the chill requirement correct? Or is that actually it?
    I found this it seems useful...
    http://www.canr.msu.edu/news/winter_dormancy_and_chilling_in_woody_plants

  • gardengal48 (PNW Z8/9)
    5 years ago

    Chill requirements really only apply to fruits and berries. Many require a certain number of hours of cold for the flowers to develop and the fruit to set properly. That's why many varieties of fruits are so location dependent.

    For other hardy woody plants, chill hours are not much of a concern. You just want the plants to go dormant and keep them dormant so you need to maintain temps right around freezing to about 45F (I prefer to keep at around 40 as some plants will emerge from dormancy at 45F).

    In my climate I just leave all hardy woody plants in containers outside. If the temps drop significantly, I might group all the smaller containers together to create a small microclimate but all the rest - Japanese maples and other trees, dwarf conifers and a few mixed perennial containers - are outside exposed to the elements year round.

    If I lived in a colder climate, I might move them to an unheated garage, basement or shed but not indoors or anywhere the temperatures are likely to exceed 4OF. Or drop much below 25F.

  • newhostalady Z6 ON, Canada
    5 years ago
    last modified: 5 years ago

    Hey val rie, sounds like your girlfriend is going keep you in check!

    The Ming Aralia is holding on. I got worried when one leaf fell off after repotting---and you know it didn't have that many to start with! Here is a picture of the roots of one of them:

    I think the roots of your tree look pretty good. How is your tree now?

    Your system for pot warming can wait. Right? I am not surprised you already spent your plant budget! It's hard not to! But if you live in zone 7a, do you think you really need to have the tree pot warming system? Can you give it a try this year (without it) and see what happens? Have you asked for advice on other forums in regards to cuttings and rooting?


  • newhostalady Z6 ON, Canada
    5 years ago

    Val rie, from the article you linked above, it says: "As the plant enters endo-dormancy, it tracks chilling units to track the passage of the winter. Chilling units are hours of time spent above freezing. The number of hours required for chilling varies for different plants from less than 500 to 1,500 hours or more. Many people think the plant is tracking hours below freezing. It is not. Hours below freezing have no effect on chilling, but will increase cold hardiness." Sounds to me that what tropicofcancer said was that dormancy begins at around 45 degrees F., but the chilling requirement is a certain number of hours a plant needs in dormancy.

    It's all a bit confusing. The article says it is talking about woody plants. And it does sound like there is chilling requirement.

    For a couple of months in winter our temperatures are generally around 20F. I put my perennials in an unheated shed or garage.

  • newhostalady Z6 ON, Canada
    5 years ago

    And I wanted to add that I figured out that my gritty mix wasn't done correctly. I think the granite pieces were too large.

  • tropicofcancer (6b SW-PA)
    5 years ago

    Read this also: https://www.evergreengardenworks.com/dormancy.htm

    Chill hours is mainly used in reference to fruiting plants and is important in agricultural to make sure the plants produce abundant fruits. For other temperate plants same thing applies and the biological process is the same just that the same terminology is not used. As a rule of thumb, as the above article states, 1000 hrs is a figure that is used for temperate plants. The tricky part is to figure out how chill hrs are counted. Al had written a good post about it but I cannot find it now. From what I remember: between 40-45F every hr contributes towards chill hrs. Below 40F every hr contributes less to chill hrs and the effectiveness keeps decreasing as you approach 32F. Below that it has no contribution to chill hrs. Changes happen to plant tissue - essentially they replace water in within and outside of cells with lipids to deal with the freeze-thaw cycles. Also the buds needed for the next season harden and are protected.

    What is hard on plants is sudden prolonged warming in late winter followed by freezing conditions. A large tree in ground can deal with it. Plants do not put all eggs (buds) in one basket. If the first set of buds dies because of freezing then the plant waits to activate its next set of buds. But the second time it will be more conservative in activating. But this takes a heavy toll on the tree. Some can even tolerate a second loss. But if it repeats the following winter it can be fatal to the plant. Such winter trauma also affects flower/fruit production a lot.

    In containers, with much smaller plants there is much less leeway. If it breaks bud then it is very important to keep it from losing those buds to freezing temperatures. Plus they are more susceptible to roots freezing. General rule of thumb is 25F is lowest they will tolerate. The soil should be on the dry side and not soggy. Soggy soil and freezing temperatures can be fatal to the roots.

    Water is a peculiar liquid unlike any other. Important temperature is 39F. As water cools to 39F its density keeps increases reaching its maximum at 39F. As it cools further its density starts decreasing and so it expands. That is why ice is lighter than water and it floats. So if in a confined space like a cell, freezing temperatures cause the cells to expand and rupture. To counter that plants replace water with lipids that behaves much better protecting the cells. Roots do not have the same luxury especially the finer roots. They will rupture and die.

    As a side note: The fact that water is so peculiar in its behavior makes life possible on earth. If you have a pond you will notice that water remains in liquid form near the bottom while the top freezes. Water at the bottom will be stuck at 39F while the frozen top acts like an insulator. Many fish and plants can survive because water will remain in liquid form at a very steady temperature. Probably you can see the connection with the fact the around 40F is the ideal chill temperature for plants.

  • val rie (7a - NJ)
    Original Author
    5 years ago

    newhostalady, looking at your gritty, it looks okay, it sure may not be at the optimal size but it won't make much difference. This may not perform exactly like the gritty mix but it will be very close. Probably 3-4 times better than anything that was in those pots before as far as aeration and drainage and the height of the water table in the pot (if any water table).
    The roots look really good on that Aralia, I'm sure they'll grow even better and stronger now in your new mix. Keep us updated. Although I'm sure to see real results you may need to wait a couple months or more. Maybe one or two weeks for the roots to hook up to the new soil and a few months more to colonize the pot.

    Yeah also for the pot warming thing I won't be doing that. I'll just wrap them with insulation mat that I found. Already did that red japanese maple with it one day that it got very cold and I panicked cause I had just repotted it like I said. It's doing great as far as leaves go but then again that's the way I bought it. It had a rough recent life at Home Depot. In Spring I expect good growth for it though. I'll be pruning it hard next month or later once I'm sure it's fully dormant. Maybe will take two months. In the mean time I'll continue researching pruning. I would like it to maintain very strong growth but being able to start shaping it too. Not sure about all that yet.
    Also I just got a new tree, a Katsura Japanese Maple. Was very cheap and looks amazing with a thick trunk. I'm also strategizing on how I will prune that one this winter. Check the Maples forum for that thread if you want to see a couple pictures of it...
    For the cuttings I have another thread up in the Maples forum go check it out, we're talking about the trident maple cuttings I just made and I have a warming system for them that works pretty well.

    tropicofcancer, thanks for the great info and link

    "Also the buds needed for the next season harden and are protected."
    I wonder about this statement, what it entails for pruning trees before spring. Should they be pruned as soon as possible once they are dormant, to get rid of the buds we don't want to waste energy on once spring comes around?

  • tropicofcancer (6b SW-PA)
    5 years ago

    For a strong plant pruning in winter is not a problem as long as it is protected when the buds and new leaves come out. Maples is a bit tricky. Ideally you would prune after it has leafed out or do it in winter when it is dormant. In spring it starts pushing sap to feed the buds and pruning then could cause it to bleed excessively.

  • val rie (7a - NJ)
    Original Author
    5 years ago

    I see. Thanks tropicofcancer. I'll have a thread about pruning my 3 JMs this winter.

  • newhostalady Z6 ON, Canada
    5 years ago
    last modified: 5 years ago

    Val rie, my Ming Aralia (in the gritty mix) has lost some of its leaves. I am not sure why. Maybe it's adjusting or it is a watering issue?

    I have two Japanese Maples. One I have had for several years. I think it is a Crimson Queen and it is planted in the garden. I am going to have to see if I can get some help with this plant. It has lost many branches. I have never pruned it. My garden center tells me that JM don't live very long. I don't know if that is true or false. I just bought a very small JM about a month ago. I think it needs repotting, root pruning? and stem pruning. I just don't have a clue how to deal with it. I am going to overwinter it in the pot it came in and put it in a shed. It was only $5 so I took a chance on it. I will be keeping it in a container. I'll be going over to the Maples Forum and will see your thread and your Katsura JM.

    Thanks tropicofcancer for weighing in. You are a wealth of information!

  • val rie (7a - NJ)
    Original Author
    5 years ago

    Is the Ming Aralia getting enough light? In the gritty it should be watered often, like every 3 days. Soak it. The pot has a good hole in the bottom right?

    I bought a ficus that I quickly repotted in gritted so I'm trying gritty for inside plants as well. In my case I need grow lights cause the light is terrible in my apartment. Almost everything is away from windows.

    For your new $5 JM it would be nice to see pics! For your big one outside make a thread with good pictures and we can try to help.


  • newhostalady Z6 ON, Canada
    5 years ago

    "Is the Ming Aralia getting enough light?" I think so. I have been watering every two days (more or less). I was wondering if the loss of leaves was due to the media change and not watering enough after repotting. The pot is just a plastic one with plenty of holes. Perhaps because my granite pieces are too large, I will have to water more frequently. You said I should "soak" it? What do you mean by that?

    That ficus's root system looks interesting. Hope it likes the gritty!

    I will do a new thread for my two Japanese Maples. I'll use the Maple forum for my in ground JM and the container forum for my small JM that will remain in a container.

  • tapla (mid-Michigan, USDA z5b-6a)
    5 years ago

    NHL - all my ficus trees are in the gritty mix, and I have somewhere around 50 of them, covering at least 2 dozen species/cultivars. I've posted hundreds of images of them, and from the images it can clearly be seen that all enjoy a high state of vitality at all times of the year.

    The size of the particles in the gritty mix is important. You should avoid a wide divergence in the particle size of various ingredients; and, there is a good deal of advantage in keeping the particle size of inorganic material as close to 1/10" as possible w/o allowing particles any smaller than that in the mix. The organic (bark) particles can be slightly larger - from 1/8-1/4 is best because that allows for some breakdown of particle size during the service life of the soil. Anything larger than 1/10" particles in the mineral fraction (inorganic) part of the soil serves only to increase aeration well beyond what's needed for good root health/function, and it increases the frequency with which you must water to keep up with your plant's demands.

    Al

  • newhostalady Z6 ON, Canada
    5 years ago

    Thanks for coming and clarifying about the gritty mix particle size Al. I thought I had done the mix correctly, but obviously something was amiss. Good thing is that I hadn't mixed too large a batch. I will make another attempt to get it right. I must say though that my ming aralia cuttings have now settled into the gritty, and I feel that I have gotten a handle on the watering. But I plan to make a new batch of gritty and up pot the ming aralias into it in the new year. This is the first time I am using the gritty mix and Foliage Pro. I am using just 1/4 tsp. per gallon during the winter season.

  • tapla (mid-Michigan, USDA z5b-6a)
    5 years ago

    Prescreened Turface is available. If you can find an entity that buys Turface by the pallet, I bet they'd be more than willing to order whatever amount you want/need. I haven't figured out what kind of value it offers (monetarily), but not having to screen it has to be worth something. Profile's HQ is in Buffalo Grove near Chicago. Lucky for me I'm in Chicago several times per year, so I'll be checking things out (like prices if bought in bulk and particle size gradients in the different products). Otherwise, the best size to buy for screening would be Turface MVP. Profile used to package MVP for John Deere Landscapes (JDL) as 'AllSport', but JDL was acquired by Clayton, Dubilier & Rice a few years ago and I don't think it's any longer sold/packaged as 'Allsport'. If you're looking for Turface MVP, your first stops should be the nearest Site One or Ewing Irrigation stores. Since both are BIG users/sellers of Profile's products, they might be willing to add the prescreened product to their next order. More here about the prescreened products.

    Al

  • Vladimir (Zone 5b Massachusetts)
    5 years ago

    Al, you wrote above: there is a good deal of advantage in keeping the particle size of inorganic material as close to 1/10" as possible. Do you now mean to say that the Turface particles should be 1/10", not 1/8 to 1/4"?

  • Vladimir (Zone 5b Massachusetts)
    5 years ago

    I was mistaken. You are correct.

  • tropicofcancer (6b SW-PA)
    5 years ago
    last modified: 5 years ago

    Last year I tried All Sport and seems to be quite usable. Compared to MVP it has a quite a bit more of <1/16 insect screen proportion. The larger particles are similar to MVP. All Sport Pro has even more of the fine stuff and largest particles are smaller than the MVP. The upside is that in our area All Sport is about $13 as opposed to $27 for MVP for a 50# bag. The dealers are different though and so is probably the markup. All Sport is available from SiteOne and MVP is available from Griffiths in Pittsburgh - if anyone is reading this from our area.

  • Skip1909
    5 years ago

    I have All Sport Pro, what can I do with all the leftover fines?

  • tropicofcancer (6b SW-PA)
    5 years ago

    I sometimes use it as replacement for peat in 511. You could just throw in the yard too. I also make hypertufa pots and sometimes use turface fines The mix is portland cement, turface fines, perlite fines in 1:1:1 ratio. Sometimes I use pine fines too. Here is a hypertufa pot I made with some semps and sedum in gritty mix. Stays outside all winter just like that and has not cracked in 4 years or so.


  • val rie (7a - NJ)
    Original Author
    5 years ago

    That's pretty cool tropicofcancer.

  • newhostalady Z6 ON, Canada
    5 years ago

    Thanks Al for the information about screened turface. I did also try to look at your link, but it doesn't seem to work.

  • tapla (mid-Michigan, USDA z5b-6a)
    5 years ago

    The first word in my post of Jan 6 above is a link to the prescreened product. When that opens, there should be another link that says View Bonsai Growing Medium Brochure & Potting Suggestions Try that route if the preceding link doesn't work. There are 2 pages. Here's the first again: Prescreened


    Al

  • newhostalady Z6 ON, Canada
    5 years ago

    I got it now Al. Thanks! Very interesting.

Sponsored