


Kitchen progress before and not quite after
mocxr
5 years ago
last modified: 5 years ago

Featured Answer
Sort by:Oldest
Comments (19)
Related Discussions
Progress-Before and After
Comments (12)Hi, and thanks all. The green plant is a dwarf yaupon. It was existing and doing well, so I just trimmed it into a ball shape. We also reused the gravel. Originally the entire yard was gravel over black plastic with a few random plants plopped in. Here's a picture of two the Lavender Provence blooming. This is the first year, so they aren't as full of blooms as they will be in future years. The Wormwood is already getting too big for the spot but it does make a good background for the Lavender. The third Lavender plant is not happy so I'll probably replace it with a Russian Sage because they are looking good there. The Russian Sage is in the upper right just past the "tipsy pot." You can see another inferno strip out by the mail box. It looks so good this year, I'll try to get pictures of it. Currently working on the other inferno by the garage. That's where Roselee's plants from the swap are. It's not ready for photos yet....See MoreBefore and After Pics of My (not quite done) Decluttered Basement
Comments (8)It is kind of annoying how ivillage adds the hyperlinks to our text with advertising... Easy to think someone is a spammer when they might not be. Here's some updated final pictures showing the full basement with a "walkaround" of each corner: http://herbygoodness.blogspot.com/2011/02/final-before-and-after-pictures-of-my.html I still need to do some work on my craft area, but basically otherwise, the basement decluttering and organizing is DONE!!! Waaaa hoooo!!!! One of my future projects will be making it look a little more homey, by adding an area rug to my craft area and adding a LARGE exercise mat under that area. I'll be watching thrift shops and flea markets and craigslist and whatnot for cheap stuff. For this project, no, I really didn't purge a ton. In looking through my before pictures when I started, I had estimated I might get rid of no more than 20% of my stuff. I did take about 4 boxes of stuff to goodwill and 1 box of stuff is designated for the habitat for humanity restore store that is opening in our area in a few weeks. We're also taking an old tv to the electronics recycling event in our town this Saturday (nobody on freecycle wanted it). I put our nordictrack ski machine up for sale on craigslist. If it doesn't sell, I'll donate it somewhere. I had three large garbage bags worth of trash and a number of boxes/etc. for recycling. Mostly though, the stuff that was down there just needed to be better organized and put away somewhere. I bought a few more shelving units (I so agree with you on the infrastructure, talley_sue - if you don't have "a place" where you can put things, it all ends up piled on the floor so your choices are purge and/or make storage options!). I lucked out in that my neighbor redid his garage this summer and threw out three 5 shelf shelving units (one matched our basement shelves, one matched our garage shelves, one didn't match at all - I shared that one with a friend who I have been helping with decluttering her basement) and one 2 shelf shelving unit and two 3 shelf shelving units. So that definitely helped me a lot. Those 5 shelf shelving units (24" deep) that I LOVE LOVE LOVE are from Home Depot. They are plastic and just snap together easy peasy. Cost is about $41 each right now, so they definitely aren't cheap. I really strongly prefer them over the metal shelves. They are so much stronger, easier to assemble and move, and nicer looking, in my opinion, unless you can afford the stainless steel restaurant quality shelving. The one caution I would give anyone starting out in buying organizing supplies is to put totes on the shelves at the store before buying. A lot of totes didn't fit well (just barely too wide to put two side by side or just barely too tall to go on shelf). I did also invest in some new totes (on sale at Home Depot for $1-$5), including a bunch of sweater boxes and shoe boxes. I had a mish mash of assorted totes I had picked up over the years. I'm happy to say I was able to use up a large number of those in this project. I am trying to transition as much cardboard into plastic as possible, just in case it ever floods down there. Finally, I put labels on everything, since in my world, out of sight is out of mind and with totes I can't see through, I might never find things again if I hid them all away. :) Eventually we want to finish the basement, but that's a long way off and even when we start, it will likely be done in stages for financial reasons. For now though, at least our basement is a whole heck of a lot more useable than it was. Here is a link that might be useful: Final Pics of Basement Decluttering...See MoreKitchen mini-makeover DIY (Before and After)
Comments (34)Nosoccermom, I will give you a couple of tips from my limited experience. Make sure you spend the time to fill holes and dings with wood putty before painting. Each little blemish will show up much more after painting than in the original wood appearance. You need a really good paint brush - my favorite is the Purdy Clear Cut. I don't know why I just liked it in my hand. Also, I used a small fine roller from Seven paints - I did not like how a sponge roller looked. After a year +, the upper cabs still look like new but the lowers definitely have little dings that need to be touched up. So make sure you keep some extra paint! We used a clear silicone(?) on our seeded glass inserts. Hope this helps a little. If it seems daunting - it is daunting. This was a big project IMO. :) Here is a link that might be useful: this old house - how to paint your cabinets...See More98% finished kitchen. Lots of before and after pictures
Comments (17)Started getting nervous when I saw the before pictures as I thought they were the after pictures. I was going why did she keep the coil electric burners? Maybe she couldn't afford a new stove....Pictures look kinda dark.... Then I see the after. Beautiful! Love the cabs and the red granite. What cooktop is that? Looks like it is fun to cook on it. Love the other choices and the brick. French doors are beautiful and I LOVE the dining room table. Who makes it? At first I thought it was black stone until I looked further and saw it was glass. Do you just love your sink? Really pretty! I too love the pop of the red. Are the floors original? Would love the details! Great job and congrats. You have to just be thrilled!...See More
mocxr
5 years agomocxr
5 years agomocxr
5 years agomocxr
5 years ago
Boxerpal
5 years agomocxr
5 years agolast modified: 5 years ago


Related Stories
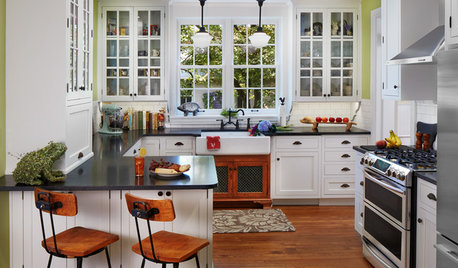
KITCHEN MAKEOVERSBefore and After: Glass-Front Cabinets Set This Kitchen’s Style
Beautiful cabinetry, mullioned windows and richly refinished floors refresh the kitchen in an 1879 Pennsylvania home
Full Story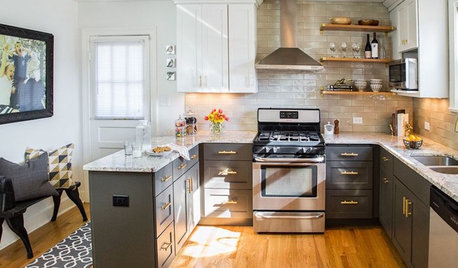
MOST POPULARBefore and After: 13 Dramatic Kitchen Transformations
See the wide range of ways in which homeowners are renovating their kitchens
Full Story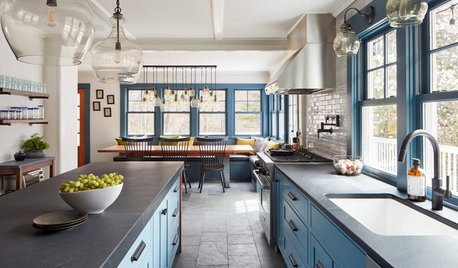
KITCHEN MAKEOVERSBefore and After: Clever Kitchen Redesign Draws a Crowd
A Massachusetts kitchen for a family of 11 gets a new configuration that provides more style, function and space
Full Story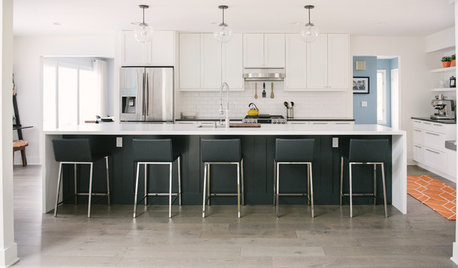
WHITE KITCHENSBefore and After: Modern Update Blasts a '70s Kitchen Out of the Past
A massive island and a neutral color palette turn a retro kitchen into a modern space full of function and storage
Full Story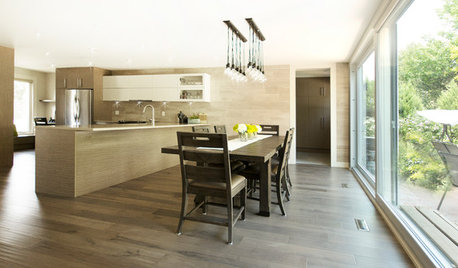
KITCHEN MAKEOVERSBefore and After: A Kitchen and Dining Area for 3 Generations
The walls come down in this Toronto home to create a more functional space for cooking, dining and doing homework
Full Story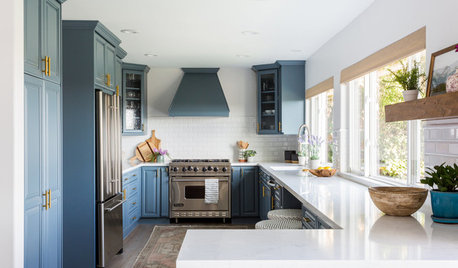
KITCHEN DESIGNBefore and After: Blue and Brass Refresh a Kitchen in Bel Air
Freshly painted cabinets and new surfaces and hardware update this kitchen in a Los Angeles couple’s first home
Full Story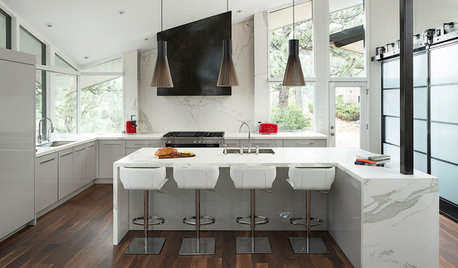
KITCHEN DESIGNBefore and After: 4 Black-and-White Kitchen Makeovers
See how the chic color palette adds contrast and drama to these renovated kitchens
Full Story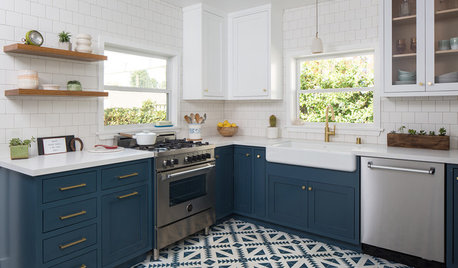
KITCHEN MAKEOVERSBefore and After: 6 Kitchen Makeovers Under 200 Square Feet
Savvy layout changes and beautiful design choices result in kitchens that work better for their households
Full Story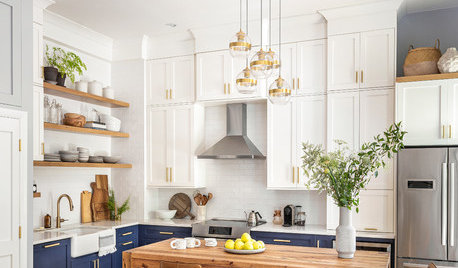
KITCHEN DESIGNBefore and After: 5 Beautiful Blue-and-White Kitchen Makeovers
See how this great color combination transformed these outdated spaces
Full Story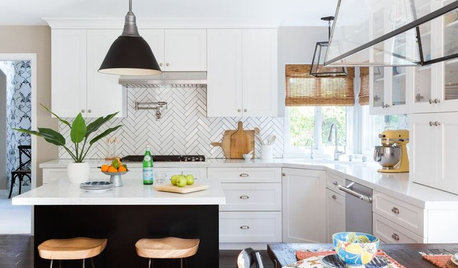
KITCHEN DESIGNBefore and After: Kitchen Gets a Bold New Look in Black and White
A built-in banquette, a herringbone-pattern backsplash and touches of black transform this California kitchen
Full Story


Boxerpal