


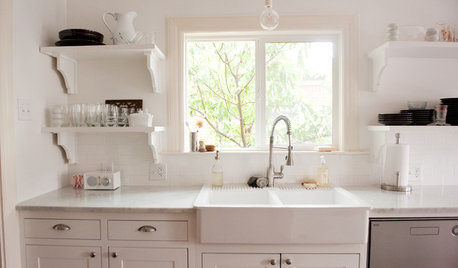
My sink odyssey must end!
A G
5 years ago
Featured Answer
Sort by:Oldest
Comments (21)
Related Discussions
Replacing Brakes - Honda Odyssey
Comments (10)Rotor spec for your car is 1.102 nominal, 1.024 minimum thickness. That means when machining my preference is to not go closer than .030 of the discard or 1.054 for the unofficial minimum machining thickness. Rotors of course can be machined off the car and have been for decades. However the preferred method for your car is to machine them on the car. That provides automatic correction for any wheel hub run-out. That's one of the reasons they are fastened to the hub with those two screws. The other reason of course is so that during initial assembly they don't fall off on the assembly line before the calipers are installed. But when you need to remove them, how does a tech do it? I have two methods. One is an impact screwdriver that operates by inertia. There are spiral groves in between the inner and outer portions of the tool, and when you hit it with a hammer and force it to collapse, the inertia of the outer half not wanting to start turning, forces the inner section to try t turn and tighten or loosen a screw depending on the tools setting. Almost every motorcyle tech will be familliar with this tool, they have existed since the 60's at the least. In fact mine is probably the oldest tool in my tool box, having purchased it in the early 70's. But it does not always work, sometimes the screws are simply too tight, and I break the screwdriver bit pretty often. That forces me to use the second method, which ruins the screw. I take a large center punch, and start by making a deep pin hole into the edge of the screw, without hitting the rotor. Once the hole is there, I move the punch to an angle to force the screw to turn by driving it with the punch and hammer. With practice this is really simple and has never failed to remove one of those screws. On a few occasions I have even been able to re-use them. Lastly, 1 1/16" translates to approximately 1.060 (about .030 for 1/32) IMO you would not have been able to machine those rotors successfully, as they would be getting too thin to allow for enough material to deal with the heat generated by braking. Plus six years old on a vented rotor, the rust that builds up in the middle cooling vanes prevents the rotor from cooling efficiently. Plus, the same rusting makes the rotor structurally weaker and prone to "crushing" which is one of the primary causes of rotor thickness variation. All those things together make it unadviseable to have not replaced these rotors when doing the brakes. At the same time we haven't talked about how good the calipers really are, and the caliper slides, how free are they? What about the rear brakes, did you check them? The parking brake assembly? How is the fluid, should it have been flushed? There is so much more to replacing brakes, than just simply slamming a set of pads. That's why you will never see my quote things like the "$99.00 brakes, additional work extra routine"....See MoreMy estimate, must be a joke? lol
Comments (31)I just received the estimates from one contractor to re-do two bathrooms, and had a similar jaw-dropping experience. Our hall bath project (I'm guesstimating it's about 8' X 8' or thereabouts) is really a cosmetic facelift- replacing the tile on the floor and tub surround, removing the old cabinets and installing a new vanity and countertop, adding beadboard wainscotting, and updating the lighting and sink/ tub fixtures. That's it. Not moving any plumbing, etc. or installing anything fancy like multiple shower heads or a steam shower. We'd keep the tub in place since it's in good shape. The estimate for this work came in at $14K NOT INCLUDING the cost of the tile, vanity, lighting fixtures, or plumbing fixutres, which are "customer supplied!" The estimate also included things like a complete demo of the walls and ceiling, all new drywall work to replace the demo'd walls and ceiling, and "rough in" plumbing. Huh? Maybe I'm missing something, but why would all of this be required to make the changes I just described? The estimate for our master bathroom - again, not including any of the materials like lights, tile, fixtures, and cabinetry - came in at $23K. This room is larger (although not huge by any means - we don't even have room for a separate WC/ toilet enclosure), and we would be relocating the tub drain and faucet, and making the shower about foot wider. It just seems SO high when it doesn't even include a lot of the materials! I've already e-mailed back for an explanation - it ought to be interesting. The guy kept commenting on how nice my house is, and it seems like business must be slow since he said they could get started "right away." I am honestly wondering if he jacked up the price, thinking he detected deep pockets - boy was he wrong :-) We live in the DC suburbs where things are generally expensive, but geez ......See MoreTell me what a 'must-have' is for my new kitchen!
Comments (30)We're just weeks from moving into our new house, but we built in 2001 and I've reproduced the things I loved most about that house in the new one. I'm one who loves deep drawers -- I kept my daily dishes -- heavy stoneware -- in one and my shoulders appreciated not having to lift them into a wall cupboard. I hated the two "door" cabinets I had because I had to sit on the floor to dig things out. The new kitchen is almost all drawers -- and the two door cupboards have pullouts this time. Full extension drawers -- wouldn't be without them. Under cabinet lighting -- ditto. The best quality cabinets you can afford. It's easy to fall in love with a look and sacrifice quality. Resist the temptation. For me, a fridge with a freezer on the bottom. The apartment we're in while building has a top freezer and I curse it every time I have to stand on my head to get something out. My old fridge was a single door, bottom freezer -- I loved it. The new one is a FD bottom freezer. I hope I like the FD as much as my DS and DDIL do. I know I'm WAY in the minority here, but I've had a ceiling fan in every kitchen since 1977, and I can't imagine not having it. I thought long and hard before sacrificing snazzy over-the-island pendants for a pedestrian fan and light -- but I love having cooling breezes while I'm cooking. The snazzy pendants are going over the sink. We loved our island in the last house, but found it a bit too small when entertaining. The one in the new house is more of a continent. I'm almost embarrassed . . . but we'll never find it too small!! Have fun planning! The link below has a lot of great ideas . . . Here is a link that might be useful: Maybe more than you wanted to know!...See MoreAre my expectations just too high for even the high end cabinet makers
Comments (45)1) Regarding the screws.... For the drawer faces: Pocket holes should be drilled into the face frames if they must be attached permanently vs using the hardware to keep them on. The pocket holes should have covers attached (either the plastic or wood options). I personally prefer if they are removable via removal of the hardware so they can be changed out or refaced in the future & since you're going the custom route I'd defiantly want it! Inside the cabinets: A pilot hole should be drilled prior to screw if the wood hardness requires it & the screw counter sunk (slightly below the side walls) with or without plastic caps (depending on the company). Cabinet/Wall Brace:Are all the cabinets secured to the wall with simple screws?? I was really surprised to see this! How are they making sure the bases are secured to studs & not just drilled through into the gypsum board? In the past I've seen cabinet makers use a base board across the run anchored into wall studs and the bases are then secured to the board. Holes: The hole that will be exposed once the dishwasher is installed needs to be fixed. The fridge cabinet with the double screws and the blank hole is ridiculous...whomever was doing the install rushed and didn't care about screw placement or taking the time to properly aline things before drilling. Again= Custom built should = quality control and care! Yes there are MUCH better ways of finding the studs...even just using your knuckles to knock on the wall can get you close enough that a max of 2 holes might need drilled if you miss it the first time....again, sloppy work installing. The range microwave: Did they know that cabinet was going to support a microwave/hood? I'd ask about the install and max weight support. I don't believe 2 screws is enough to hold it (especially if they only screwed it into the wall & not a support board!) but don't know...I'd just hate to have it come crashing down a year from now! *You need to make sure the cabinet makers know that screw placement & finish result is important to you and you expect no screws will be felt or seen once the install is complete. 2) Shims: Yes, it's totally normal for wood shims to be left under the cabinets. Floors aren't completely level and in a new build the house will settle over time and the floor will change so it's important that the cabinets can be leveled. This is why RTA cabinets like IKEA have adjustable feet on the base that's hidden with a toe kick. Custom cabinet makers use wood shims to level on site during install and those can then be removed or added to as time goes on and any changes are required to keep the cabinets level. 3) Fixture & Outlet Holes: Yes, it's common to have large square pre-cut from the backs before install as plumbing is different for every job & since fixtures change depending on the choices made in faucet, garbage disposal, dishwasher lines, etc they can't make exact cuts. Again, this is why a lot of RTA cabinets are backless and if the backing is ordered it must be cut by the installer to fit the existing fixture spaces. HOWEVER- I totally agree with your being upset about the range plug placement and their solution to cut another hole into the side of the custom cabinet boxes. Although- I'm not entirely sure I understand correctly if it had to go through another base to reach the outlet or just the base of that unit vs the back side where a hole was already cut? I don't know what another solution would have been.... 4) Cabinet Face Gaps: Are you doing a full overlay with the new build as well? I completely agree that the gap's should be consistent and you definitely shouldn't be able to see the contents of the drawers! If the cabinets are full overlay why is the frame not hiding the contents? If they are custom inset then I'd be very picky about how it all lines up since this is a fine craft that requires skill & time to get right (hence the excessive cost)...plus wood swells & contracts so they need to fit properly with a slight consistent gap after install....See More
Sue 430
5 years ago PRO
PRODiana Bier Interiors, LLC
5 years ago
new-beginning
5 years agochiflipper
5 years agolast modified: 5 years agoJanet
5 years agodan1888
5 years ago- PRO
Patricia Colwell Consulting
5 years agolast modified: 5 years ago 
Lisa SW
5 years agoAnne Duke
5 years ago
Related Stories
KITCHEN DESIGNKitchen Sinks: Easy-Clean, Surprisingly Affordable Ceramic
You get a lot for the price with ceramic sinks, and they're available everywhere. See the pros and cons here
Full Story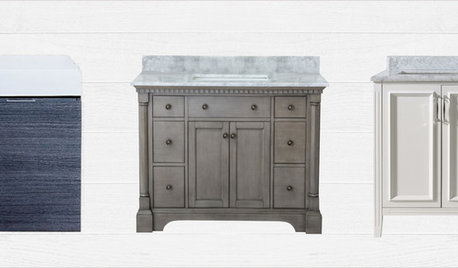
SHOP HOUZZUp to 55% Off Single-Sink Vanities in Every Style
Vanities for your powder room or guest bath
Full Story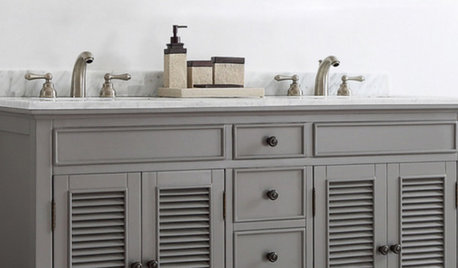

KITCHEN DESIGNQuick Project: Brighten the Space Under Your Kitchen Sink
Give yourself a lift with a refreshed place for your kitchen cleaning supplies
Full Story
SHOP HOUZZUp to 40% Off Modern Single-Sink Vanities
Modern bathroom cabinets in a range of shapes and finishes
Full Story0
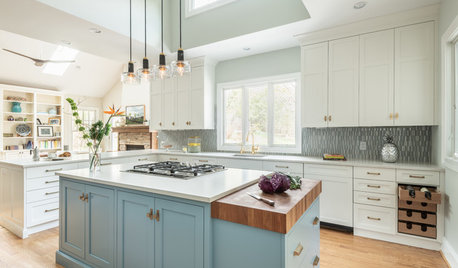
NEW THIS WEEK7 Smart Ideas for the End of a Kitchen Island
Extend function in the kitchen by building in chopping blocks, appliances, storage and more
Full Story
SHOP HOUZZDouble-Sink Vanities With Free Shipping
Up to 60% off vanities for your master suite
Full Story0

SHOP HOUZZUp to 65% Off Single-Sink Vanities by Style
Freshen up your en suite with a stylish vanity on sale
Full Story0
SHOP HOUZZUp to 65% Off Bathroom Sinks and Faucets
Restore your vanity with a fresh sink-and-faucet duo
Full StorySponsored
Columbus Area's Luxury Design Build Firm | 17x Best of Houzz Winner!


friedajune