


My winter project! Before / After
ShadyWillowFarm
6 years ago


Featured Answer
Sort by:Oldest
Comments (22)

Bri Bosh
6 years agoRelated Discussions
This year's major project - before and after
Comments (27)This is lovely. Keep rambling! I love to hear about other's garden adventures. I also do not know any other gardeners locally, although I do get to talk to my sister on the phone about our respective gardens. Your path is really beautiful and co-ordinates well with the fencing. Plus, all the plants look so healthy. The neighbors maple is a nice addition too. The only thing I can think of is trying for a kid's garden in the center plot. A bean teepee and some towering sunflowers or maybe a 3 sisters corn/bean/squash mound just to model interesting plant interactions. Although it looks as though you may have already filled it up with some goodies since there are plants in the pic....See MoreMy my science project is dieing before I start the project
Comments (7)Hmmm, I suspect a bit of procrastination is evident here; either in putting off the project, or putting off learning how to care for the plants. Neither your teacher nor Nature is going to like that - the teacher may flunk you, but as you are finding out, Nature is less forgiving and gets rid of failures whether it's the plant's fault or not. Meanawhile, you have a problem because A) it takes time for noticeable differences in growth/coloring to be apparent to the casual eye and B) most houseplants are sturdy enough to tolerate mistreatment such as soil variation for literally months before you can see a difference (or else they are so tender that death will take place due to wrong temperatures, poor light conditions, or improper moisture long before they can react to different sorts of soil). See if your teacher will accept a report on how soil variances affect the seed sprouting and young growth. Lettuce will sprout quickly and grow rapidly -- and the seed should be available at your local stores; I'd suggest using a leaf lettuce such as Black-seeded Simpson. Get all your samples of soil (and label them when you get them), and let them get up to room temperature. Buy a pack of 1-oz paper cups and label 6 cups to match each soil label. use a pin to poke a hole in the bottom of each cup. Be sure the soil is moist but not wet -- stick your finger in: if you feel dampness that's good; mud is bad; dry as dust is very bad. Fill each little cup with the matching soil and tap the top with one finger [you'll probably tap the soil down and need to add more]; then put 2 or 3 seeds on top of the soil. Now sprinkle more soil to cover the seeds - this is a guessing game... just guess how much will put another 1/8" soil over the seeds. Next each pot should be sprinkled with enough water to dampen the top of the soil -- fill a clean windex bottle with warm water and mist! Now put the pots on a tray or paper plate, cover the whole plate with a transparent cling wrap, and put it onto the top of your water heater or a similar place where they can be warm but not cooked. A sunny windowsill is good -- if the sill itself is warm: put your hand on the sill for a couple minutes to feel the temperature: if your fingers get cold, any seeds will shiver instead of sprouting. Prepare your report form now: describe the soil types; note the date seeds were planted. Every day you will need to check the soil to be sure the soil's surface is moist (carefully - don't poke the seeds). In about a week, the seeds should start sprouting: remove the cling wrap (it helps keep the seeds moist but it will hurt the sprouts) and then note when each seedling came up; what color the leaves are, and use a ruler to measure how much growth occurred since the previous day. The seedlings will need sunshine (and at this time of year, several hours of additional light from a lamp) in order to grow. Every day or two, you will need to water very deeply - that means get the soil really wet! or else the sprouts will flop over and die of thirst. Within 2 weeks you should have enough information to determine how much, if any, difference was apparent between the plants. If you study up a bit, you might be able to determine whether the difference was caused by soil type (clay, sandy) or by nutrients (was one soil more loamy than another). Oh, and if you want, - after you write your report - you can make a salad out of the subject. Good luck, and let us know what happens....See MoreMy refinishing project (Before and After pics)
Comments (27)Thanks so much, all of you! Honestly, I'm surprised at how well this turned out. The paint is Do-It-Best's Best Look brand, and the color is "Pumpkin Stem." I bought it at an independent "Do It Best" hardware store. The color is accurately named, I would say. I'd never used that brand before, but I liked it. It was thick, but went on easily. The primer is important, though. I can't say enough good things about Kilz Premium. One coat eliminates the wood grain completely. I used it previously on bead-board plywood, and was amazed at what a great surface it created for painting....See MorePatio Project - Before and After w/Pics and Video
Comments (1)Beautiful! I would however instruct my little 1 to ride his trike around on the lower lever only. That raised edge on upper level would still give serious bumps & bruises to little 1 on a trike going off of it. You did a wonderful job of taking pics!! Enjoy your new patios & Hope you have many happy times there with friends & family. Looks perfect for entertaining!...See More
Sammy
6 years ago
ingrid_vc so. CA zone 9
6 years agoUser
6 years ago
ilikefriday
6 years ago
iheartsix
6 years ago
Yayagal
6 years ago
Twosit4me
6 years ago
my_four_sons
6 years agoJeann W
6 years ago
FeatherBee
6 years ago PRO
PROLaura Lee Designs
6 years ago PRO
PROMega Builders
6 years ago PRO
PRODesign Connection, Inc.
6 years ago
ShadyWillowFarm
6 years ago
Kathie738 P
6 years agoilikefriday
6 years agolisaam
6 years agoartemis_ma
6 years agoShadyWillowFarm
6 years agoAnnegriet
6 years ago
Related Stories

BATHROOM DESIGNBefore and After: 9 Small-Bathroom Makeovers That Wow
Ready to remodel? Get inspired by these bathroom projects that come in at less than 60 square feet
Full Story
LIVING ROOMSBefore and After: 5 Revamped Living Spaces That Feel Like Home
See how designers make these living rooms more stylish, comfortable and welcoming
Full Story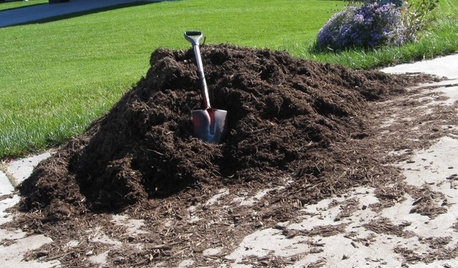
FRONT YARD IDEASBefore and After: Front Lawn to Prairie Garden
How they did it: Homeowners create a plan, stick to it and keep the neighbors (and wildlife) in mind
Full Story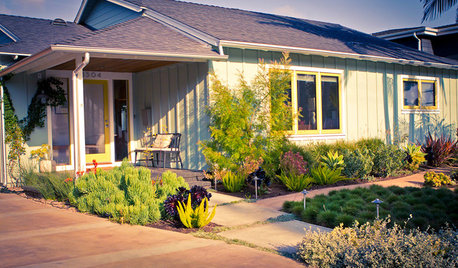
FRONT YARD IDEASBefore and After: See 5 Dramatic Front Yard Updates
These makeovers, including a parking-strip farm and an entertaining hub, elevate the typical front yard
Full Story
TRADITIONAL HOMESBefore and After: Beauty and Functionality in an American Foursquare
Period-specific details and a modern layout mark the renovation of this turn-of-the-20th-century home near Boston
Full Story
LANDSCAPE DESIGNBefore and After: 5 Patios That Celebrate Outdoor Living
See how landscape designers transform yards of all sizes and styles into stylish, hardworking patios
Full Story
BEFORE AND AFTERSBefore and After: Redo Includes a New Media Wall and More
Gorgeous new built-ins, furnishings, windows and a new backyard update this New York family home
Full Story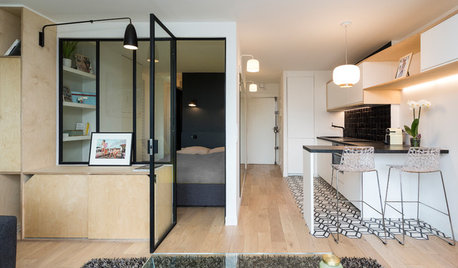
APARTMENTSBefore and After: Glass Partition Enhances a Parisian Studio
A French student’s apartment gets an upgrade, with a new bedroom, sound insulation and a more refined style
Full Story
BEFORE AND AFTERSBefore and After: 19 Dramatic Bathroom Makeovers
See what's possible with these examples of bathroom remodels that wow
Full Story
BEFORE AND AFTERSBefore and After: Master Bathroom Gains a 5-Star Hotel Feel
Carefully edited materials and a strategic layout give this master bathroom the look and vibe of a resort retreat
Full Story


nanhomesweethome