


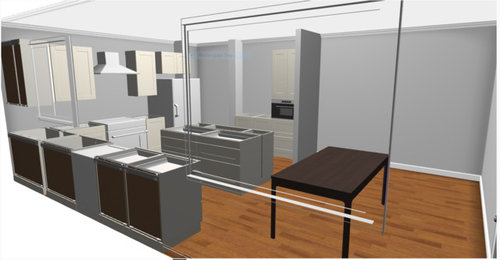
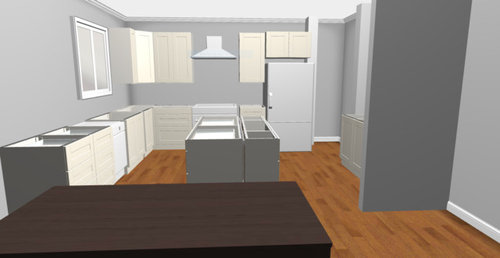
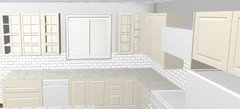
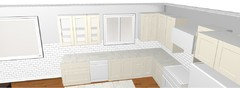
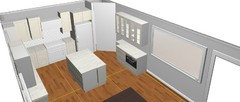
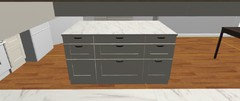
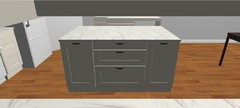
can someone please rip apart my kitchen plan?
elleewa
6 years ago
Featured Answer
Sort by:Oldest
Comments (202)

elleewa
6 years agoelleewa
6 years agoRelated Discussions
rip my floor plan apart
Comments (26)ben, I wouldn't want a loft for my kids over my master bedroom. Sorry, but that wouldn't fly with me. Unless you don't have kids, and have no intention on keeping the person up who is sleeping in the Master. Idon't know how hot it gets where you are, but here in SC it can get really hot in the summer. Air conditioning is expensive, and heat rises, so the loft will not be used much in the hotter months, unless you don't mind huge electric bills. I like the house plans, I think you should look at it, and turn it. Literally, don't put the house on the lot with the front porch acting as a front porch, Turn the plans, pick a different side. If you want to utilize the porch, put it on a sie of the house next to your driveway where you would enter the house. Did you want to wake up to a particular view? If not, turn it around, and add a bigger porch out off of your locker entrance. You did a pretty good job with your own plans though. My dad's sister had a ranch in Alabama when I was growing up, and her entrance was on the side of the house. No entrance at all in the front. The driveway was on the side too. Her giant barn was to the left of the house, off the driveway. Good Luck, I hope you are happy with the finished product....See MoreI need to strip my kitchen table, can someone recommend a brand?
Comments (9)You really think the table top is pine veneer?? I don't think I've ever seen anything but solid pine. And if it were solid pine, I wouldn't hesitate to pull out my power sander and sand off the bad coat and however much of the scratches and dents you want. Stripper performance is greatly affected by temperature and humidity. When it is warm and/or dry, the solvent evaporates too quickly to get the finish removed, so it re-hardens. If it's cool and damp, you can probably remove a poorly applied clear finish with anything. If it's warm and/or dry, as it probably is almost anywhere right now, I've had the best luck with a brand called Dad's. Or cover the stripper with a sheet of plastic. Also, tackle the stripping as early in the morning as possible. It sounds like you want to match the color of the top to the legs. Waterlox is a nice product, but it is quite dark amber. Minwax Wipe-On Poly is quite a bit lighter, performs just as well, and is easy to apply. It's also much cheaper. Minwax Fast-Drying Poly is a little lighter still, and can be made into an easy-to-apply wiping varnish by adding thinner....See MoreCan someone draw my kitchen for me?
Comments (19)I was thinking it might be nice to have prep sink on the refrigerator end of the island...it would expand your prepping options. Since work flow is refrigerator/pantry to sink, usually, and then to the range/oven/MW, it would be nice to have a sink a little closer to the refrigerator/range area. Maybe an 18" sink base on that end. I'd also think about switching the DW & trash pullout. It would take the DW out of the prepping/cooking area and put the trash pullout so it's accessible to the prep, cooking, and cleanup zones. Speaking of MWs, where is your MW? Sorry, I don't have any of that cool software that others have so I can't draw it up for you! (I do all mine either by hand or in PowerPoint...no elevations/3-D look)...See MoreParents kitchen plan - please tear apart!
Comments (24)Thank you, Eyegirlie, for the vote of confidence, but I am absolutely not a pro. I say that because the pro's who volunteer their time on the boards are in a completely different category of skill (look for the 'pro' tab on their usernames). I am an arm-chair wannabe, who is grateful for the help and advice given when I was working on my kitchen. And encouragement--GW helped save my sanity. Can the WD be placed against the DR wall, then vented to the side? PS, the floorplan is flopped, in relation to the pic. Adding: If you need a small sink, it could be placed opposite against the garage wall, then it would be easy to put a hose hook-up in the garage, for washing cars. Why waste a waterline? ;)...See More
bbtrix
6 years ago
sheloveslayouts
6 years agoelleewa
6 years agobbtrix
6 years agobbtrix
6 years agoelleewa
6 years agoelleewa
6 years agolast modified: 6 years agobbtrix
6 years ago
Hillside House
6 years agolast modified: 6 years agobbtrix
6 years agoelleewa
6 years agolast modified: 6 years agobbtrix
6 years agoelleewa
6 years agoelleewa
6 years agosheloveslayouts
6 years agobbtrix
6 years agoelleewa
6 years agobbtrix
6 years agolast modified: 6 years agobbtrix
6 years agolast modified: 6 years agosheloveslayouts
6 years agobbtrix
6 years agoelleewa
6 years agoelleewa
6 years agolast modified: 6 years agoelleewa
6 years agobbtrix
6 years agosheloveslayouts
6 years agoelleewa
6 years agobbtrix
6 years agobbtrix
6 years agoelleewa
6 years agobbtrix
6 years agoelleewa
6 years agoelleewa
6 years agolast modified: 6 years agobbtrix
6 years agoelleewa
6 years agobbtrix
6 years agoelleewa
6 years agolast modified: 6 years agobbtrix
6 years agoelleewa
6 years agobbtrix
6 years agoelleewa
6 years agobbtrix
6 years agobbtrix
6 years agoelleewa
6 years agoHillside House
6 years agobbtrix
6 years agoelleewa
6 years agolyfia
6 years ago


Related Stories
KITCHEN WORKBOOKNew Ways to Plan Your Kitchen’s Work Zones
The classic work triangle of range, fridge and sink is the best layout for kitchens, right? Not necessarily
Full Story
BEFORE AND AFTERSKitchen of the Week: Saving What Works in a Wide-Open Floor Plan
A superstar room shows what a difference a few key changes can make
Full Story
KITCHEN DESIGNHow to Plan Your Kitchen Storage for Maximum Efficiency
Three architects lay out guidelines for useful and efficient storage that can still leave your kitchen feeling open
Full Story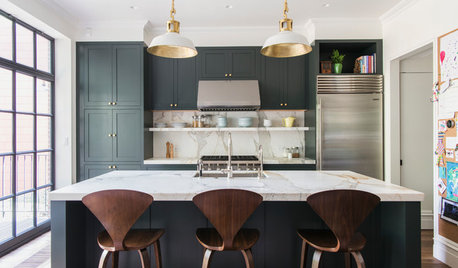
KITCHEN DESIGNRemodeling Your Kitchen in Stages: Planning and Design
When doing a remodel in phases, being overprepared is key
Full Story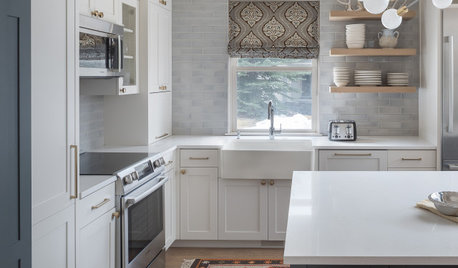
ORGANIZING7-Day Plan: Get a Spotless, Beautifully Organized Kitchen
Our weeklong plan will help you get your kitchen spick-and-span from top to bottom
Full Story
KITCHEN DESIGNOptimal Space Planning for Universal Design in the Kitchen
Let everyone in on the cooking act with an accessible kitchen layout and features that fit all ages and abilities
Full Story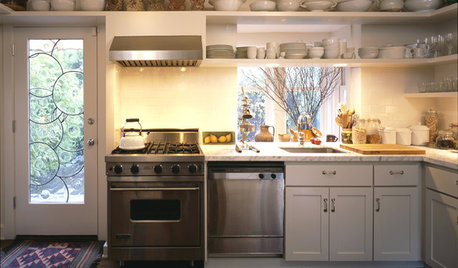
KITCHEN DESIGNHouse Planning: How to Set Up Your Kitchen
Where to Put All Those Pots, Plates, Silverware, Utensils, Casseroles...
Full Story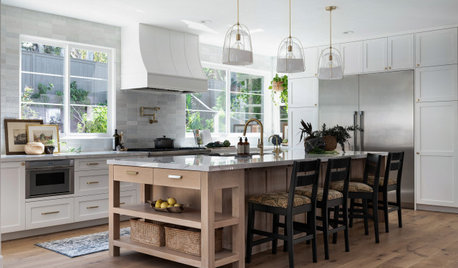
KITCHEN DESIGN9 Questions to Ask Before You Plan Your New Kitchen
To get your dream kitchen, start with a strong mission and wish list, and consider where you’re willing to compromise
Full Story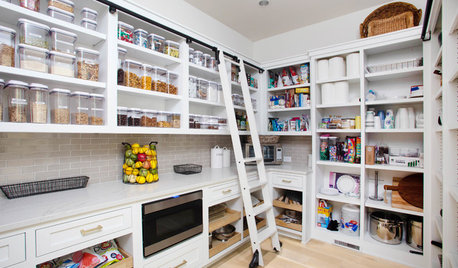
KITCHEN DESIGN9 Questions to Ask When Planning a Kitchen Pantry
Avoid blunders and get the storage space and layout you need by asking these questions before you begin
Full Story
KITCHEN DESIGNThe Cure for Houzz Envy: Kitchen Touches Anyone Can Do
Take your kitchen up a notch even if it will never reach top-of-the-line, with these cheap and easy decorating ideas
Full Story

thetzone