


Large watering contraption for lots of containers
ajs317
6 years ago
Featured Answer
Sort by:Oldest
Comments (9)

Nil13 usda:10a sunset:21 LA,CA (Mount Wash.)
6 years ago
Nick (9b) Modesto Area
6 years agolast modified: 6 years agoRelated Discussions
Container soils and water in containers III
Comments (150)You're welcome. Thanks again, for being so kind. Some thoughts I offered in another, older threads on this forum. They should pretty much answer your question, and may even be quoted in the text somewhere up this thread (if so, I apologize for the redundancy): In my estimation, the only case to be made for reusing container soils is one of economics, and you'll never find me argue against making that decision. If you can't afford, you can't afford it. That said and setting economics aside, you might decide to reuse soil for reasons other than economical. Perhaps the effort involved with acquiring (or making your own) soil is something you might not wish to go through or be bothered with. In any case, it would be difficult to show that soils in a more advanced state of structural collapse can somehow be preferred to a soil that can be counted on to maintain its structure for the entire growth cycle. So, if the economic aspect is set aside, at some point you must decide that "my used soil is good enough" and that you're willing to accept whatever the results of that decision are. All soils are not created equal. The soils I grow in are usually pine bark based & collapse structurally at a much slower rate that peat based soils, yet I usually choose to turn them into the garden or give them over to a compost pile where they serve a better purpose than as a container soil after a year of service. Some plantings (like woody materials and some perennials) do pretty well the second year in the same bark-based soil, and with careful watering, I'm usually able to get them through a third year w/o root issues. Watering habits are an extremely important part of container gardening. Well structured soils that drain well are much more forgiving and certainly favor success on the part of the more inexperienced gardeners. As soils age, water retention increases and growing becomes increasingly difficult. If your (anyone's) excellence in watering skills allows you to grow in an aging medium, or if your decision that "good enough" is good enough for you, then it's (your decision) is good enough for me, too. The phrases "it works for me" or "I've done it this way for years w/o problems" is often offered up as good reason to continue the status quo, but there's not much substance there. I'm being called away now, but I'll leave with something I offered in reply on a recent thread: "... First, plants really aren't particular about what soil is made of. As long as you're willing to stand over your plant & water every 10 minutes, you can grow most plants perfectly well in a bucket of marbles. Mix a little of the proper fertilizers in the water & you're good to go. The plant has all it needs - water, nutrients, air in the root zone, and something to hold it in place. So, if we can grow in marbles, how can a soil fail? Our growing skills fail us more often than our soils fail. We often lack the experience or knowledge to recognize the shortcomings of our soils and to adjust for them. The lower our experience/knowledge levels are, the more nearly perfect should be the soils we grow in, but this is a catch 22 situation because hidden in the inexperience is the inability to even recognize differences between good and bad soil(s). Container soils fail when their structure fails. When we select soils with components that break down quickly or that are so small they find their way into and clog macro-pores, we begin our growing attempts under a handicap. I see anecdotes about reusing soils, even recommendations to do it all over these forums. I don't argue with the practice, but I (very) rarely do it, even when growing flowery annuals, meant only for a single season. Soils don't break down at an even rate. If you assign a soil a life of two years and imagine that the soil goes from perfect to unusable in that time, it's likely it would be fine for the first year, lose about 25% of its suitability in the first half of the second year, and lose the other 75% in the last half of the second year. This is an approximation & is only meant to illustrate the exponential rate at which soils collapse. Soils that are suitable for only a growing season show a similar rate of decline, but at an accelerated rate. When a used soil is mixed with fresh soil after a growing season, the old soil particles are in or about to begin a period of accelerated decay. I choose to turn them into the garden or they find their way to a compost pile. Unless the reasons are economical, I find it difficult to imagine why anyone would add garden soils to container soils. It destroys aeration and usually causes soils to retain too much water for too long. Sand (unless approaching the size of BB's), has the same effect. I don't use compost in soils because of the negative effect on aeration/drainage. The small amount of micro-nutrients provided by compost can be more efficiently added, organically or inorganically, via other vehicles. To boil this all down, a container soil fails when the inverse relationship between aeration/drainage goes awry. When aeration is reduced, soggy soil is the result, and trouble is in the making. I've mentioned before that I don't post here to get people to convert to a particular mix or blend of soil. I post what I know will work very well for anyone who can get appropriate ingredients & modify the mix to suit their climate & other cultural conditions. If you use a mix that guarantees good aeration for the expected life of the planting - you're in good shape. Most peat based mixes will not work well in extended life plantings. Conifer bark based mixes, on the other hand, retain structure for much longer periods. If you still have questions, please don't hesitate .... Al...See Morecontainer vs. self-watering container mix
Comments (22)Justaguy, Tom Mobley has a had unbelievable success with just 14 14 14 in his pot n pot method. I am totally new at this business, my dad who just past away this year at 99 always had a large veggie garden in NC, but I was never interested until now at 72 ! I have put some MG in the water once they started blooming, but this first big beef is unbelievable (seems to be my favorite word this morning :>)). Our weather here is very subtropical, I have two very large mango trees that people said would not survive this far north and west (away from the Atlantic and gulf stream), but put them on the South side of my 12 cbs wall of the hangar and they have done extremely well. People keep tomatoes producing here from fall until June when it apparently is so humid that they fail to set new fruit. Typical day high here summer is 92 and 90% humidity and 70 low at night. Lots of rain in summer, we've had zip where we're located here west of port st lucie this winter and spring. Sorry about how dark the pictures turned out and with my palmetto background it is really hard to see how large the first bigbeef is in the bucket. Will try again to make a picture. bernie...See MoreAutomatic watering for self watering containers
Comments (17)Worked out the cheapest, most compact and most simple automatic watering system for me. Uses 3 buckets, one float valve, simple barbed fittings and clear 1/2" tubing. There are no penetrations below water level and no alterations to planters. Top bucket only holds 5 gal, so you can hook up to larger tank if you desire. Use only clear tubing to detect any air bubbles. I am going to use Hudson valve to feed top bucket when away from home. Used 3 Lowe's buckets. Top Bucket - no alterations Bucket 2 - Cut off top below the expanded "ring" for spacer to lift top bucket up additional 2 3/4". Discard bottom. Bottom Bucket Installed 1/2" US Plastics #23136 float valve slightly above desired water level. Installed barbed elbow on float inlet. Installed clear 1/2" tubing from elbow over the top of top bucket to reach bottom. (Siphon action feeds float valve on bottom bucket) Ran 1/2" tubing from bottom of bottom bucket through side (above water level) to barbed connector. Ran 1/2" tubing from the barbed connector to barbed "Tee" at top fill pipe of first container. Ran 1/2" tubing from "Tee" to bottom of fill tube. Tubing runs from bottom bucket to "Tee" on first container, to "Tee" on second container, to "Tee" on 3rd, etc. (Last container doesn't have "Tee", tubing runs directly from last "Tee" to bottom of container fill tube. Primed siphon of container tubing by holding end of tube in bottom bucket to garden hose. Put top bucket into bottom bucket and fill. Primed siphon of top bucket to float valve. Note: Fill planting containers first, as the siphon action to the float valve only supports a small but adequate flow rate....See MoreLarge Scale Small Container Wick Watering
Comments (6)I'm trying a galvanized horse trough right now, using twelve rope wicks, and I know plenty of people do them with 4-inch pipe stubs that extend from the soil compartment down into a water space in the bottom, using the soil in the pipes as wicks. They tend to use a lot of those pipe stubs. I'm trying to see if enough water will disperse through the soil well enough from four clusters of three rope wicks running up through tubes. So, I think it's not exactly whether or not it will drain the reservoir but whether you are able to keep enough water in all that soil for the plant demands. Mature, fruiting tomato plants may need anywhere from 2 pints to a gallon of water a day, depending on conditions. Six feet of 4-inch pipe holds about 15 gallons. In my system, the maximum capacity for six feet of pipe would be twelve 3-gallon pots. That would require daily refill at the absolute worst cast, and I would expect to go two or three days between fills. I don't see any difference between a 36 gallon tub and the twelve 3-gallons, assuming similar depths of soil, and my latest observation suggests that I may need to raise the pots a bit. Right now, the wicks lie in the soil about one inch higher than the water level, and that may be pulling a little too much water into the pots. Keep in mind that this is all experimental. I might well end up going back to my original notion or a single row of pots above the pipe, if that wicks more properly and makes the reservoir last longer on a single fill (assuming I don't automate the filling). Can't tell yet. There is considerable difference in moisture depending on how far the probe ends up from the rope wick. I'm going to try some different things and report on the blog....See More
ajs317
6 years ago
myermike_1micha
6 years agoajs317
6 years agolast modified: 6 years ago
Sherry8aNorthAL
6 years agoNil13 usda:10a sunset:21 LA,CA (Mount Wash.)
6 years agostuartlawrence (7b L.I. NY)
6 years agolast modified: 6 years ago
Related Stories
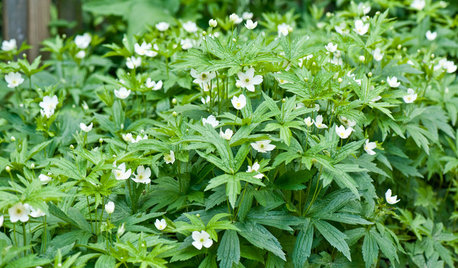
GARDENING GUIDESGreat Design Plant: Anemone Canadensis Adds Pizzazz to Water’s Edges
Plant Canadian anemone along pond, lake or stream edges for a splash of white flowers in late spring
Full Story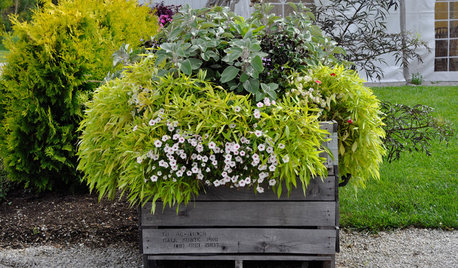
GARDENING 101This Pro Tip Will Save You Money on Your Container Garden
For large planters, use empty milk cartons or plastic bottles to fill extra space before putting in potting soil
Full Story
SMALL HOMESEasy Green: 10 Tiny Homes That Live Large
Go ahead, micromanage. These 10 inventive spaces show how to pack a lot of living and style into small square footage
Full Story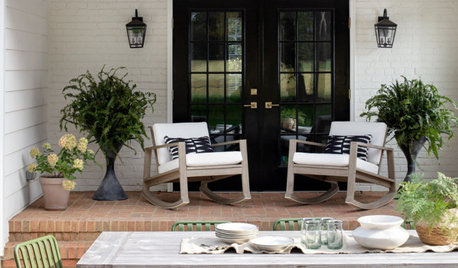
SUMMER GARDENINGHow to Water and Refresh Your Potted Plants Over the Summer
Keep container gardens looking lush by cooling them down when temperatures rise and by giving them a seasonal spruce-up
Full Story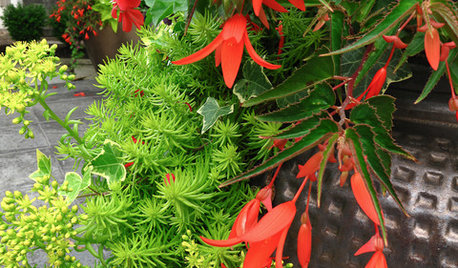
GARDENING GUIDESSuperstar Annuals for Containers and Baskets
High performing, low maintenance and all-around gorgeous, these container plants go the distance while you sit back and relax
Full Story
TREES10 Top Trees to Grow in Containers
These container-friendly trees make great specimens for pots on the patio or marking an entrance
Full Story
GARDENING 101How to Choose the Right Plant Container
Keep plants healthy and container gardens looking good by beginning with the right pot size and shape
Full Story
CONTAINER GARDENSHow to Get a Lush Look on Your Patio With Container Gardens
Find design ideas for containers brimming with bold foliage plants, colorful flowers, trailing vines and more
Full Story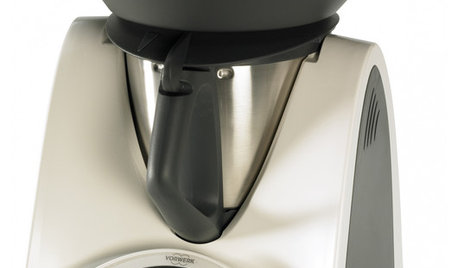
HOME TECH3 Kitchen Contraptions You Won’t Believe
Pizza hot from the printer, anyone? These cooking gadgets harness imagination and high tech — and have price tags to match
Full Story
GARDENING GUIDESBlooming Container Gardens That Welcome Butterflies and Bees
Attract pollinators with one of these colorful nectar- and pollen-rich container combinations
Full Story
Sherry8aNorthAL