

Excessive breakage of lasagna noodles
8 years ago
Featured Answer
Sort by:Oldest
Comments (41)
 8 years ago
 8 years ago
Related Discussions
using oven ready lasagna noodles
Comments (39)Cathy : How did I miss your Message ??? Sherry :This started when I asked my butcher to slice some Sirloin thin for Sandwich Steaks. He sliced them a little too thick for Philly cheese Steaks. Sooooooooo !!!! I used my imagination and came up with this.Not hard to do. Just found the recipe: From Luigis Kitchen Stuffed, Large Roasted Braciole , Surf and Turf. I dont think this has been done before but Im not sure. Here are the Stuffing Ingredients: Seasoned Bread Crumbs, 2 cups, with Garlic powder, 1/3 teaspoon Onion Powder, 1/3 teaspoon Salt and a Pinch of Old Bay Seasoning Parsley Crushed , 1 teaspoon Parmesan Cheese I tablespoon 1 Tablespn. of Pwd. egg, or 1 egg mixed with the 1/2cup water, below 1/3 cup of Onions chopped small and cooked 3 min. in Micro Wave ¼ teaspoon of Black Pepper Mix all these ingredients together well. - - - - - - - - - - - - - - - - - - - - - - - - - - - - - Other Ingredients for the stuffing are; 2 Hardboiled Eggs, sliced. ½ cup of Olives and Capers chopped Mushrooms ( optional ) Cooked Shrimp Pepperoni pieces Also, add whatever you like . Maybe some Provolone Cheese? - - - - - - - - - - - - - - - - - - - - - - - - - - - - - If using regular egg ,mix in here, when cool. In a ½ cup of hot water, mix 1 heaping teaspoon of, Chicken Soup Base and add this to the Bread Crumb mix. Dont mix too much ! And just blend to dampen, Not too wet. Lay one piece of Steak in a large Platter or whatever you choose. The piece in the Photo is about 6 in. X 12 in. Spread all the Bread Crumb stuffing mix on this evenly. Place all the Other Ingredients on the stuffing evenly. I put smaller pieces of the steak under the side and let them hang out for wrapping the Braciole as it is rolled. Lay another large piece ( the same size, as the bottom piece of the sirloin. Start rolling the steak, folding in the side pieces as you go. Hog tie the whole mess very good !!! I Browned this well and put it into the Waterless Roasting Cooker With 1/2 cup of water Now it is Ready, to go in the Oven with the Potatoes It baked 1 ¾ Hours,at 350 deg. The internal temperature went to 160 degrees....See MoreLasagna - Can't Get the Cheese Filling Right
Comments (47)Food is so variable that I can't understand absolutes. I think it was on Top Chef recently that they featured the heretic who first did parmesan cheese five ways, incuding frico and foam, and he's now considered a king and his efforts seminal. There are somethings that are innovative and good, but called by ”wrong” names. I remember reading that Wolfgang Puck, when he first got into the frozen foods biz, ran afoul of government regulations which defined pizza as having tomato sauce. IIRC, they compromised for that particular pizza by adding sliced tomato, but eventually decided that Michelin star chefs should define their food, not regulators, so they rewrote the definition. or something like that. I think the controversy also helped by publicising that pizzas might not have tomatoes, thereby changing public expectations. The Italian woman who taught us lasagna also taught us the ragout. There's a very basic recipe with canned tomatoes (fresh can be used—they just cost more and take a lot more work— and dried herbs that is the framework. The unwritten part is dependent on season and what you can afford, plus cleaning the fridge. Maybe not peas (shudder), but pretty much any alium, brassica or umbellifer could find it's way in, as well as nightshades and squash. Sausage for the flavor, or other meat and more seasonings/herbs/spices etc., to make up for it. Over time I've learned that a green bell pepper is necessary for it to taste "right" (and oregano, of course), and that marjoram makes things taste like pizza. Otherwise, pretty mich anything goes and it ends up pretty much the same as a whole. And using the framework of what we call lasagna, the dish, I also make lasagne, the pasta, with a barbecue chicken profile, and a pumpkin one. Definitely American. Really good....See MoreBechamel Sauce in Lasagna?
Comments (13)I haven't use bechamel but do use white sauce for veggie lasagna. I always make mine using dry (uncooked) lasagna noodles too. It's probably been 30 years since I first saw a box of lasagna noodles in the grocery store that were marked as being some you could use without cooking first. I looked at them and said to myself that they are identical to every other lasagna noodle. From then on, I made my lasagna with the uncooked noodles and it comes out great. Just has to bake a little bit longer. I don't even put excess moisture in, because I found that doing so made a watery lasagna....See MoreThoughts: DIY Instant Noodles Cups
Comments (21)tishtoshnm -- As with many gluten-free books, they use more high-glycemic starches and all-purpose gluten-free flour mixtures than I care to consume. I tend to use more almond and coconut flour for baked goods. You are right, my "shoestring" is definitely much smaller than the author's (LOL). To give credit where credit is due, she does the math with many of the recipes in the book to prove her "shoestring" theory - based on making her recipe or buying a g-f frozen version. Personally, I can live without a gluten-free baked pretzel - at any price. Some foods you just can't make a good gluten-free substitute, so I don't waste my time/money. There are a lot of meat-related and vegetable recipes, but most people who are gluten-free don't need a recipe for glazed carrots or pot roast. The only recipe I've tried was for Arepas: (makes 10-12) 1 c. precooked cornmeal flour (P.A.N.) 1 c. grated mozzarella cheese 1/8 t. kosher salt 1 c. plus 2-4 T. tepid water 1/4 c. vegetable oil (I use coconut oil) In a large bowl, combine the cornmeal flour, cheese, and salt. Add 1 cup of water and stir to combine and incorporate the water into the flour mixture. Add more water by the tablespoonful if necessary for the dough to come together. Once the dough has come together, cover the towel with plastic wrap and allow it to stand at room temperature for 3-4 minutes. The cornmeal flour will continue to absorb water, and the dough will stiffen as it stands. After the dough has stiffened, wet your hands and divide the dough into 10-12 portions of about 3 T. each. With wet hands again, form the first piece of dough into a ball, then flatten into a disk about 1/4-inch thick and 2-1/2-inches wide. Repeat with each piece of dough. Pour the oil into a 12-inch skillet with at least 2-inch high sides, and heat the oil over medium-high heat until it shimmers. While the oil heats, prepare the first portion of dough for frying. Wet your hands again and press all around the edge of the disk, eliminating any cracks. Flatten along the side, smoothing as you go. When you fry the Arepas, if you have successfully eliminated all the cracks, steam will build up inside and they will puff and swell. It takes some practice, but it's well worth the effort. When the oil is ready, place each portion of dough carefully in the pan, and fry until golden brown, turning over once during frying and frying for 4-5 minutes per side. Do not crowd the pan. Fry in batches. Drain Arepas on towels before serving. With a wet serrated knife, slice the Arepas in half horizontally and serve warm or at room temperature. (Grainlady note: I slice them open before wrapping the leftovers for the freezer. In fact, I use my English Muffin "fork" for the task. I like to toast the inside on a dry griddle after they are thawed, apply the filling of choice - we often make ham and cheese - then grill the outside to melt the cheese inside and warm the ham. I also use them with poached eggs (using one-half of an arepa, toasted), shredded pork/beef/chicken sandwiches, egg salad, tuna salad...... I always wish I would have know this recipe for my mother, who had Celiac disease. She would have loved these little beauties. :-) -Grainlady...See More 8 years ago
- 8 years ago
- 8 years ago
 8 years ago
- 8 years ago
- 8 years ago
- 8 years ago
 8 years ago
- 8 years ago
 8 years ago
- 8 years ago
- 8 years ago
 8 years ago
 8 years ago
- 8 years ago
- 8 years ago
- 8 years ago
- 8 years ago
- 8 years ago
- 8 years ago
- 8 years ago
- 8 years ago
- 8 years agolast modified: 8 years ago
- 8 years ago
- 8 years ago
- 6 years agolast modified: 6 years ago
 6 years ago
- 6 years agolast modified: 6 years ago
 6 years ago
- 6 years ago
- 6 years ago
 6 years ago
- 6 years ago
 5 years ago
Related Stories

PRODUCT PICKSGuest Picks: The Well-Stocked Starter Kitchen
We’ve got all the kitchen basics and tableware you need (or that recent grad needs) to make cooking a joy
Full Story
STORAGE15 Fun Organizing Ideas for Fashionistas
Give your clothes, shoes and accessories the home they deserve with these strategies for posh storage and display
Full Story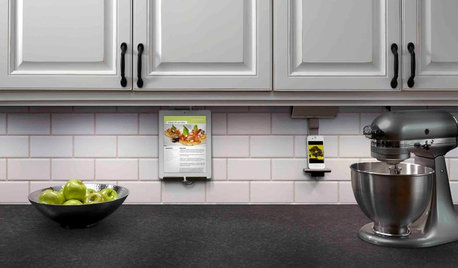
KITCHEN DESIGNHouzz Call: What’s Cooking in Your Kitchen?
Most of us turn to recipes, videos and culinary shows when we cook. Where do you set your cookbook, tablet or TV screen?
Full Story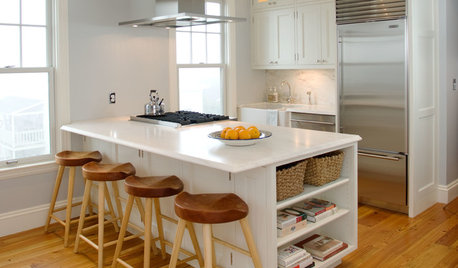
KITCHEN DESIGN20 Kitchen Must-Haves From Houzz Readers
We asked you to tell us your top kitchen amenities. See what popular kitchen features made the list
Full Story
jerzeegirl (FL zone 9B)