

Making popcorn
8 years ago
last modified: 8 years ago
Featured Answer
Sort by:Oldest
Comments (42)
 8 years ago
 8 years agolast modified: 8 years ago
Related Discussions
glass top range/induction, and making popcorn--help!
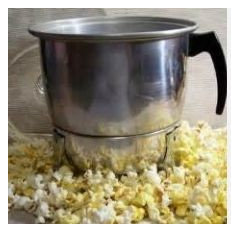
Comments (25)This is hubby again. @FLSandytoes: I use a Kuchenpot that's just over 2.5L. It's a German brand, but it's nothing fancy and I think we got it at TJ Maxx. I use 1/2 cup of popcorn and the popped volume fills it perfectly. I cook it on a Miele induction cooktop at "7" until I hear 2 seconds between pops. I do not have anything under the pot between it and the cooktop. There is paint on our cooktop to mark the element locations, and it does not show any signs of wear after ~3 years of popping alongside regular cooking (which, at 1-2 hot meals a day probably adds up to a lot more moving around than popcorn). I usually do the shaking twice: once at the very beginning, and then once a minute or so into the cycle, but before any pops have started. The purpose of the first shakes are to evenly spread the kernels so they're all exposed to the oil. I'm not really sure if the second set of shakes is necessary, but they give a very pleasing sound of sizzling in the oil, and in theory they help turn the kernels so all sides of them are exposed to the hot oil. One other thing to mention is that I usually take off the lid when it gets about 3/4 full. I do this because the pot almost exactly fits the volume of popped corn I'm cooking, and the lid gets wet with moisture during cooking. If the popcorn pushes up against the lid, the top kernels can get soggy. Once the pot is 3/4 full, there is enough weight to keep almost all the newly popping kernels from popping out of the pot. I would never be able to do this with gas or electric, because a kernel or two still occasionally pops over, and I'd be too worried about the kernel catching fire. With the induction, I've never been worried as the only hot parts are the bottom of the pot and the area directly underneath it on the cooktop, neither of which is accessible to an occasional flying kernel....See MoreMiele Microwave and popcorn...
Comments (4)If it is the Miele "microwave"..it is not Miele made (or even made in Germany. The Microwave is actually a Creda, re-badged as a Miele. Miele Speed Oven, which is a convection and microwave is Made by Miele in Germany! So, be mad at Creda. Damn English!! LOL...See MorePopcorn?
Comments (3)He did mention prior to butter or salt application. Sbryce in that case I would give it to the worms and its not likely you are ever going to have so much at one time to cause any imbalance. Popcorn without butter and salt is just a grain and popped should be a nice fluffy treat for them that breaks down readily. We had some leftover from a movie and I tossed it as it had all the good stuff that makes us want more of it, The Wife was going to feed it to the chickens but really it didnt seem like it would be good for them either....See MoreMy new hot water heater has been making popcorn sounds
Comments (4)quite obviously, you need another appliance with butter sounds . . . :) but, yes. I know how disconcerting this can be be. When I got to grad school, my family and I were temporarily housed in honest-to-goodness quonset huts, temporary GI housing from 50 years earlier. One of the two-dozen work orders we had to submit was "hot water heater percolates." Seriously, it sounded like an old coffee pot. And it was int he living room. It seems that over decades, the lime builds up into limestones, and the gas from the water boiling lifts them up. As they get to the top, it is released into the air, and they rattle as they tumble down the side . . . appliances should be seen and not heard , , ,...See More 8 years ago
- 8 years ago
- 8 years ago
- 8 years ago
 8 years ago
- 8 years ago
- 8 years ago
 8 years ago
 8 years ago
- 8 years ago
- 8 years ago
- 8 years ago
- 8 years ago
 8 years ago
 8 years ago
 8 years agolast modified: 8 years ago
- 8 years ago
 8 years ago
 8 years agolast modified: 8 years ago
- 8 years ago
- 8 years agolast modified: 8 years ago
- 8 years ago
- 8 years ago
- 8 years agolast modified: 8 years ago
- 8 years ago
 8 years ago
 8 years ago
 8 years ago
- 8 years ago
 8 years agolast modified: 8 years ago
 8 years ago
 8 years ago
- 8 years ago
- 8 years ago
- 8 years ago
- 8 years ago
- 8 years ago
- 8 years ago
- 8 years ago

Related Stories
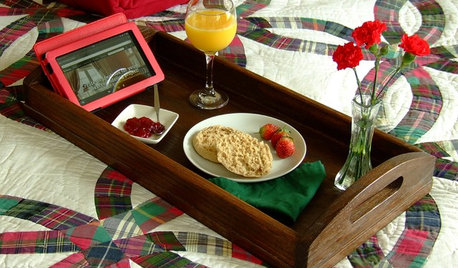
DIY PROJECTSNeat Little Project: Make a Sturdy Wood Serving Tray
New to woodworking? This DIY wood tray project will get you closer to being an old hand
Full Story
DECORATING GUIDES11 Tricks to Make a Ceiling Look Higher
More visual height is no stretch when you pick the right furniture, paint and lighting
Full Story
CEILINGSHow to Remove, Hide and Play Down a Popcorn Ceiling
When it comes to dealing with stucco overhead, you’ve got options
Full Story
HOLIDAYS10 Holiday Gift Ideas to Help Make Home a Little Cozier
Consider these suggestions for presents to pamper the special people in your life
Full Story
COMMUNITY15 Ways to Make Your Neighborhood Better
Does your community lack ... well, a sense of community? Here's how to strengthen that neighborly spirit
Full Story
LIFE12 House-Hunting Tips to Help You Make the Right Choice
Stay organized and focused on your quest for a new home, to make the search easier and avoid surprises later
Full Story
KITCHEN OF THE WEEKNew Kitchen Makes Healthful Cooking Easier
This family in Australia’s Blue Mountains cooks more than ever now that there’s a well-designed kitchen to do it in
Full Story
DECORATING GUIDESPlease Touch: Texture Makes Rooms Spring to Life
Great design stimulates all the senses, including touch. Check out these great uses of texture, then let your fingers do the walking
Full Story
LIFE10 Ideas for Making Screen-Free Play a Reality
Here's how to tempt your children with activities that will encourage their creativity and keep them away from the TV
Full Story
LIFE7 Ways to Make the Most of the Coming Weekend
From prepping a party tray to having your chimney cleaned, do some of these things now and enjoy the season even more
Full StorySponsored

ont_gal