


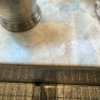
Removing large molding on plaster walls
Marisa Rospos
6 years ago
Featured Answer
Sort by:Oldest
Comments (39)

Marisa Rospos
6 years agoRelated Discussions
Removing old plaster lath wall
Comments (19)I've removed many slat and plaster walls and this is the most efficient\minimal mess technique I have discovered. The fact is, this is a messy job and "bashing walls" is out of the question if you want to minimize the spread of dust and cleanup time. Here's what you need and how to do it: 1. Quality respirator mask (no exceptions). I recommend a $19 dual filter mask from Wal Mart. 2. Thick durable work gloves. 3. Protective plastic goggles (Wal Mart). 4. 1 Large black marker. 5. 10 X 12 thin plastic drop sheets (Wal Mart). 6. 1 flat pry-bar. 7. 1 Drill with half 1/2 inch bit. 8. Reciprocating Saw (any reliable brand will do) with extension chord. 9. 1 stud finder. 10. 1 ladder. 11. Large 96 gallon square trash bin with wheels or durable plastic storage container with wheels (preferably). 12. 1 Shop vacuum. 13. 1 Broom & dustpan 14. A partner to help (needs items 1, 2, & 3). Step 1) Turn off the power in the room that contains the wall you plan on stripping. You do not want to electrocute yourself! If other rooms have power receptacles on a separate fuse you can run an extension chord into the work room to power a flood lamp. Or if it's daylight you're all set ;) Step 2) Remove all wood trim from wall. Using the ladder, stud finder, and the black marker, start about 5" down from the wall\ceiling crease and locate and mark all the wall studs on the wall you plan to strip plaster slats from. Make your stud marks horizontal and 4" wide. Have your partner mark where the stud finder began beeping and where it stopped. Make note of all electrical switches and outlets. If you have multiple plugin outlets on a single wall chances are the wiring will be horizontally ran inside the wall to join the outlets. Use the marker to draw a horizontal line between outlets. You will not cut below or within 5" of the top of this line. Step 3) Cover the floor of the room where you're working with the 10 X 12 plastic. I like to "booth off" the room with plastic by taping 10 X 12 sheets from the ceiling to the floor using blue painters tape as it will not rip your drywall paint\paper when you remove the tape. I tape all joining plastic sheet seems from ceiling to floor and allow a slit for me to walk out during breaks. Step 4) Put on you respirator, goggles and gloves. Make sure your respirator is tight enough not to let air in and the nose bridge is snug on the bridge of your nose. You do not want ancient dust creeping in your mask! A hat is optional if you don't want dust in your hair (ladies). Position the 96 gallon trash can by the ladder and have your partner waiting for you to hand them square slat and plaster section to put into the garbage can. Step 5) Start at the left hand side of the wall. At the top of the ceiling, using the drill and the 1/2" bit, drill a hole on the right end of the 4" stud marking. Only drill a hole in the section your are currently working on. Step 6) Place the blade of the reciprocating saw half way in the 1/2" hole you drilled earlier and begin sawing downward. gently add downward pressure to the saw, don't force the saw, let the saw do the work. It should cut through like butter. Keep your cut line as straight up-and-down as possible. You can also steer the saw close to the parallel wall stud for a closer cut. If the saw blade pops out or is hard to move, chances are you're cutting into a wall stud. Stop, evaluate the situation (using a flashlight), and reposition and continue to cut just the slats and plaster. Stop cutting when you're about 2" from the floor. You should now have a semi-straight vertical cut line from ceiling to floor. Step 7) On the ladder, using the pry bar, at the top of the wall, you will pry off your first single square section of wall by using the following technique. At the top of the wall, from left to right, diagonally slide the pry bar (hook end towards you) behind the cut plaster panel and leave the very end of the pry bar(flat end) sticking out at the lower bottom left. With your right hand, firmly grad the upper right of the plaster section, holding the hook end of the pry bar against the back of the plaster wall section. With your left hand, firmly hold the flat end of the pry bar behind the lower left corner of the plaster wall section. Slowly pull the entire panel of plaster towards you keeping the pry bar firmly pressed behind the plaster section you are removing. If you do it correctly you will keep 98% of the plaster in tact and all nails joining the wood slats to the 2 X 4 beam will be pulled out at the same time. Hand the square plaster section to your partner to place in the bottom of the 96 gal plastic trash can. Continue this technique all the way down the cut in the section you are working. You should get the hang of it by the time you're done with the removal of your first section. Step 8) Repeat steps 5 through 7 until the wall is stripped. You may have some remaining nails to remove with the pry bar when you are completely finished with the entire wall. Step 10) Pick up stray pieces of plaster and slats when you're finished. Gently roll up the plastics sheets being careful not to spread the dust; dispose of the plastic. Sweep and vacuum and remaining dust and debre that escaped the plastic. You may need to make several trips to the waste transfer station with the trash can to dispose of the slat and plaster or you can pay someone to pick it up. I have this technique down to where I can strip a 10 x 8 wall in 60 min with little or no mess on the floor. Have fun, be safe....See MoreAttaching/gluing molding to large wall mounted mirror
Comments (25)I did this - I used liquid nails for mirrors, bought at Home Depot. Here are before and after pics. I also painted the vanity and the cultured marble countertop, applied a top coat of marine grade polyurethane. This was done 2 years ago as a quick facelift, it still looks the same, has held up well! We are planning to replace the vanity and flooring next year, but it made the bathroom less ugly for the meantime. As far as how-to goes, I had to remove the clips and shoot some of the mirror adhesive down the back, replace the clips overnight to let the adhesive set (now glued to the wall). Then remove all the clips, make sure mirror is really secure and then glue the wood to the mirror. I used crown molding for the top. I chose to do square corners not mitered because the crown at the top was not a miter join (though it was a mitered cut to look right). Before After...See MoreGross plaster smell still in studs, after plaster removal
Comments (5)I would also recommend exploring other more usual sources of odor in old houses than dry studs. I have never heard of dry plaster having a smell. For example, wax rings around toilets will need to be replaced periodically and may cause toilet water slow leaks around the toilets. Also, drain pipes in areas with low use may have the p trap dried out, allowing sewer gas to pervade the house. This is a general bad smell that is hard to source. I have 2 laundry areas, one of which is not in use now and the trap dries out every few months and it starts to smell. Do you have any drain traps that may just need a cup of water added to them? The previous owners to my own house noticed a terrible smell and it turns out that my house's sewage pipe had not been connected and years of blackwater were draining into a pit under my house. This is obviously extreme but just an example. Did you check the attic area for evidence of bat guano, raccoon nests etc. These can get pretty smelly, especially the bigger animals will cause soaking of the wood/insulation or paper facing of the ceiling below with urine.feces. I am sure others will have other suggestions of hidden sources of stink....See MoreHow to transition between plaster and cabinetry crown molding
Comments (4)The easiest thing to do and what I think would look somewhat planned is to remove it from the small wall and have it end in the corner like it does on the other side. If you continue around the corner you have to do the same on the other side all the way into the kitchen and then transition to the kitchen cab molding. Certainly you could do that but just easier & le$$ to end it there and paint it all the same color and it will look finished and blend in nicely....See More PRO
PROJAN MOYER
6 years ago- PRO
JAN MOYER
6 years agolast modified: 6 years ago Marisa Rospos
6 years ago PRO
PROBeth H. :
6 years ago- PRO
JAN MOYER
6 years agolast modified: 6 years ago - PRO
JAN MOYER
6 years ago Marisa Rospos
6 years agolast modified: 6 years agoMarisa Rospos
6 years ago PRO
PROJoseph Corlett, LLC
6 years ago- PRO
JAN MOYER
6 years ago - PRO
JAN MOYER
6 years ago Marisa Rospos
6 years agoUser
6 years agolast modified: 6 years ago- PRO
JAN MOYER
6 years ago Laurie Schrader
6 years agolast modified: 6 years agoMarisa Rospos
6 years agoMarisa Rospos
6 years ago PRO
PROSombreuil
6 years agoMarisa Rospos
6 years agoDavidR
6 years ago- PRO
Patricia Colwell Consulting
6 years ago - PRO
JAN MOYER
6 years agolast modified: 6 years ago 
jhmarie
6 years ago- PRO
JAN MOYER
6 years ago einportlandor
6 years agoMarisa Rospos
6 years agojhmarie
6 years agolast modified: 6 years agoMarisa Rospos
6 years agoKailyn Murphy
6 years ago PRO
PROFlo Mangan
6 years agoKailyn Murphy
6 years ago- PRO
Patricia Colwell Consulting
6 years ago - PRO
Sombreuil
6 years ago - PRO
DoubleJ
last year


Related Stories
MOST POPULARHow to Get Rid of Household Mold
Find out how to work with a pro to stop mold from damaging your house and health — and how to prevent it from forming
Full Story
REMODELING GUIDESDesign Details: Moldings — or Not?
16 new and unusual ways to trim your doors, floors and ceilings
Full Story
REMODELING GUIDES11 Reasons to Love Wall-to-Wall Carpeting Again
Is it time to kick the hard stuff? Your feet, wallet and downstairs neighbors may be nodding
Full Story
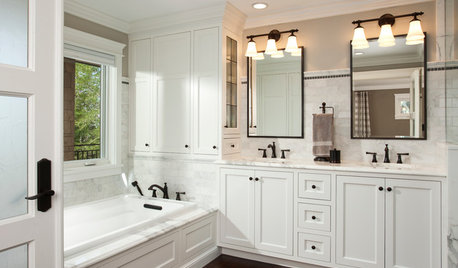
REMODELING GUIDESCrown Molding: Is It Right for Your Home?
See how to find the right trim for the height of your ceilings and style of your room
Full Story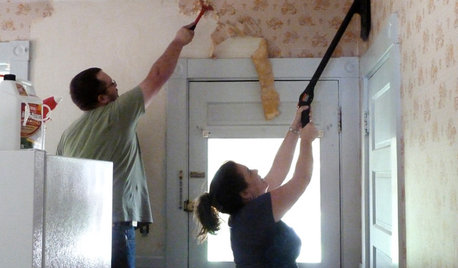
DECORATING GUIDESHow to Remove Wallpaper in 4 Steps
Learn the best way to remove wallpaper with only water (and elbow grease) so your next wall treatment will look great
Full Story
REMODELING GUIDESOne Guy Found a $175,000 Comic in His Wall. What Has Your Home Hidden?
Have you found a treasure, large or small, when remodeling your house? We want to see it!
Full Story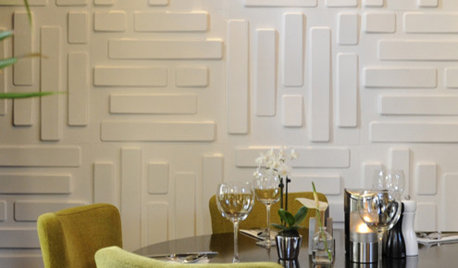
MATERIALSUnexpected Style for Your Wall
Go Beyond Paint and Paper with 3D, Plaster, Copper, Tile, Marble and More
Full Story
KITCHEN OF THE WEEKKitchen of the Week: Bye-Bye, Big Red Wall
An in-the-way wall disappears to bring in a large island, built-in cabinets and lots of light
Full Story
WALL TREATMENTSRemovable vs. Traditional Wallcoverings: Which Is Right for You?
Read about the pros and cons — and see great examples — of wallcovering options available for your home
Full Story
DECORATING GUIDESGive Your Walls an Architectural Dimension
Make a room special with the texture of wainscoting, panels, shiplap and more
Full StorySponsored
User