

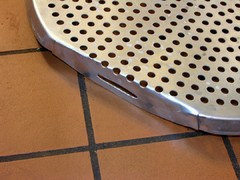
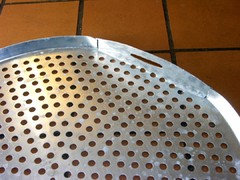
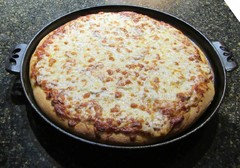
New cast iron pizza pan arrived, does not appear to be seasoned
9 years ago
Featured Answer
Sort by:Oldest
Comments (22)
Related Discussions
Black residue on cast iron skillet
Comments (23)That was caused by not seasoning at a high enough temperature......all you accomplished with your seasoning attempt was to create an oil removable coating on your pan. That is not the same thing as actual "seasoning". Next time you you re-season your pan with Crisco, do it a higher temperature.....350 degrees is NOT HOT enough. For best results you need to use a temperature that is ABOVE the smoke point of your seasoning oil (Crisco in your case).....use a 450/475 degree temperature instead. Make sure you put a VERY thin/light coating of "melted" Crisco on your "warm" skillet. You do not want the Crisco to be puddled or in a thick layer anywhere on your skillet. Again, use a very thin layer and place in a hotter oven. You will have to do this coating/baking procedure several times for the pan to develop a real nice durable seasoning. Dan...See Moreenamled cast iron
Comments (8)Seasoned Cast Iron vs Enameled Cast Iron. Enameled Cast Iron is in lieu of Seasoned Cast Iron, invented for those who didn't know how or didn't want to know how to season cast iron cookware. Cast Iron Cookware, enameled or just seasoned, cooks the same. The enamel is NOT a non stick surface so oil will still have to be used. A well seasoned pan will also stick unless oil is used but usually because of too high heat. Cast iron cooks best at medium to low temperatures, rule of thumb - if the oil smokes the burner is to hot! A well seasoned cast iron pan is coated with carbonized oil (seasoned) and has a nice smooth surface inside and out, cooks and cleans beautifully every time - a grungy, stinky, heavy coated pan is NOT a good well seasoned pan, it is a dirty mess with built up carbonized food and grease and not fit to feed your dog in. Enameled cast iron can also become a dirty mess if not properly cared for. Enameled cast iron is fashionable again today as it was 80 years ago but still has some drawbacks - it can chip, craz, pit, and become rough and dull from heat and cleaners. And, be cautious of cheap imports! For me, I'll keep my old turn of the century Griswold's, seasoned to perfection with olive oil, over any of the new enameled cast iron on the market today including the over priced Le Creuset!!...See MoreCast Iron Skilliet
Comments (16)Cocaty, as I understand it, braising is slow cooking in a moist environment. That allows the connective tissues to break down as opposed to tightening up. The limited amount of water keeps from diluting the flavor--as opposed to boiling or stewing, where a lot of the meat's flavor ends up in the liquid. Here's one of my favorite braises, perfect for cold weather--especially on a day you have a lot to do in the house. You start the dish around lunchtime then you don't touch it for 7 hours. You don't have to brown the meat before cooking it, but if you want to that's okay too. I have an old cast iron pot that works fine for this, but any covered casserole will do. Don't be alarmed by the amount of garlic it calls for: it'll all cook down and be sweet during those seven hours. Gigot de sept heures (Seven hour leg of lamb) 1 leg of lamb, about 6# 4 garlic cloves, sliced, plus 20 whole garlic cloves 1/4 cup olive oil salt & pepper 2 small onions, thinly sliced 4 carrots, peeled 1 bouquet garni 1 cup dry white wine 1 cup flour, 1 cup water Preheat oven to 300àF. (If necessary, trim most of the external fat off the lamb. Some legs of lamb will come with a heavy fatty connective tissue, called the âÂÂfellâÂÂ, covering a lot of its surface. Remove as much of it as practical--leaving it on will make the dish gamier because most of the gamy flavor is in the fat and connective tissues.) Make many small stab incisions in lamb and place slivers of garlic in each incision. Rub lamb well with olive oil, season with salt & pepper. Place it in Dutch oven and add onions, carrots, bouquet garni, garlic, wine. Put lid on Dutch oven. Combine flour and water, make a 'caulk' and use it to seal the lid to the dutch oven. (Note: ThatâÂÂs not necessary if you have a casserole or Dutch oven with a fairly snug-fitting lid.) Place it in the 300ÃÂoven and cook for 7 hours. Yes, 7 hours. NO PEEKING--leave it alone. A half hour before itâÂÂs done, fix some noodles or rice or couscous to soak up the juices. Remove the Dutch oven and break the seal. You don't eat the cooked flour paste. That's it! About a half hour to an hour of prep, then you leave it the heck alone for 7 hours. It's nearly foolproof. Serve it with whatever else you want, and a medium bodied red wine goes quite well with this (say, a nice Zinfandel) but a dry white (such as the remainder of the bottle you opened to get the cup of wine in the recipe) is fine as well if that's your preference....See MoreOT - Mrsmortamixer & Others - How to Season Cast Iron?
Comments (8)We have a collection of old cast iron, some from DH's grandparents and some we have gotten from antique places and DH has cleaned and seasoned. We started giving as wedding gifts to young couples and this are the instructions we include with them for caring: Use and Care of Cast Iron Cookware Cooking: Before cooking coat the inner surface of the cookware with a light coating of bacon grease, solid vegetable shortening, or PAM. Use more for frying. Cast iron cookware heats evenly, therefore it is not necessary to use extremely high cooking temperatures. Best results are obtained with medium to medium-high temperature settings. Allow the cookware to heat as the burner does as a very cold pan on a very hot unit could crack. Uncover hot food after cooking because steam will work to remove the seasoned finish from the cookware. If possible deglaze the pan while it is still hot. Add a little oil and scrape the glaze from the pan with a spatula. For some sauces you may wish to use wine. Most residues will wipe out with a paper towel. Frequently this is all the cleaning the cookware will need. Washing Tips: More stubborn residue will yield to the Steel Scrubber and Hot Water. Let it soak for a few minutes first. Careful though, cold water added to a hot pan can cause the iron to crack. Never use Detergent as it will remove the seasoned finish from the pan. If you feel that you must use soap, use soap, not detergent. Storing: Dry on the stove at low heat and then very lightly coat the still warm cookware with bacon grease, a solid vegetable shortening, or PAM. Wipe away all that you can with a paper towel. It is best to store cast iron in a warm dry place with the lids off or upside down. Newly Seasoned or Reseasoned Cookware: Do not use detergents or a dishwasher. The first few times you use your cast iron cookware avoid cooking acidic foods such as tomatoes and beans, or foods with a lot of water content. Instead, fry up some bacon or ham. Seasoning or Reseasoning Seasoning is required for new cast iron cookware and any time you detect rust on your cookware or a metallic taste to your foods. Newly seasoned cookware will be brown and perhaps have an uneven color. The more it is used the more seasoned the finish will become. The cooking surfaces will grow darker and become more shiny and non-stick with each use until they finally become black. The cookware can be reseasoned any time you wish (even if it doesn’t need it) this will only improve that slick black non-stick finish that great chefs covet. Seasoning Instructions: Wash your cast iron cookware thoroughly with soap and water. Light rust will yield to steel wool and soap. Heavy rust will require a steel brush or light sand paper. Then apply Coca~Cola to rusty areas for at least ten minutes. Rinse and dry over low heat to remove all moisture from the metal. With a paper towel lightly coat the entire surface of the heated pan or pot with bacon grease, solid vegetable shortening, or PAM. (Do not use butter or margarine). Coat the inside, outside, the lids, and corners. Lower both oven racks to the bottom two positions and place a cookie pan or aluminum foil on the lower rack to catch any drippings. Bake the cookware upside down at 300 degrees for 90 minutes without pre-heating. Then allow the pan to completely cool in the oven. For darker pans use a higher temperature....See More- 9 years ago
 9 years agolast modified: 9 years ago
- 9 years agolast modified: 9 years ago
 9 years ago
- 9 years agolast modified: 9 years ago
- 9 years ago
- 9 years ago
 9 years agolast modified: 9 years ago
 PRO9 years agolast modified: 9 years ago
- 9 years agolast modified: 9 years ago
- 9 years agoLars thanked dcarch7 d c f l a s h 7 @ y a h o o . c o m
- 9 years agolast modified: 9 years ago
- 9 years ago





Related Stories
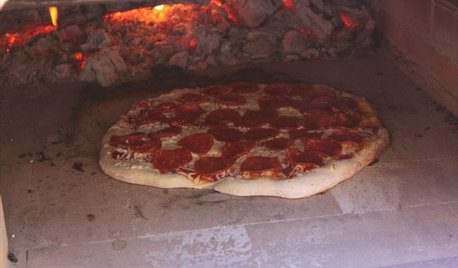
GREAT HOME PROJECTSHow to Get a Pizza Oven for the Patio
New project for a new year: Light a fire under plans for an outdoor oven and claim the best pizza in town
Full Story
HOUSEKEEPINGHow to Clean Your Cookware So It Lasts
Avoid damage during everyday cleaning and stain scrubbing, with these tips for pots and pans made of popular materials
Full Story
THE HARDWORKING HOMEA Laundry Makes Room for a Diva Cat
A South Carolina laundry room was designed to be sophisticated and functional, but when a kitten arrived, whimsy emerged
Full Story
HOUZZ TV FAVORITESHouzz TV: Flickering Virtual Fireplaces to Warm Your Heart
Sit back and enjoy a crackling fire set to seasonal music and surrounded by ideas for your own dream living room
Full Story
MONTHLY HOME CHECKLISTSYour April Checklist for a Smooth-Running Home
Shake off the winter blues and spring into action to get your home in the spirit of the new season
Full Story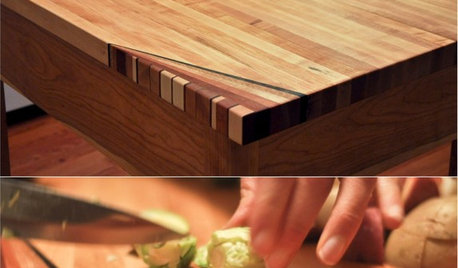
WOODWORKINGHow to Clean and Care for Your Butcher Block
Keep butcher block counters and boards looking sharp as a knife — and sanitized for safe food prep — with this advice from a pro woodworker
Full Story
KITCHEN DESIGN8 Kitchen Sink Materials to Consider
Learn the pros and cons of these common choices for kitchen sinks
Full Story
HEALTHY HOMEDetox Your Kitchen for the Healthiest Cooking
Maybe you buy organic or even grow your own. But if your kitchen is toxic, you're only halfway to healthy
Full Story
MOST POPULARThe Not Naturally Organized Parent's Guide to the Holidays
This year get real about what you can and cannot handle, and remember the joys of spending time with the ones you love
Full Story
OUTDOOR KITCHENSYour Guide to Grills and More for Great Outdoor Cooking
Learn the pros and cons of gas versus charcoal grills, and about neat add-ons that let you do more
Full StorySponsored

Central Ohio's Trusted Home Remodeler Specializing in Kitchens & Baths
Solsthumper