

My pie crust keeps shrinking
9 years ago
Featured Answer
Sort by:Oldest
Comments (16)
 9 years agolast modified: 9 years ago
 9 years ago
Related Discussions
Falling pie crusts
Comments (20)She specifically said to :Freeze the crust it for at least a half hour, until chilled. This is an important step in pre-baking. Otherwise the crust will slip down the sides. But that is not correct. Azzalea and the others have it right. Why does crust fall down? Several reasons. First, the butter that was stiff from being chilled or frozen, becomes soft and starts to melt. Take a stick of wrapped butter out of the freezer and hold it up. Set it on a hot windowsill for about 30 minutes and see what happens. It will slide out of the wrapper and down your hand. That's what happens in the oven. Whether you chill first or not, once you start cooking the butter will get hot. Then there's the water evaporation. As water evaporates, the dry ingredients shrink together. That's the principle behind drywall mud that they use for taping your drywall. And then there's the issue of the proteins in the flour that you've stretched out. If there's any stretch or tension left in the dough, it will pull itself together. So you need to roll the dough out a lot bigger than your pan and then kind of work your way around and let it get as tight as it wants to before putting it in the pan. Once it's in, make sure you haven't stretched it, but help it relax again. Then, when the butter starts melting and the water evaporating, the proteins won't tighten up and pull the dough back. Also, you might want to figure a way to "hook" it over the lip of the pan. If you have a beautiful rim, that may be difficult, but you can kind of mush it down ever so slightly so it won't pull back. And then the weights and things will keep it from puffing up too much. Where this is a big issue isn't so much with pie crusts, as those are fairly easy to keep from shrinking, but in those French tart pans with straight sides. It's next to impossible to keep dough from sliding straight down....See MoreHelp! Need CRISP pie crust recipe for one crust cream pie!!
Comments (10)My hunch, if it was central VA and a BBQ place, was that it wasn't a pate sucree or something similar. It was probably an "American" pie crust. You can make a great flaky crust in about four minutes with butter, flour, and a little ice cold water. Can add a pinch of salt if you want. Leave some pretty large chunks of butter and make sure you do the fraisage. Like always, let it sit for an hour or so or even a day before rolling it out. Most likely based on cost and region, they probably used shortening, but don't. It tastes bad and makes your crust have a bad mouthfeel. Just use butter. Bake it well, maybe weighing it down, and make sure you bake it very close to the time you are going to use it. In other words, don't bake it today for use tomorrow or the next day. It's never as crisp as it is the first day. Let it cool, fill and serve immediately. The water from the filling will start to soften it right away, so you don't want to let that sit if you want to maintain the crispiness. This post was edited by rosesinny on Mon, Feb 18, 13 at 17:57...See MoreMy nemesis, pie crust
Comments (7)I'm surprised the CF regulars have not come forth. I use the Cook's Illiustrated vodka pastry recipe with good results. Wizardnm shared this with us long ago. Ingredients 2 1/2 cups (12 1/2 ounces) unbleached all-purpose flour 1 teaspoon table salt 2 tablespoons sugar 12 tablespoons (1 1/2 sticks) cold unsalted butter, cut into 1/4-inch slices 1/2 cup cold vegetable shortening, cut into 4 pieces 1/4 cup cold vodka 1/4 cup cold water Procedures 1 Process 1 1/2 cups flour, salt, and sugar in food processor until combined, about 2 one-second pulses. Add butter and shortening and process until homogeneous dough just starts to collect in uneven clumps, about 15 seconds (dough will resemble cottage cheese curds and there should be no uncoated flour). Scrape bowl with rubber spatula and redistribute dough evenly around processor blade. Add remaining cup flour and pulse until mixture is evenly distributed around bowl and mass of dough has been broken up, 4 to 6 quick pulses. Empty mixture into medium bowl. 2 Sprinkle vodka and water over mixture. With rubber spatula, use folding motion to mix, pressing down on dough until dough is slightly tacky and sticks together. Divide dough into two even balls and flatten each into 4-inch disk. Wrap each in plastic wrap and refrigerate at least 45 minutes or up to 2 days. *I have used this recipe with lard instead of shortening. Even better.* Another recipe some members swear by is Nathan's fool proof pastry. Posted by annie1992 (My Page) on Wed, Nov 2, 11 at 20:17 I make SharonCB's pastry, it's wonderful to handle and doesn't need to be chilled before rolling, although Sharon said she chilled it an hour or so and it was even easier to handle. I use half butter and half lard when I can get lard, or all butter if I can't. I do mix the dry ingredients with the fat in the food processor, but I add the liquid and mix it in by hand, I always over process with the food processor and it gets too warm and has to be chilled, which takes even more time than I would have spent mixing it by hand! NATHAN'S NEVER FAIL PASTRY ********************************** These quantities make enough pastry for 3 double-crust pies or 3 1/2 dozen tart shells - muffin size. 5 cups flour 1 teasp salt 2 teasp baking powder 1 lb (454 grams) Tenderflake lard 2 teasp white vinegar 1 egg - slightly beaten. Add water to vinegar and egg to make 1 cup 1) Mix together flour, salt and baking powder. Cut in lard until crumbly (using two knives.) 2) Add liquid and mix gently with hands. (I use a fork to help me here.) Roll into a ball. 3) Roll out amount needed on a floured board. Refrigerate or freeze remainder. Source: 'I've GOT To Have That Recipe' Doubleday Canada - Victoria, B.C. 1986 sharoncb's tip: After step two I often put it in the fridge for an hour to make it firmer and easier to roll out. Annie I hope this helps....See MorePie Crust 101
Comments (40)Rolling pie dough: I always have success, and have followed the Joy of Cooking's basic pie dough recipe for decades -- I've successfully baked pies for 40+ years. The recipe calls for only the basics: cold butter, room temperature shortening (I use Crisco), all purpose flour, salt and 4-6 Tablespoons of cold water. That's it. Very simple and very traditional. The dough is NEVER chilled. Think about it: You want the butter and shortening to be soft and absorb/mix-in with the dry ingredients. Chilled fat will take a LOT of handling to get to that consistency, and increased handling results in tough pie crusts. That's why most of the recipes I've seen do not call for chilling the dough. I mix the flour, salt and butter together using a hand-held pastry blender -- See photo. It's a simple, basic pastry making tool that costs between $5 - $10. Very traditional, very tried & true. Sometimes I mix the butter in first, sometimes I mix the shortening. Whichever you choose to use, use the blender to mix the dry ingredients and butter/shortening until the crumbs look like peas. Then add either the butter or shortening and continue mixing with pastry blender until the ingredients look like cornmeal. You really will notice the difference. At that point, add the cold water 1 Tbs at a time, using a fork to lift and mix the ingredients together. While the recipe calls for 4-6 Tbs., I find that 4 Tbs works for me ....sometimes as much as 5. This has been true regardless of whether I've made pies in the dry, mountainous West, or the humid east coast. You'll add only enough water until you can get most of the dry ingredients to hold together in a ball. Assuming it's a 2-crust pie, I halve the pie dough and immediately begin working the first crust. I leave the rest of the pie dough in the bowl, uncovered, open to the air, at room temperature. I ALWAYS roll the dough on a pastry cloth, using a cheese cloth cover for the rolling pin. I use a 40 year old wooden rolling pin. Standard size and weight. Absolutely nothing fancy or unusual about it. The key to using a pastry cloth and cheese cloth cover for the rolling pin is that you will be able to roll out your pie dough and use MUCH less flour. All you need to do is lightly sprinkle a small amount of flour on the pastry cloth, roll the rolling pin over the top of the pastry cloth to get some of the flour on the pin, then begin to work the dough. I have granite counter tops in this house. Other houses have had Corian, wood and the old fashioned vinyl. The type of counter makes absolutely no difference in the quality of the crust. I promise! I anchor the pastry cloth with my body in the front and cannisters in the back, so that everything stays fairly quiet...but even it if moves a bit, that's not a problem. When rolling out your pie dough, work gently but quickly. Do NOT lean on the rolling pin. Merely lightly push the pin from the middle of the dough out in circles. You'll work around the dough. You'll have thick spots of dough and thin, and work the thick spots out...by gently rolling the pin over the dough. Don't lean on it or force it by brute force. More often than not my pie crusts are not perfect when they are rolled out. I like a thinner crust, so that means that I'll have some repair to do as I lay the crust in the pie pan, or lay the top crust on top of the filling. There is lots of room for forgiveness. If it's the bottom crust you're repairing, no one will ever know because it will be hidden by the filling. If it's the top crust, your cut-outs to allow the steam to escape the baking pie will camouflage that. The key is to ensure you have a solid bottom crust so that juice will not escape the pie crust, AND to ensure you have a large enough bottom crust that you can flute the edges of the pie. OR, a large enough top crust for fluting....I've done it both ways, and it just depends on what the crust gods decide that day. I hope these suggestions help. I assure you that once you understand what you're supposed to do, you'll be able to turn out consistently good pie crusts, with confidence and speed. Here is a link that might be useful:...See More 9 years ago
 9 years ago
- 9 years ago
- 9 years ago
 9 years ago
 9 years ago
 9 years ago
- 9 years ago
- 9 years ago
 9 years agolast modified: 9 years ago
- 9 years ago
- 9 years agolast modified: 9 years ago
- 9 years ago

Related Stories
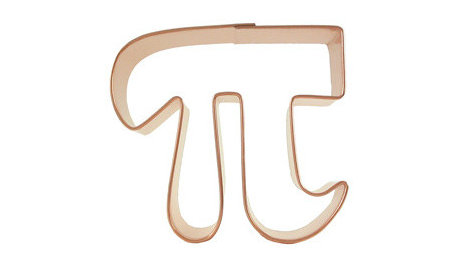
PRODUCT PICKSGuest Picks: Pi Day + Pie Stuff = Yummy Fun
Add these tools and accessories to your baking arsenal and watch smiles multiply
Full Story
COFFEE WITH AN ARCHITECTDesign Explained in Pie Charts
If you've ever wondered about the creative process of architects and designers, check out these simple charts
Full Story
PRODUCT PICKSGuest Picks: Cooking for One
Whip up single portions easily — and keep cleanup simple — with these size-conscious kitchen tools, cookware pieces and gadgets
Full Story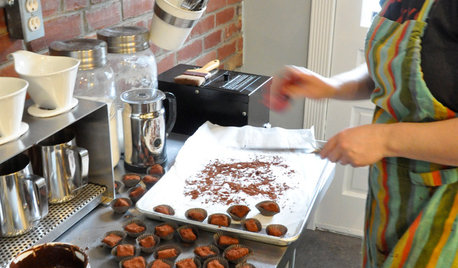
KITCHEN DESIGNLove to Cook? We Want to See Your Kitchen
Houzz Call: Show us a photo of your great home kitchen and tell us how you’ve made it work for you
Full Story
FUN HOUZZSpace We Love: Down the Rabbit Hole
We're dying to crawl through this secret Alice-in-Wonderland tunnel, aren't you?
Full Story
KITCHEN DESIGNHouzz Call: What’s Cooking in Your Kitchen?
Most of us turn to recipes, videos and culinary shows when we cook. Where do you set your cookbook, tablet or TV screen?
Full Story
LIFECreate a 'Forever House' Connection
Making beautiful memories and embracing your space can help you feel happy in your home — even if you know you'll move one day
Full Story
KITCHEN DESIGNKitchen of the Week: A Budget Makeover in Massachusetts
For less than $3,000 (not including appliances), a designing couple gets a new kitchen that honors the past
Full Story
ENTERTAINING8 Stress-Busting Tips for Hosting Small Gatherings
Make entertaining easy with these ideas for casual get-togethers
Full Story
FUN HOUZZWhat You Do When There’s No One Around
Ice cream binges, air guitar concerts, napping in the closet. Houzzers worldwide disclose their quirky secret indulgences
Full Story

Islay Corbel