


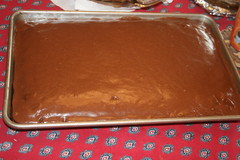
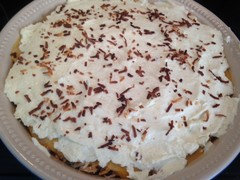
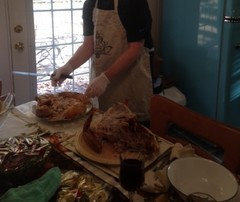
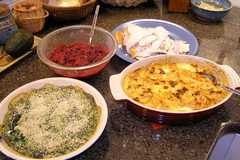
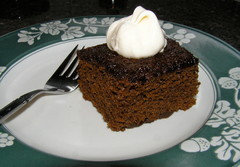
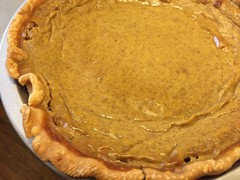
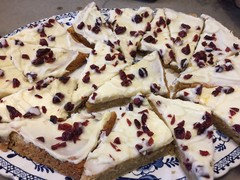
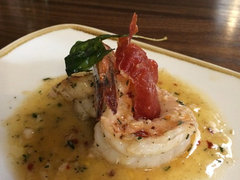
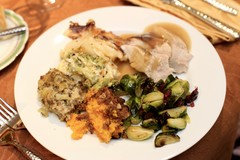
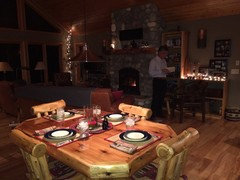
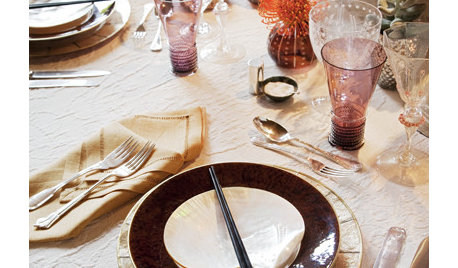
Happy Thanksgiving! Post your food and table photos if you have them
gsciencechick
7 years ago
Featured Answer
Sort by:Oldest
Comments (20)
Related Discussions
Happy Thanksgiving From our home to yours
Comments (8)OOPS! To the wonderful people here at The Garden Web, I do apologize for my oversight. I am learning computing at another Computer Help site as well as here. Upon posting my thanks to them there, I copied and pasted the full post that I submitted there and didn't delete there Logo. Please except my apologies! You folks are really great here at The Garden Web, and been so good to Joe & I, that I did not want to disclude you in my thanks! We do hope that your Holiday is fulfilling and shared with love of Family & Friends! "good people of the world here at Help2Go"Donna aka bbbluz...See MoreWhat's your one spendy food item that you just have to have in yo
Comments (101)Ok... after reading more I realize we have a few more splurges that had not occurred to me at the time. Tomatoes on the vine or any good garden type tomato. I cannot abide a thick skinned mealy supermarket kind. Any San Marzano tomatoes for sauce work fine. It must be the soil or that water.... Sangria jelly, whenever I can find it. It is ridiculously good. The smoked whitefish spread at Costco. We have that in our house at all times. If cheese were less fattening, I'd have a whole fridge dedicated to it. As it is, I splurge on "eating cheese" (as opposed to cheese for cooking or grated cheeses) when we have guests. I love the horseradish cheddar kind or the champagne cheddar and any good asiago variety is my fave. I nibble it to try to make it last. I think I lived on a half cheese diet when pregnant as it was one of the few things that did not turn my stomach. Virginia ham is also a little splurge as it is usually more expensive than other kinds. It tastes like deli ham is supposed to taste to me. The other kinds are ok,and I'll buy them when they are much lower, but Virginia style is superior. German sausages from the German butcher are also a splurge. They carry the good European bread to go with their amazing cold cuts. I count what I buy there as eating out prices, and consider it lucky that we are not tipping for it, lol. I guess it is a way to justify those prices for eating at home and having it cost so much, lol....I don't even know what the price per lb is and prefer not to know. It is the one time I don't know prices out of everything else I do in life and hope to never know as it would ruin it for me. I get a large bag of stuff and it is spread out over several meals, but is probably our largest splurge, only done once in a while..... We do only drink imported beer and since most domestic is so awful, don't even consider that a splurge. It is a necessity to drink the better quality. After becoming used to German/Austrian beer over there, it is impossible to accept less. It sounds snobby, but if anyone did a side by side comparison, they'd forgive us ;) Luckily, we don't drink quantity. Often, dh and I will split a beer with dinner just to accompany certain foods. Our fave wine is a German reisling by Schmitte Sonne, which has a screw top, so is not crazy expensive, but it does cost more than many other whites we could buy instead. Since we buy by the case, we cut the costs some. It is always a hit when we bring some as a hostess gift....See MoreFood Photo Tips: Part 3 - Lighten or Darken Photos with EV
Comments (0)Posted by canarybird (My Page) on Wed, Jul 22, 09 at 14:41 FOOD PHOTO TIPS : Part 3 - Lighten or Darken Your Photos with EV Hi everyone! I'm back again with another chapter of hints on how to use your digital camera for taking tabletop photos. I hope everything so far has been easy to understand. But I'll be going over and repeating some things as well so they're not forgotten or misunderstood. For those who are unfamiliar with this very useful item, I want to introduce the EV function on your camera. EV stand for Exposure Value and the button or menu option is called the Exposure Compensation, or Exposure Bias. Here's the icon, which is a square with plus and minus signs inside. You may find this icon stamped on the arrow pad on the back of your camera as in Fig, 17. When that upper arrow is pressed, it produces a new icon in the top right corner of the LCD screen as in Fig. 18, where a black rectangle shows 0.0 and two blue right/left arrows. That tells you that you are now able to use the EV function, and by pressing the right and left sides of the arrow pad you will either increase or decrease the value which will appear in that top right corner of the screen. The increments go up to plus or minus 2 in steps of 1/3 or 1/2. Example: +0.3, +0.7, +1.0 etc. up to +2 (or minus when using that arrow pad.) So for what is that used? In short, you can manually lighten or darken the picture you see in the viewfinder before shooting by using this setting. Sometimes when your subject is dark against a bright background, the light meter adjusts the overall setting for the brightness, leaving your subject too dark. In that case you would (on my camera here) press the right side of the arrow pad as in Fig. 18a. Now you see the number in the top right screen corner has changed to +0.3 to brighten the picture. If I were happy with that, I would then press the OK button in the centre of the arrow pad and then press the shutter to take the picture. If I wanted the picture to be lighter still, I would press the arrow pad twice instead of once, which would give me +0.7. In the case where the overall picture was too bright and the subject was going to look lighter than I would like, then I'd press the left arrow and that would give me a minus value, darkening the photo Fig. 18b. You can get some very lovely effects with a -0.3 setting, especially outdoors where it is often so bright that your photos can look a little overexposed. I keep my cameras set at -0.3 for nearly all my outdoor photos. And my daughter was very pleased when I told her about that when she was getting used to a new camera. Her garden photos turned out so much better with the EV set to -0.3 on bright days. And some closeup flower photos can look quite dramatic at this setting. Here is where I find the EV option on my little pocket Stylus. By pressing the main menu in the centre of the back arrow pad I get these four options in Fig. 19. On this camera one presses the top and bottom arrows to lighten or darken the picture. Fig. 20. In Fig. 21 you see the EC has been set to +0.7. I show the example of this second camera only to illustrate that you may have to look in more than one place to find the EV function on your camera. I was setting up to illustrate the differences in EV settings and found another good use for a small bag of dry catfood! Fig. 22. Together with a clothespeg and a sheet of white paper it makes an idea reflector for the small object on the table. I changed my mind and used some orange poster paper as a backdrop for the following photos. So here we go with some examples of how a picture looks when taken at different EV values, ranging from 0.0 in Fig. 23 up to +0.1 in Fig. 26. Fig. 27 is back at 0.0 and Fig. 28 to 30 are minus steps increasingly dark. Click on photos to enlarge. Sorry I see that the Fig. numbers are only visible when you click on the below photos to enlarge them. The first and the fifth are without an EV adjustment. You can read the EV value in the clicked enlargements. (I do love those dark ones!) I just went outside and took some examples with our clerodendrom which was still in partial sunlight. I started with the first example without using any Exposure Compensation and took samples at different minus values of EV. I didn't include them all here but with these five you can see the difference between no adjustment in the first and six steps in the minus scale to -2.0, which is a little too dark. However I do like the effect at -1.0 and -1.3. All photos on this page were taken using the PORTRAIT setting in the SCENE option. Remember that the icon for portrait is a girl's head. The indoor photos had a WHITE BALANCE setting of "cloudy". I hope you will be able to give some of these options a tryout. You can do a lot to correct lighting when using automatic settings by making an adjustment with the EV function. I have the next chapter ready but I think this is enough for one day. It is a fun one....how to use a paper sweep for seamless backgrounds. Really easy! Please ask if anything isn't clear. If I know the answer I'll be back with a reply. Until then, thanks for joining me. I'll be uploading the next instalment soon. And please feel free to save the pages on your computer. Sharon (Canarybird) (All text and photos copyrighted) Free for personal, non-commercial use Follow-Up Postings: o RE: Food Photo Tips: Part 3 - Lighten or Darken Photos with EV clip this post email this post what is this? see most clipped and recent clippings * Posted by loves2cook4six (My Page) on Wed, Jul 22, 09 at 17:13 Sharon THANK YOU for these great tutorials. We are on vacation but I hope to do some experimenting with my camera's settings. I've been to scared to move off AUTO but you are inspiring me to take some "risks" lol o RE: Food Photo Tips: Part 3 - Lighten or Darken Photos with EV clip this post email this post what is this? see most clipped and recent clippings * Posted by canarybird (My Page) on Thu, Jul 23, 09 at 5:34 You're welcome loves2cook and I hope you will also try new settings while taking some vacation photos as well. Have a good rest of your holiday! SharonCb o RE: Food Photo Tips: Part 3 - Lighten or Darken Photos with EV clip this post email this post what is this? see most clipped and recent clippings * Posted by shaun (My Page) on Fri, Jul 24, 09 at 22:20 Thank you!!!!! o RE: Food Photo Tips: Part 3 - Lighten or Darken Photos with EV clip this post email this post what is this? see most clipped and recent clippings * Posted by momto4kids (My Page) on Wed, Jul 29, 09 at 10:21 Sharon, Just when I thought I'd have time to be a regular at CF again...my time gets zapped up so quickly. I wanted you to know I am thoroughly enjoying these posts! I am having a great time figuring out what you're saying with my own camera. My pictures have already improved remarkably. I've been begging (okay, whining) to take some classes and they just aren't to be found around here. Your tutorials are just what I need! Thank you for all your time! Deb...See MoreHave you tried any new products/food/clothes that you're happy with?
Comments (137)Thanks! Oakley -yay for Aquage! That brush looks amazing. Funkyart which style do you think runs wider? My feet feel much better. My left foot doesn’t hurt at all anymore when I have them on. The right foot still does but I suspect it will take awhile for that foot to settle down. I really need a pair of comfortable (standard work with almost anything black) boots/booties but don’t really like their styles. Theres one that’s ok but I wish the toebox was shaped a little different. Going to order more sandals. Im going to look into some of the other sandals mentioned here too. Thanks Eld. Yeon -The small bottle (they have a large size too) has a dropper and I just put a drop on the applicator and run it along the top. Another drop for the bottom and drop right at the beginning of the spooly brush to use on my brows. It sounds like a lot but I have over half a bottle still. I don’t recommend brushing the oil on the lashes with the spooly brush (mascara wand) because the oil is so thick it just beads up. It’s kind of gunky feeling but doesn’t irritate the eyes at all. I do it right before bed and sleep with it on. In the morning I just rub my eyes. It seems some of its absorbed in because there’s less. ETA - Thanks for suggestions about exercises. I was thinking there was probably stretches or something I could do to help. I'll check it out. Justerrilynn -They look great! And nice ZZ plant too....See More
gsciencechick
7 years agogsciencechick
7 years ago
Oakley
7 years ago
3katz4me
7 years ago
eld6161
7 years agoeld6161
7 years ago


Related Stories
HOLIDAYSHouzz Call: Show Us Your Thanksgiving Table Decor!
Mercury glass, pheasant feathers and colorful glassware are just a few of the fall table setting ideas we're spotting
Full Story
DECORATING GUIDES7 Design Rules and Why You Should Break Them
Think tile is only for kitchens and bathrooms? Art should hang at eye level? Time to consider breaking these old rules
Full Story
HOLIDAYSYour Post-Thanksgiving Game Plan
Once you’ve recovered from the big day, take these steps to make welcoming the next round of holiday guests easier
Full Story
FALL AND THANKSGIVINGHouzzers' Tablescapes Capture the Thanksgiving Spirit
We feel blessed with abundance sharing all these wonderful, creative Thanksgiving table decorations by Houzz users
Full Story
HOLIDAYSSet an Eclectic Thanksgiving Table
Think beyond orange pumpkins and leaves for your Thanksgiving decorations this year
Full Story
HOLIDAYSRoom Tour: Reinvented Thanksgiving Table
Create a beautiful Thanksgiving table with found treasures and handmade charm
Full Story
HOLIDAYSShow Us Your Party-Time Food and Drink Station
Entertaining season is upon us, and we want to see photos of how you keep guests refreshed
Full Story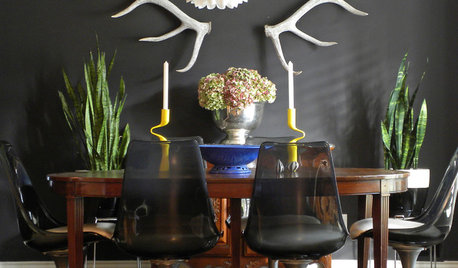
DECORATING GUIDESTaste a Rainbow: 11 Top Home Decorating Colors and How to Use Them
Prime yourself for spring painting season with our color-happy guide to working with popular shades around the home
Full Story
GREAT HOME PROJECTSPower to the People: Outlets Right Where You Want Them
No more crawling and craning. With outlets in furniture, drawers and cabinets, access to power has never been easier
Full Story
PAINTINGWhat to Know About Milk Paint and Chalk Paint — and How to Use Them
Learn the pros, cons, cost and more for these two easy-to-use paints that are great for giving furniture a vintage look
Full Story

monicakm_gw